ENGLISH
13
P
HOTOCELL AND EDGE TEST: the test checks that the photocell
is working properly each time the control unit receives a
command to open or close. If the test fails, the photo led flashes
at 2 Hz for 5 seconds, together with the motor/test/error led.
The EDGE TEST, that can be used with electronic sensitive edges,
carries out the same check on the sensitive edges. If the test
fails, the EDGE led flashes together with the motor/test/error
led.
During the TEST the control unit recognizes also if the safety
edge gives a normally closed contact or an impedance
(conductive rubber edges).
WARNING: if using a conductive rubber safety edge it is
compulsory to activate the TEST of the safety edge (DIP 5),
otherwise the safety edge is not recognized.
The ERROR TEST signal repeats itself after each control, for a
period of 5 secs.
WORKING TIME
In order to change the working time, proceed as follows:
NOTE: the parameters change by pressing the MENU key. When
it is required to press for a time (TS), it is necessary to press and
immediately release. When required to press for a time (TL), it is
necessary to keep pressed the key (for about 2 seconds) until the
leds change indicating that the control has been made.
1. Press the MENU key for a time (TL).
2. The leds show the current setting of the virtual dip switches
for 12 secs.
3. Within 12 secs. press the MENU key again for a time (TL)
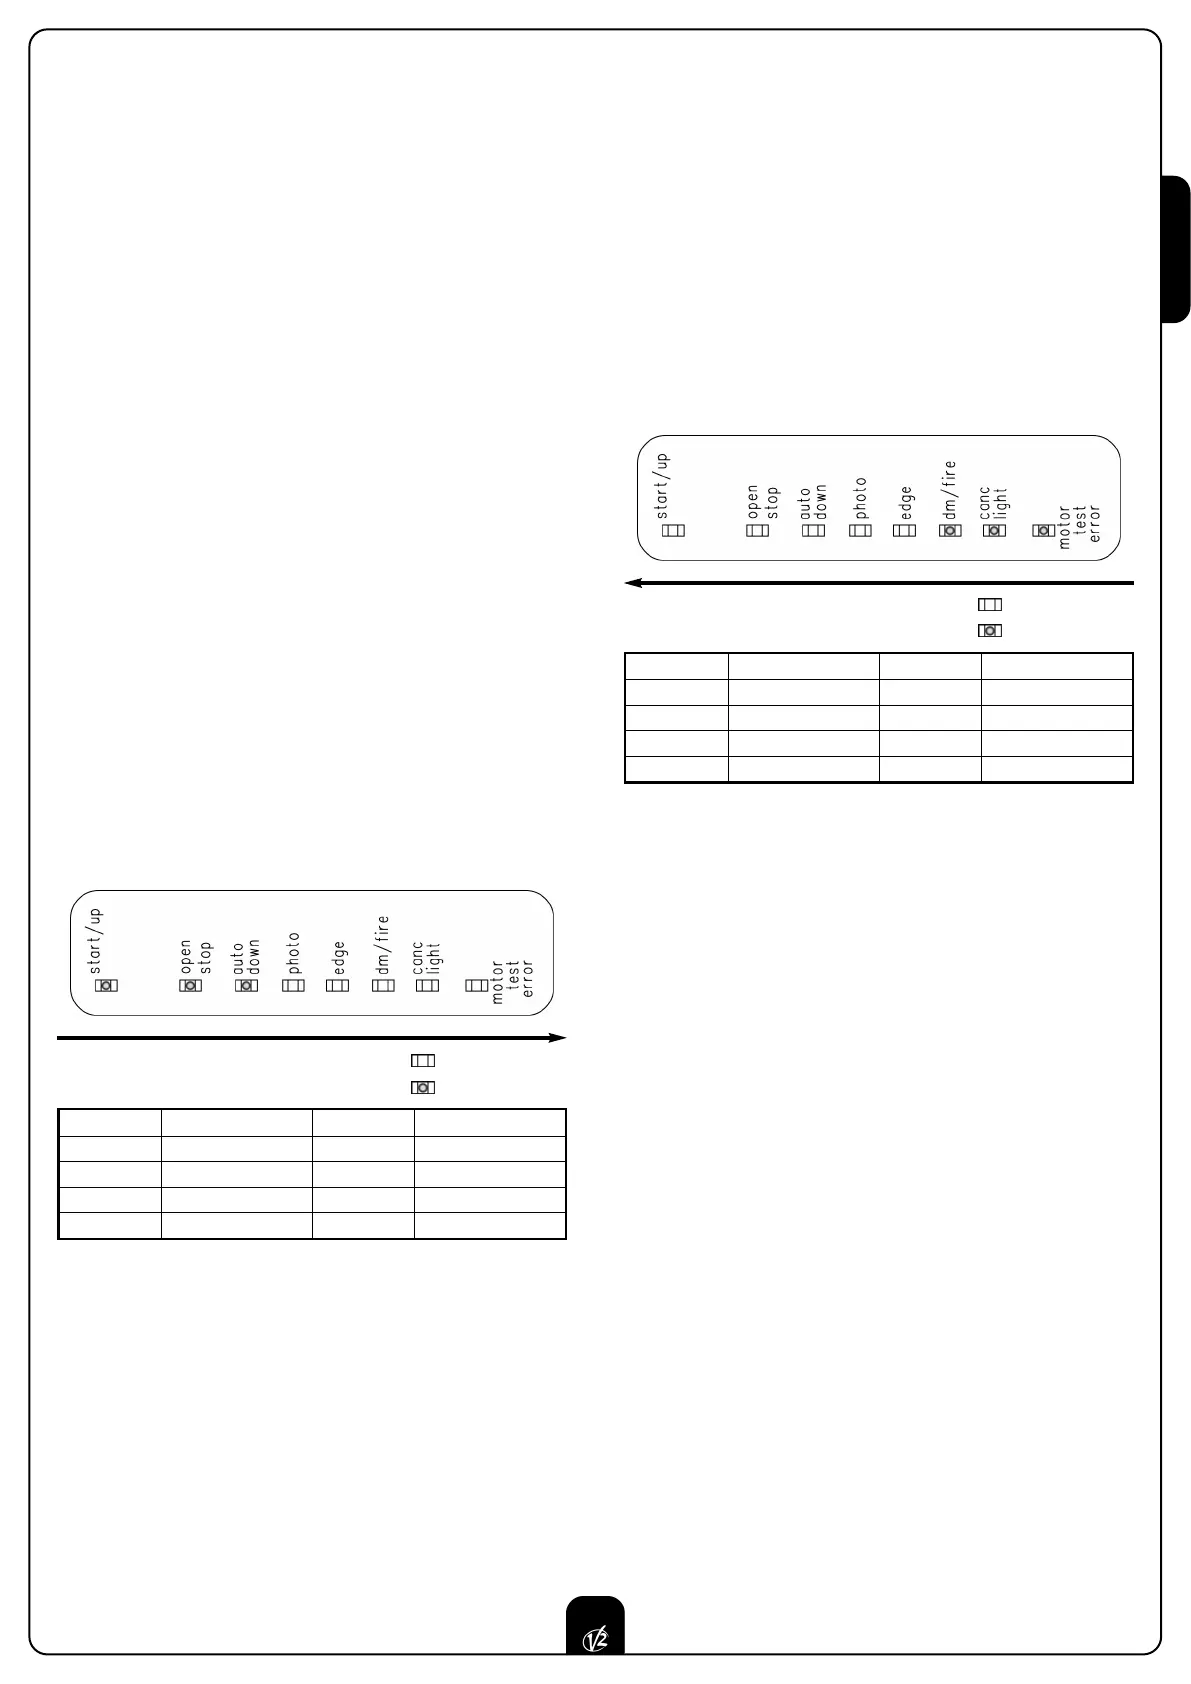
4. The leds show the set working time for 12 secs.
5. Within 12 secs., press the MENU key for a time (TS); each
time it is pressed, the next leds come on one by one. When
they are all on, start again from led 1. The table shows the
working time setting according to the number of leds on.
6. When the setting is correct, wait 12 secs., the new data is
saved and the control unit exits the programming mode.
P
AUSE TIME
In order to change the pause time, proceed as follows:
N
OTE: the parameters change by pressing the MENU key. When
it is required to press for a time (TS), it is necessary to press and
immediately release. When required to press for a time (TL), it is
necessary to keep pressed the key (for about 2 seconds) until the
leds change indicating that the control has been made.
1. Press the MENU key for a time (TL)
2. The leds show the current setting of the virtual dip switches
for 12 secs.
3. Within 12 secs. press the MENU key again for a time (TL)
4. The leds show the set working time for 12 secs.
5. Within 12 secs. press the MENU key again for a time (TL).
6. The leds show the set pause time for 12 secs.
7. Within 12 secs., press the MENU key for a time (TS); each
time it is pressed, the next leds on one by one.
When they are all on, start again from led 1. The table
shows the pause time setting according to the number of
leds on.
8. When the setting is correct, wait 12 secs., the new data are
saved and the control unit exits the programming mode.
DELAY IN TURNING OFF THE COURTESY
LIGHT
When the control unit returns to standby after an operating
cycle, the courtesy light stays on for a time that can be set for a
period up to 5 minutes. Setting the turn off delay can be done if
output is set as a courtesy light (virtual dip switch light/canc
ON).
In order to change the delay in turning off the courtesy light,
proceed as follows:
1. Press the MENU key and keep it pressed, ignoring the
appearance of the virtual dip switches on the leds.
2. After 5 secs., the leds turn off and the courtesy
light turns on
3. Keep the MENU key pressed for the time required for setting
4. Release the MENU key. The courtesy light turns itself off
and the time it stayed on for is saved as a delay in turning
off.
LED TIME LED TIME
1 10 sec. 5 45 sec.
2 15 sec. 6 60 sec.
3 20 sec. 7 90 sec.
4 30 sec. 8 120 sec.
= Led OFF
= Led ON
= Led OFF
= Led ON
LED TIME LED TIME
1 15 sec. 5 60 sec.
2 20 sec. 6 90 sec.
3 30 sec. 7 120 sec.
4 45 sec. 8 180 sec.
 Loading...