10
SIP classic lobby/1-line/2-line - S1100/S1210/S1220
Installation
Telephone base installation
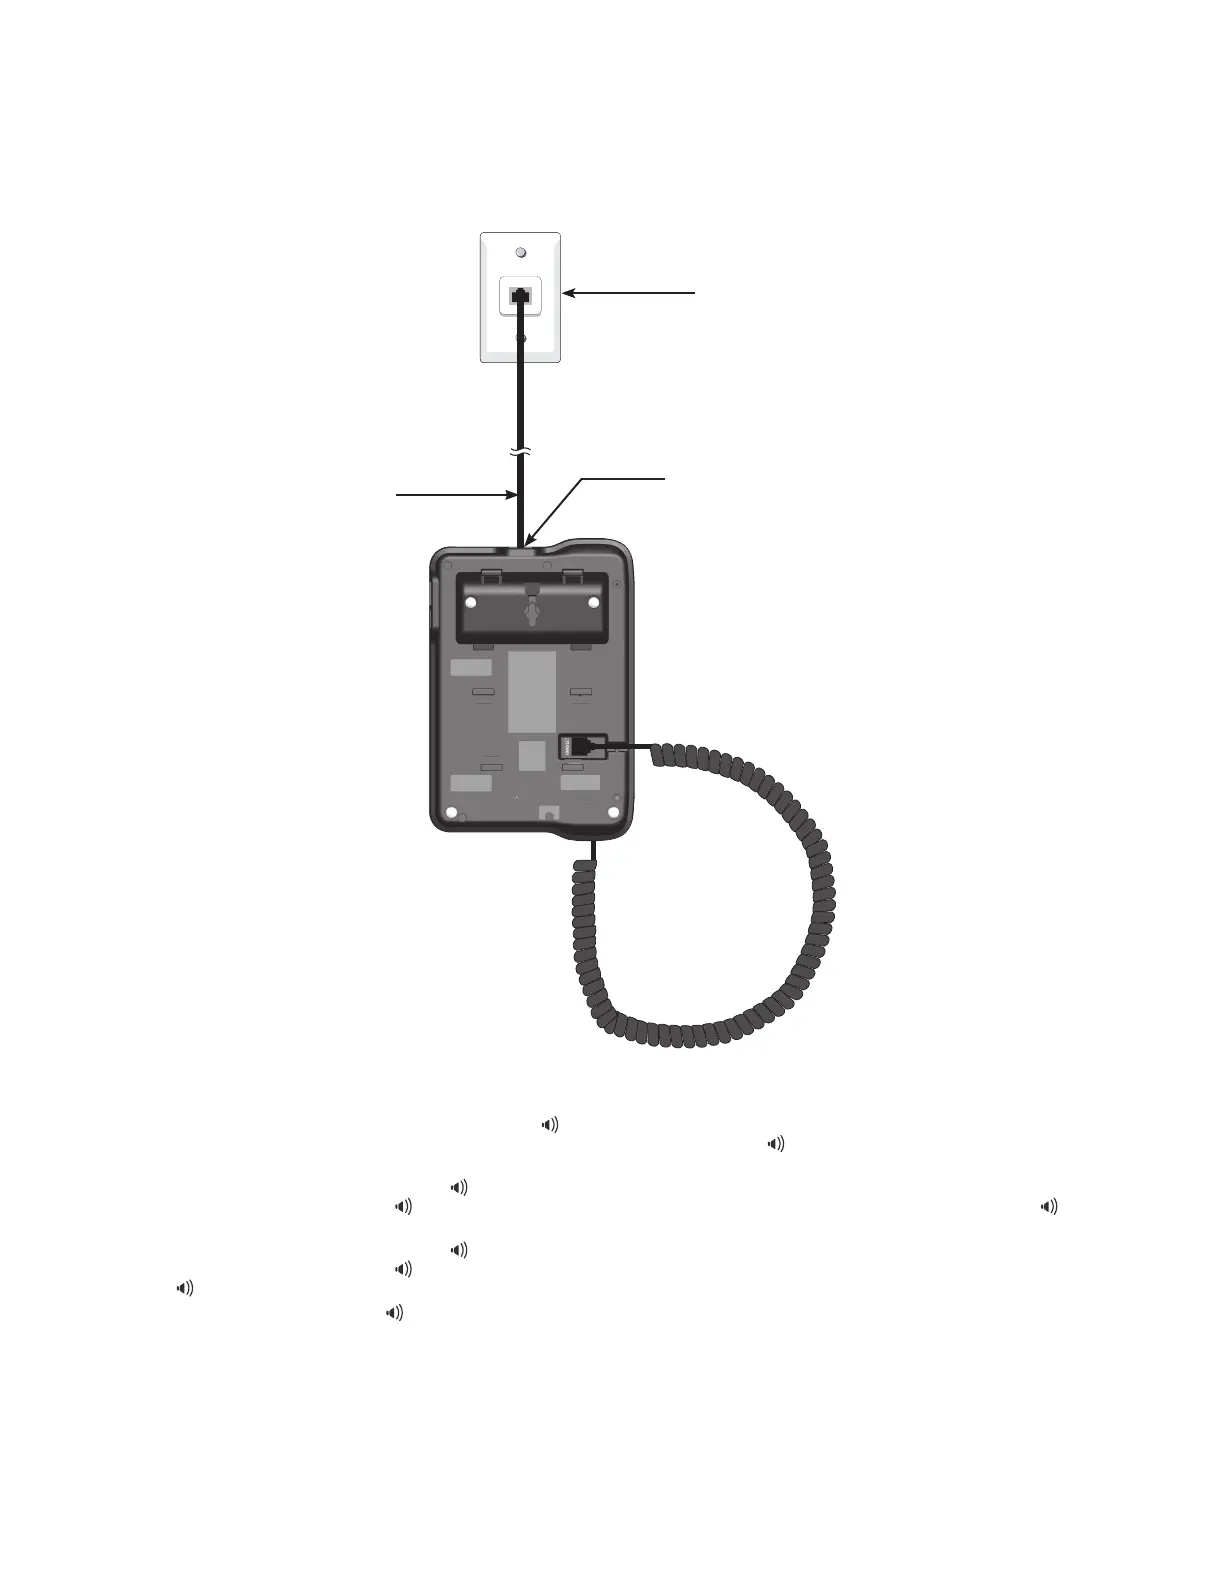
The telephone comes ready for desktop use. Install the telephone base as shown below.
Once installed, the telephone begins a four-step initialization and system registration process.
For S1100: (1) The MUTE key cavity LED and the /SPEAKER key cavity LED turn on and then go off. (2) The MUTE key
cavity LED ashes. (3) The MUTE key cavity LED stops ashing and then the /SPEAKER key cavity LED ashes. (4) Both
LEDs illuminate for 500ms when initialization and system registration are successful.
For S1210: (1) The MUTE key and the /SPEAKER key turn on and then go off. (2) The MUTE key ashes. (3) The MUTE
key stops ashing and then the /SPEAKER key ashes. (4) The MESSAGE WAITING LED, LINE, MUTE and /SPEAKER
illuminate for 500ms when initialization and system registration are successful.
For S1220: (1) The MUTE key and the /SPEAKER key turn on and then go off. (2) The MUTE key ashes. (3) The MUTE
key stops ashing and then the /SPEAKER key ashes. (4) The MESSAGE WAITING LED, LINE 1, LINE 2, CONF, MUTE
and /SPEAKER illuminate for 500ms when initialization and system registration are successful.
If the system registration fails, the /SPEAKER key blinks twice every second. To reset, disconnect the Cat-5 network cable
from the network wall jack with Power over Ethernet (PoE) and connect it back again.
1.
2.
•
•
•
CAUTION:
Use only the supplied Cat-5 network cable. Cat-5 network cable is not designed for use in any other IT devices. Misuse of Cat-5 network cable on
your other IT devices shall be prohibited. To order a replacement, visit our website at www.vtechhotelphones.com or call 1-888-907-2007.
Cat-5 network cable
Network wall jack with Power over Ethernet (PoE)
RJ-45 LAN port
 Loading...