Page 41
Section 8
Appendixes
When to Use the Reconfigure Mode
Use the Reconfigure Mode to (1) reconfigure
the ECU if necessary (see Table K — ECU
Reconfiguration); or (2) to clear repaired faults
from ECU memory. (Refer to Figure 8.2 for a
Reconfigure blink code example.)
Table K — ECU Reconfiguration
How to Use the Reconfigure Mode
For an alternate blink code access procedure, see
“Warning Lamp Diagnostics”, in Appendix C.
1. The vehicle must be stationary to activate
and reconfigure the ECU. Power the ECU with
12 volts DC (9.5–14 is an acceptable range).
2. If the diagnostic tool is not attached to the
diagnostic cable: Plug the diagnostic tool into
the diagnostic cable socket usually located on
the right side of the sub-frame.
3. Activate the Reconfigure Mode: Press the blink
code lamp switch three times for one second
each time as follows:
a. Depress the blink code lamp switch once
for one second.
b. Release the switch for one second. The
lamp will go OFF.
c. Depress the switch once for one second.
The blink code lamp will come back ON.
d. Release the switch once for one second.
The blink code lamp will go OFF.
e. Depress the switch once for one second.
The blink code lamp will come back ON.
f. Release the switch. The blink code lamp
will go OFF.
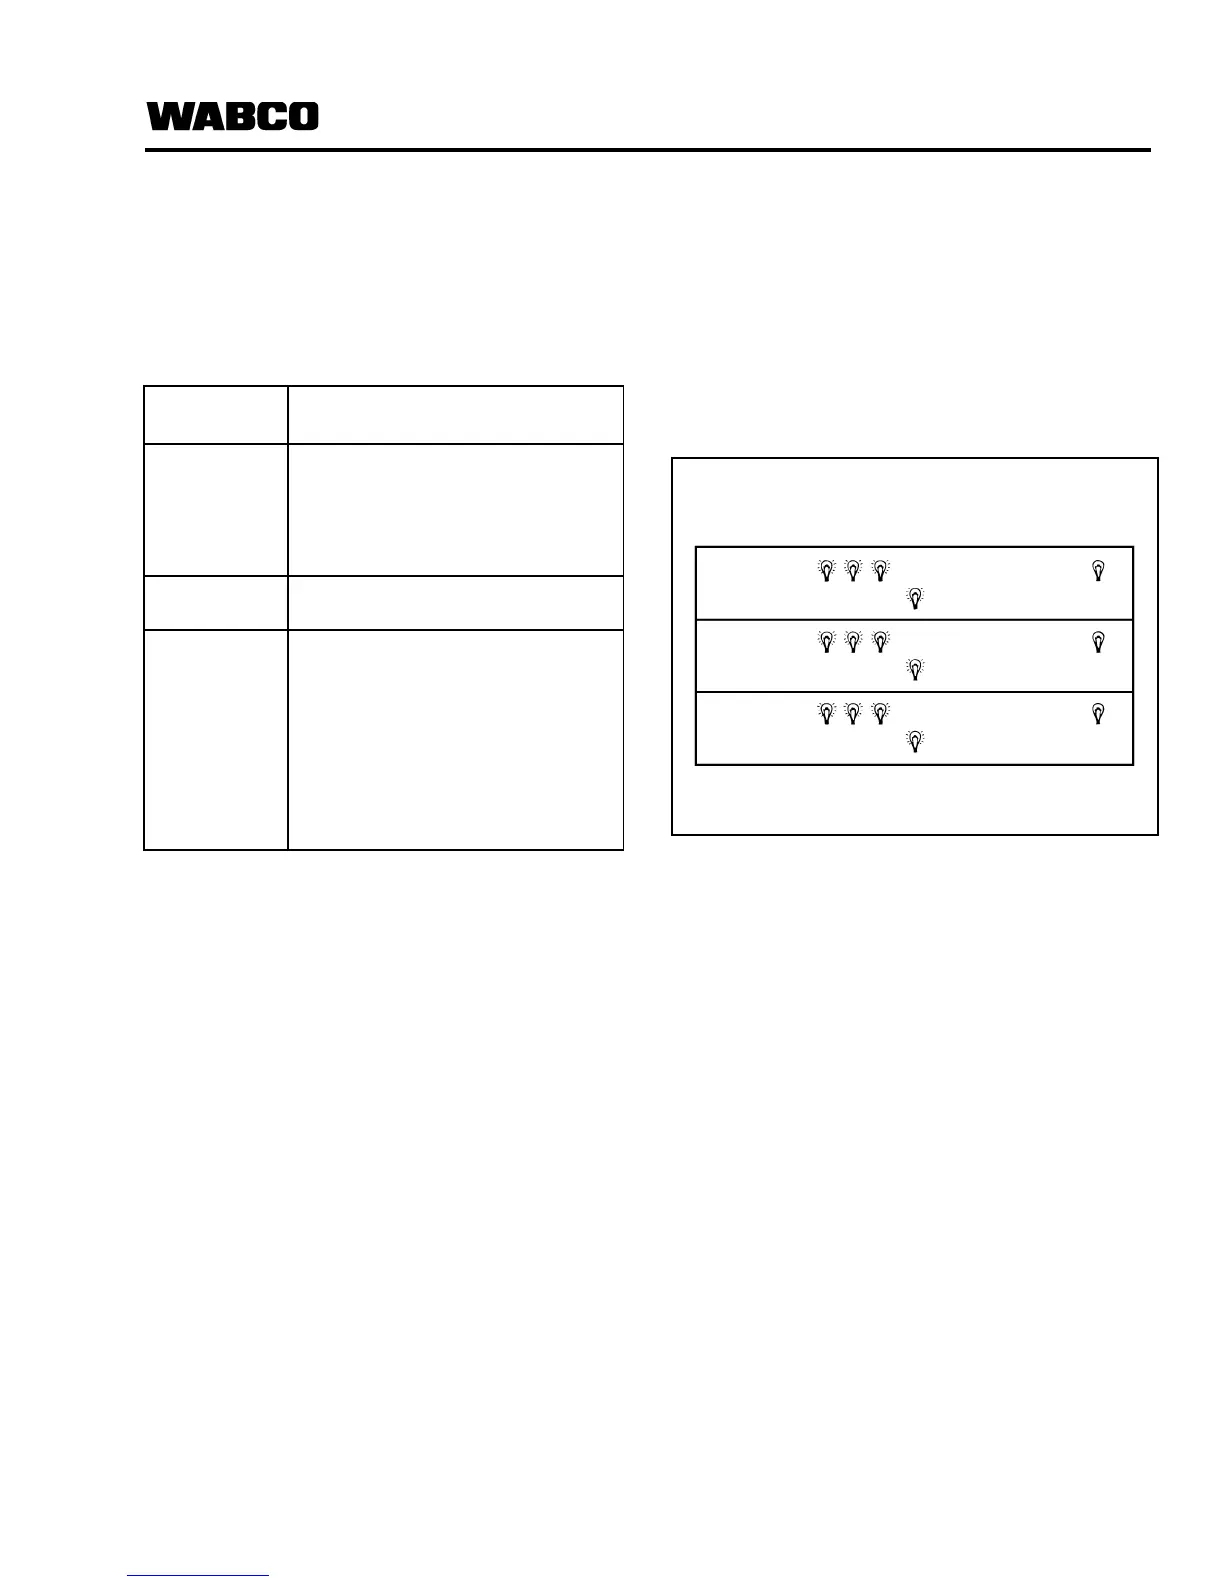
4. The blink code lamp will display the system's
identification three times. For example, three
flashes identify a 4S/2M system. (Refer to the
system identification example shown below.)
To accept the ECU reconfiguration, you must
depress the blink code lamp switch for three
seconds during the third display of the
system's identification.
5. During the third time the lamp displays the
system's identification, depress the blink code
lamp switch for three seconds and release the
switch to accept the system reconfiguration.
6. The blink code lamp will flash rapidly eight
times to acknowledge that the ECU is
reconfigured. The lamp will continue to flash
the system's identification until you turn OFF
the power to the ECU.
7. If you repaired or replaced the ECU/Valve
Assembly or ABS Modulator Valve, refer to
“Final Test Before Returning a Trailer to
Service” in Section 7, "Sensor Adjustment &
Component Testing".
ECU Part
Number
Reconfiguration
Requirements
472 500 001 0 Manual reconfiguration required
if ECU is installed on other than a
2S/2M configuration.
See “How to Use the
Reconfigure Mode”.
472 500 011 0 2S/1M only. No reconfiguration
required.
471 500 012 0
&
472 500 013 0
Automatic reconfiguration for
upward configurations (e.g.,
2S/2M to 4S/2M). If downward,
manual reconfiguration required.
Do NOT reconfigure the ECU
unless system usage has
changed. Contact WABCO North
America Customer Care at 855-
228-3203 for assistance.
Figure 8.3
2002111b
THREE FLASHES LAMP GOES OFF 2.5 SECONDS
LAMP COMES ON 2.5 SECONDS LAMP GOES OFF 2.5 SECONDS
THREE FLASHES
LAMP GOES OFF 2.5 SECONDS
LAMP GOES OFF 2.5 SECONDS
LAMP GOES OFF 2.5 SECONDS
LAMP GOES OFF 2.5 SECONDS
LAMP COMES ON 2.5 SECONDS
LAMP COMES ON 2.5 SECONDS
THREE FLASHES
4S/2M SYSTEM IDENTIFICATION
 Loading...