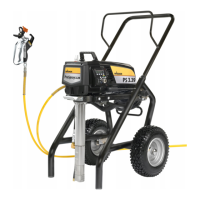
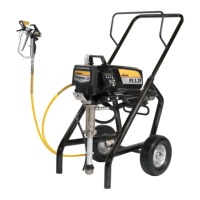
15
Project 115
Cleanup
If you are using water-soluble materials, use warm suds
to clean the spray device. If you are using solvent-
based spray, use a suitable solvent for cleaning, with a
ash point of over 21°C.
Do not use solvents for water-soluble materials, as the
mixture will turn into a gel-type substance which is
dicult to remove.
Figure 16 - Short Term Cleanup
Only follow these instructions when using water-
soluble materials. If you are using solvent-based spray,
follow the Cleanup and Long-Term Storage steps.
A) Shutdown
1. Perform the Pressure Relief Procedure (see gure 7) and
unplugthesprayer.
2. Pour1/2cupwaterslowlyonthetopofthepainttoprevent
thepaintfromdrying.
3. Wrapthespraygunassemblyinadampclothandplaceitin
aplasticbag.Sealthebagshut.Placethesprayerinasafe
place out of the sun for short-term storage.
B) Startup
1. Remove the gun from the plastic bag. Stir the water into the
paint.
2. Turn the PRIME/SPRAY knob to PRIME.
3. Plugsprayerin.
4. TurntheswitchtoON(I).
5. TurnthePRIME/SPRAYknobtoMAXSPRAY.Testthesprayer
onapracticepieceandbeginspraying.
Figure17-FlushingtheSystem
1. Perform Pressure Relief Procedure (see gure 7).
2. Emptythehopperofsprayingmaterial(seegure8).
3. While removed, rinse the hopper with the appropriate
cleaning solution until clean.
4. Lockthegunandremovespraytipassembly.Replacethe
hopper and return tube. Fill the hopper with appropriate
cleaning solution.
5. Place a waste container (a) next to the original material
container (b). The containers should be touching. Aim the
spraygunintothesideoftheoriginalmaterialcontainer(b)
and hold the trigger.
6. Whilepullingtheguntrigger,turnthepumpON(l),and
turn the PRIME/ SPRAY knob to SPRAY (1) to purge material
fromthehosebackintotheoriginalcontainer.Keepholding
trigger through next steps.
7. Whencleaningsolutionowsfromthespraygun,keep
holdingthetriggerandaimthespraygunintothesideofthe
waste container (ground gun with a metal container if ushing
with ammable solvent).
8. Trigger the gun until the uid owing out of the gun is clear.
Youmayneedtodisposeandobtainnewcleaningsolution.
9. Turn the PRIME/SPRAY knob to PRIME and trigger gun to
relieve pressure.
10. Ifhopperisemptyofallcleaningsolution,rellwithnew
cleaning solution.
11. TurnthePRIME/SPRAYknobtoPRIME,andturnthepumpON.
12. Let the pump circulate the cleaning solution out the return
tubefor2-3minutes.TurnthepumpOFF.
13. Removeandthoroughlyrinsethehopperoncemore.
14. Replace the hopper for storage.
Figure18-CleaningtheSprayGun
1. MakesurethepumpisswitchedOFF(O).Makesurethe
PRIME/SPRAYknobisturnedtoPRIME.Unplugthesprayer.
2. Removespraygunfromthepainthoseusingadjustable
wrenches.
3. Unclipthetriggerguard(a)fromthelterhousing(b)by
pulling outward from the lter housing. Unscrew the lter
housing.
4. Removethelter(c)fromthespraygunhousingandclean
with the appropriate cleaning solution (warm suds for water-
soluble materials, solvents with a ash point of over 21°C for
solvent-based substances).
5. Removespraytip(d)fromsprayguardassembly.Cleanspray
tip with a soft-bristled brush and the appropriate cleaning
solution. Be sure to remove and clean the washer (e) and
saddleseat(f)locatedintherearofthespraytipassembly.
6. Replace the cleaned lter, tapered end rst, into the gun
housing. The tapered end (g) of the lter must be loaded
properlyintothegun.Improperassemblywillresultina
plugged tip or no ow from the gun.
7. Installspraytip(d),saddleseat(f)andwasher(e),andreplace
sprayguardassembly.
8. Threadthespraygunbackontothepainthose.Tightenwith
a wrench.
Figure 19 - Long-Term Storage
1. Removehopper.Pourapproximatelytwoouncesoflight
household oil into the inlet valve (a).
2. Removehosefromsprayhoseport.Placearagoverthespray
hoseport,andturntheswitchON(l).Lettheunitrunforve
seconds.TurnthepumpOFF(O).
3. Replace the hopper.
4. Wipe entire unit, hose and gun with a damp cloth to remove
accumulatedpaint.Replacethesprayhose.
5. Push handle lock to collapse the handle.
 Loading...