valve cover (14). Remove the diaphragm (15). Clean all the parts carefully.
WARNING! Never hold the spray gun rear part under water or immerse it
into liquids. Clean the housing only with a moistened cloth.
12)
Clean the outside of the spray gun and container with a cloth soaked in solvent or water.
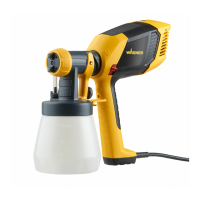
13) Unscrew the union nut (Fig. 10, 1) and remove the air cap (2) and nozzle (3). Clean the
air cap, nozzle seal (4) and nozzle with a brush and solvent or water.
Assembly
The unit may only be operated with an integer diaphragm (Fig. 10 A, 15).
1)
Place the diaphragm (Fig. 10 A, 15) with the pin facing upwards on the bottom section
of the valve. Also see the marking on the gun body.
2) Place on the valve cover (Fig. 10 A, 14) and screw it closed.
3) Place the ventilating hose (Fig. 10 A, 13) on the valve cover and on the nipple at the
gun body.
Attention! Never operate the device if the nozzle seal is either damaged or
missing. If the nozzle seal is either missing or damaged liquids can enter
the device and increase the risk of an electric shock.
4) Push the nozzle seal (g. 10 B, 4) over the needle (18); the groove (slot) should point
towards you.
5)
Put the nozzle (g. 10 B, 3) onto the gun body and nd the correct position by turning it.
6) Put the air cap onto the nozzle and tighten it using the union nut.
7) Place the container seal from below on the suction tube and slide it over the collar,
while turning the container seal slightly.
8) Insert the suction tube with container seal in the gun body.
14. Maintenance
WARNING! Never operate the machine without the air lter; dirt could be
sucked in and interfere with the function of the machine. Disconnect plug
before changing parts.
•
Change the air lter if it is soiled (Fig. 9).
•
In order to mount the gun more easily apply lubricating grease (enclosed) liberally
to the O-ring at the gun front part. (Fig. 10, Item 5)
 Loading...