5
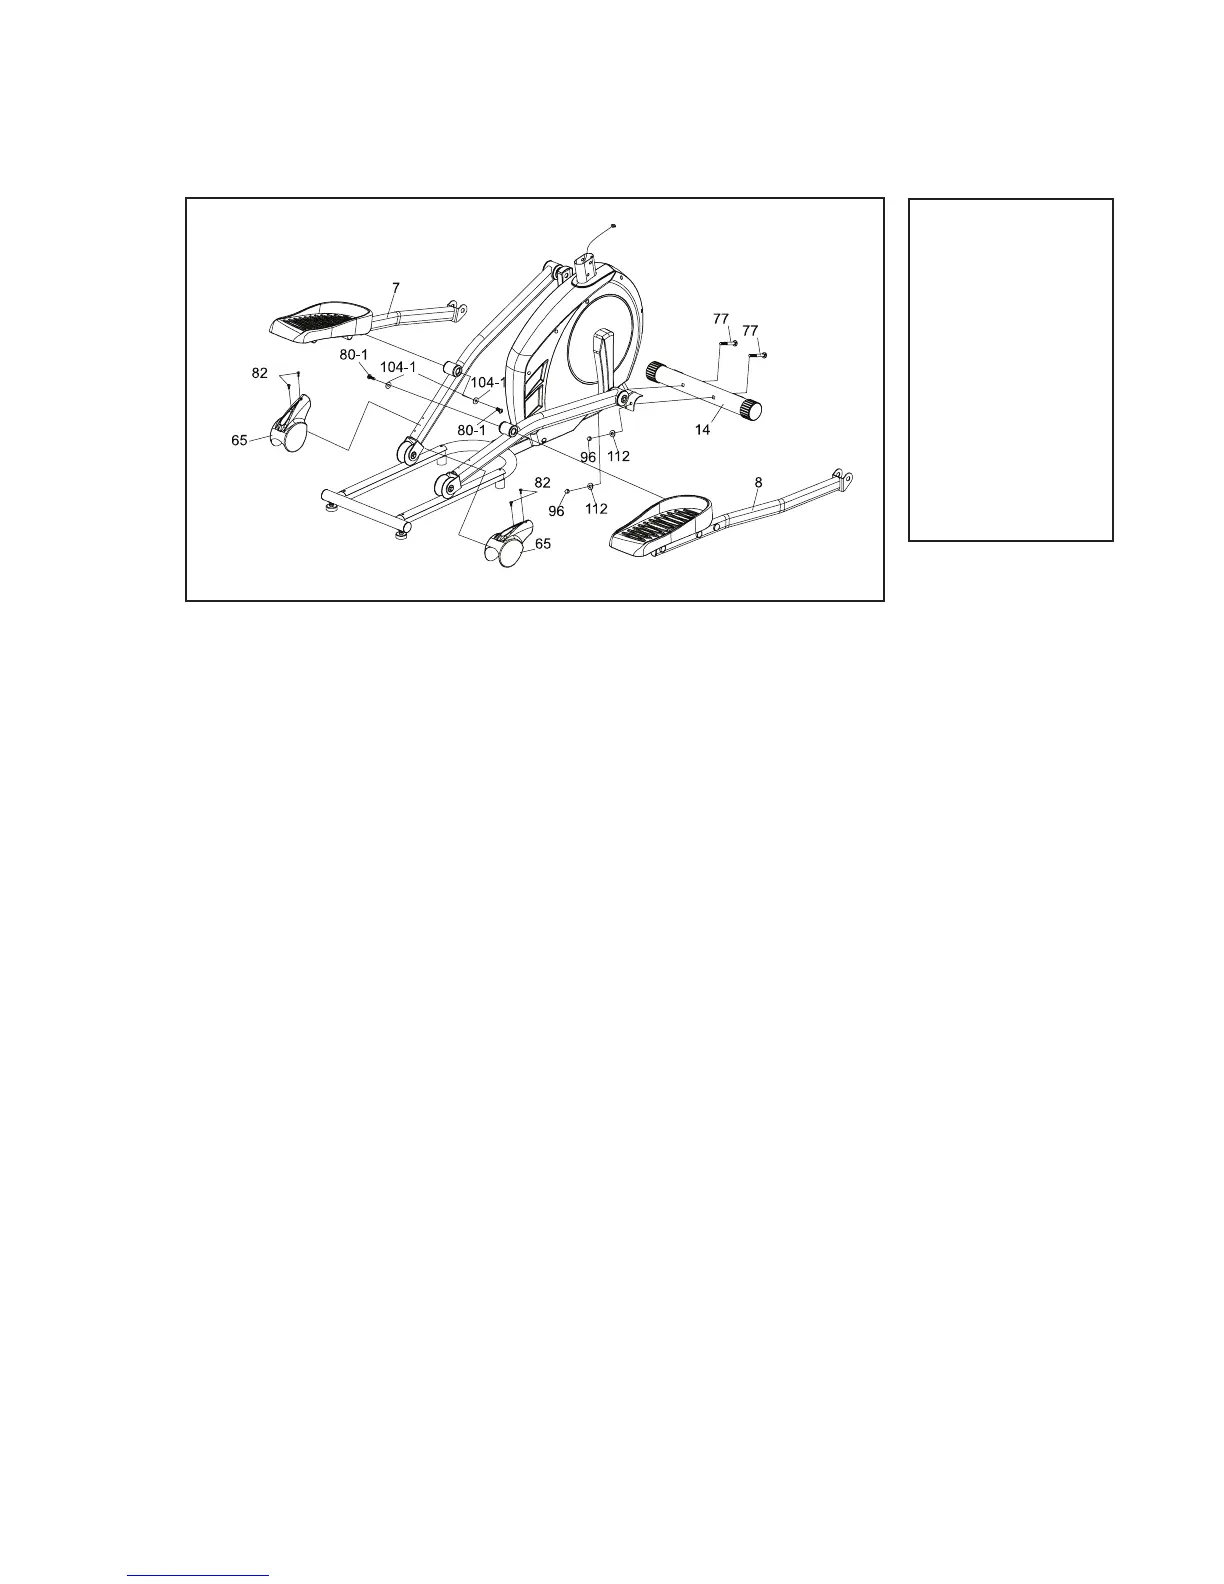
1. Install the Front Stabilizer (14) on the front stabilizer holding plate at the
bottom of the main frame with the transportation wheels facing forward
and secure them with two Carriage Bolts (77), two Curved Washers
(112) and two Cap Nuts (96) by using the Wrench (115).
2. Secure two Slide Wheel Covers (65) on left and right pedal arm (5) with
four Phillips Head Screws (82) by using Combination M5 Allen Wrench &
Phillips Head Screw Driver (118).
3. Insert the shaft on left connecting arm (7) to the bushing on left pedal
arm (5) and secure with one Button Head Socket Bolt (80-1) together
with one Flat Washer (104-1) by using Combination M5 Allen Wrench &
Phillips Head Screw Driver (118). Do it the same way for right connect-
ing arm (8) and right pedal arm (5).
FS3.5 Assembly Instructions
Hardware Step 1
Front Stabilizer and Connecting Arms
#77. 3/8” x 3”
Carriage Bolt (2 pcs)
#80-1. 5/16” x 15mm
Button Head Socket
Bolt (2 pcs)
#82. M5 x 15mm
Phillips Head Screw
(4 pc)
#96. 3/8”
Cap Nut (2 pcs)
#104-1. 8.7” x 20 x 1.5T
Flat Washer (2 pcs)
#112. 3.8” x 23 x 1.5T
Curved Washer (2pcs)
1
 Loading...