Trouble Recovery
107
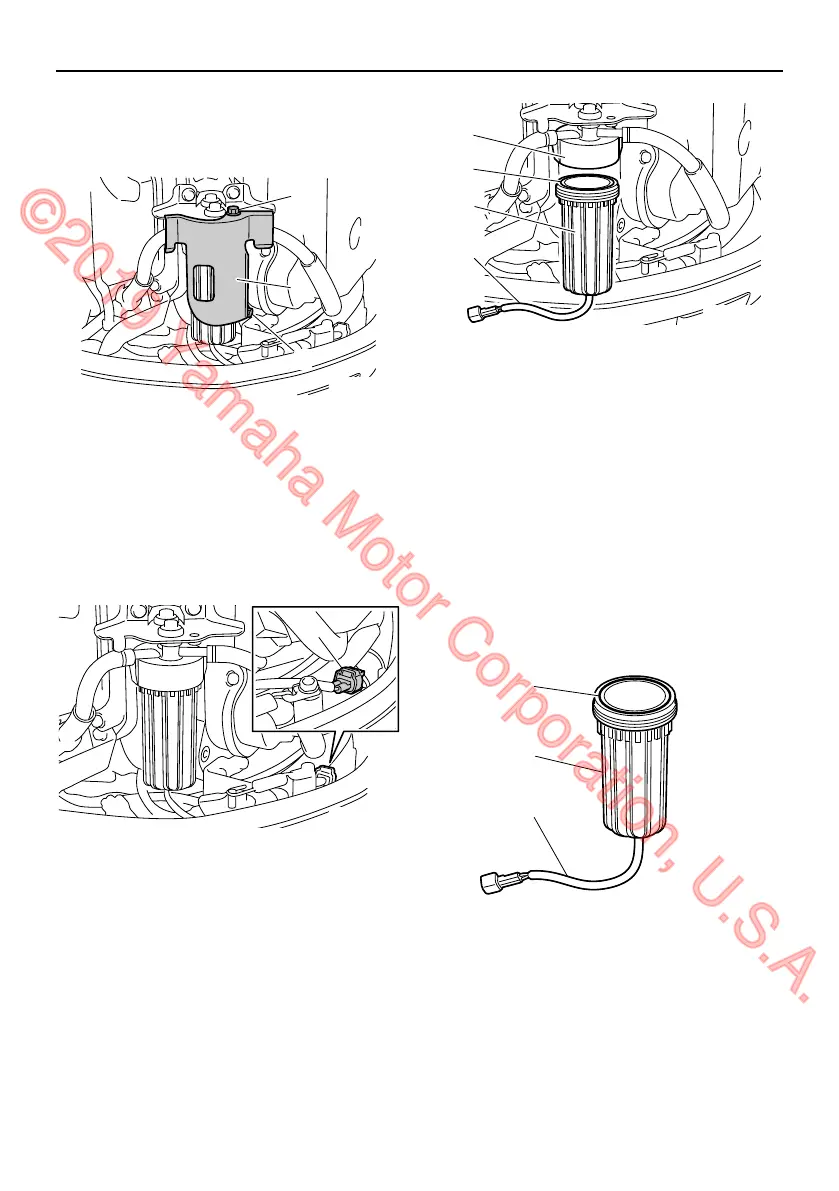
2. Remove the top cowling.
3. Remove the bolts, and then remove the
fuel filter cover.
4. Disconnect the water detection switch
coupler. NOTICE: Be careful not to get
any water on the water detection
switch coupler, otherwise a malfunc-
tion could occur.
[ECM01951]
5. Remove the filter cup from the filter
housing, and then remove the O-ring
from the filter cup. NOTICE: Be careful
not to twist the water detection
switch lead when unscrewing the fil-
ter cup.
[ECM01961]
6. Drain the water in the filter cup by soak-
ing it up with a rag.
7. Put the O-ring on the filter cup in its orig-
inal position, and then install the filter
cup onto the filter housing. NOTICE: Be
careful not to twist the water detec-
tion switch lead when screwing the
filter cup onto the filter housing.
[ECM01971]
8. Connect the water detection switch cou-
pler securely until a click is heard.
9. Install the fuel filter cover, and then tight-
1. Bolt
2. Fuel filter cover
1. Water detection switch coupler
1. Filter housing
2. O-ring
3. Filter cup
4. Water detection switch lead
1. O-ring
2. Filter cup
3. Water detection switch lead
6CE-9-36-1E0.book 107 ページ 2014年11月28日 金曜日 午後2時55分
©2019 Yamaha Motor Corporation, U.S.A.
 Loading...