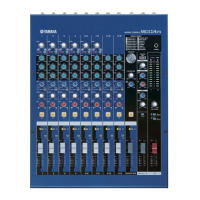
MG12/4FX
16
Heat Sink
[B]
[A]
[A]
(ヒートシンク)
PS
IC01
IC02
IC03
IC04
IC05
Q01
IC01
IC02
IC03
IC04
IC05
Q01
Fig.2
4. シート DSP、シールド DSP12
(所要時間:約 7 分)
4-1 ボトムカバーを外します。(2 項参照)
4-2 サイドカバーR、シートPSを外します。(3-3項参照)
4-3 [326]のネジ 2 本を外し、カバー DSP を外します。
(図 3)
4-4 [320]のネジ 4 本を外し、シールド DSP12 からシー
ト DSP を外します。(写真 9)
4-5 [290]のネジ2本と[300]のリベット2本を外し、シー
ルド DSP12 を外します。(写真 9)
[290]
[320] [300][300]
DSP
MAIN(1/2)
ShieldDSP12
(シールドDSP12)
Photo.9 (写真9)
Fig.3
[300]: Plastic Rivet
NRP-345 (CB815740)
[326]: Bind Head Tapping Screw-S
2.6X4 MFZN2Y (VU757900)
[320]: Bind Head Tapping Screw-S
3.0X6 MFZN2BL (EP630210)
[360]
SideCoverR(サイドカバ−R)
PowerSupplyUnit(シートPS)
Fig.1
[360]: Bind Head Tapping Screw-B
3.0X8 MFZN2BL (EP600190)
[290]: Bind Head Tapping Screw-S
3.0X6 MFZN2BL (EP630210)
CoverDSP
(カバーDSP)
[326]
ShieldDSP12
(シールドDSP12)
DSP
MAIN1/2
4. DSP Circuit Board, Shield DSP 12
(Time required: About 7 minutes)
4-1 Remove the bottom cover. (See procedure 2)
4-2 Remove the side cover R and PS circuit board.
(See procedure 3-3)
4-3 Remove the two (2) screws marked [326]. The cover
DSP can then be removed. (Fig. 3)
4-4 Remove the four (4) screws marked [320]. The DSP
circuit board can then be removed from the shield
DSP12. (Photo. 9)
4-5 Remove the two (2) screws marked [290] and two
(2) rivets marked [300]. The shield DSP12 can then
be removed. (Photo. 9)
(図2)
(図1)
(+バインドBタイト)
(プラスチックリベット)
(+バインドSタイト)
(+バインドSタイト)
(図3)
(+バインドSタイト)
w
w
w
.
x
i
a
o
y
u
1
6
3
.
c
o
m
Q
Q
3
7
6
3
1
5
1
5
0
9
9
2
8
9
4
2
9
8
T
E
L
1
3
9
4
2
2
9
6
5
1
3
9
9
2
8
9
4
2
9
8
0
5
1
5
1
3
6
7
3
Q
Q
TEL 13942296513 QQ 376315150 892498299
TEL 13942296513 QQ 376315150 892498299
http://www.xiaoyu163.com
http://www.xiaoyu163.com

 Loading...