QL5/QL1
129
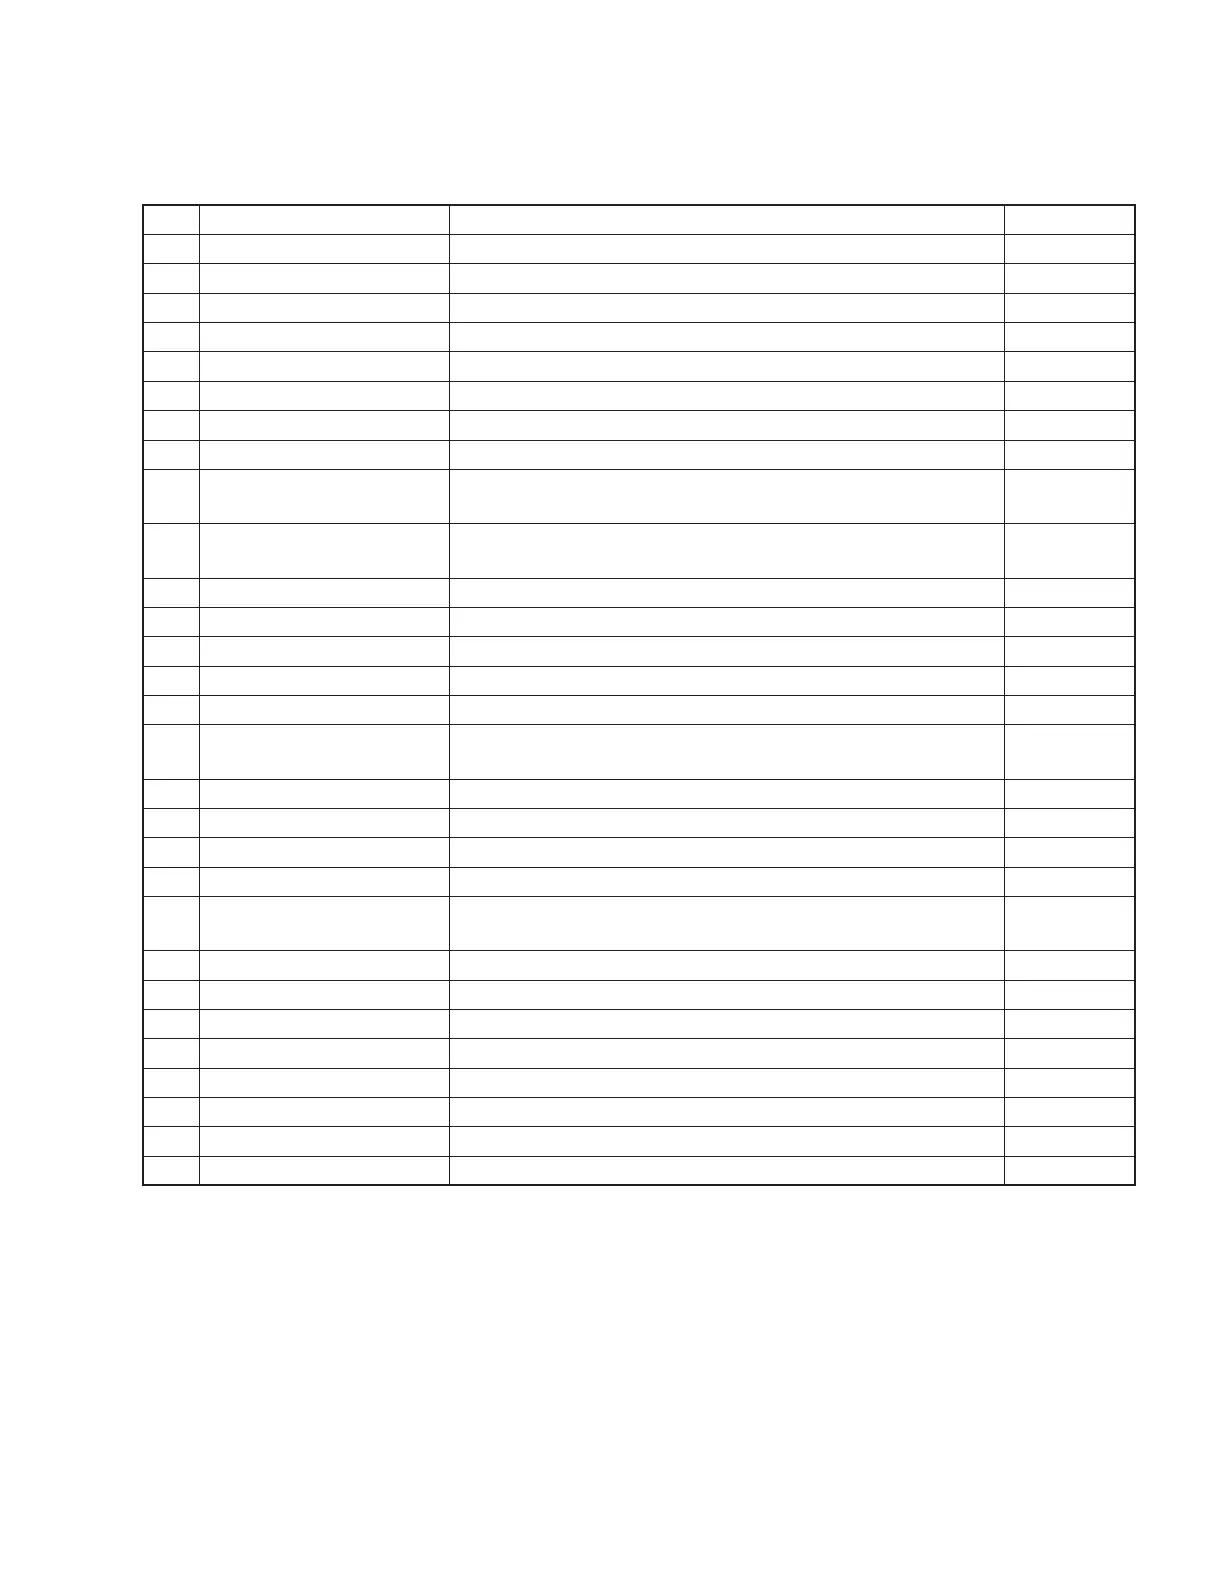
Item Check name Outline of check item Judgment
1-0 INFORMATION Check the version and other items of the fi rmware. Auto
1-1 CPU MRAM Check the data bus and address bus of CPU MRAM. Auto
1-2 CPU SDRAM Check the data bus and address bus of CPU SDRAM. Auto
1-3 BATT Check the voltage of the backup battery. Auto
1-4 RTC Obtain and set Real Time Clock. Auto
1-5 PLLPU Check PLLPU register by reading/writing it. Auto
1-6 DSP6 Check each DSP6 register by reading/writing it. Check SIO for connection. Auto
1-7 DSP7 Check each DSP7 register by reading/writing it. Check SIO for connection. Auto
1-8 SHARC
Check communication/FLAG line between CPU and SHARC.
Check SHARC SDRAM
Auto
1-9
SLOT1
SLOT2
Check each signal of SLOT and power voltage. Auto
1-10 WORD CLOCK Check PLL LOCK by counting Fs of WCLK OUT at WCLK IN. Semi-auto
1-11 AES/EBU(OUT) Check through sound by connecting with SYSTEM2/speaker. Visual check
1-12 MIDI Check transmission/reception by loopbacking MIDI IN/OUT. Auto
1-13 GPI Connect IN/OUT with jig. Auto
1-14 NETWORK Check by communicating with PC. Auto *1
1-15 DM9000
Set the network with DM9000 and check if it is linked with the internal
switch on the Dante circuit board.
Auto
1-16 USB STORAGE Check control line by reading/writing USB MEMORY. Auto
1-17 LAMP Check by actually turning the lamp on and off. Visual check
1-18 LCD Check LCD indication. Semi-auto
1-19 TOUCH PANEL Check touch point scale/luminance by touching LCD. Semi-auto
1-20 RECORDER
Check RECORDER IC register by reading/writing it.
Check SIO connection.
Auto
1-21 DNTU Brooklyn2 Check Brooklyn2 and Primary/Secondary ports. Auto
1-22 DNTU SIO Check UART and SPI with Brooklyn2. Auto
2-1 Ch Name LCD indication Check Ch Name LCD and each Ch name indication. Visual check *2
2-2 LED all lighting Check that all LEDs for lighting altogether and one by one. Visual check *2
2-3 LED lighting by colors Check lighting of red, orange, yellow and green LEDs color by color. Visual check *2
2-4 Switch input Check input from switches. Visual check *2
2-5 Encoder input Check input from encoder. Visual check *2
2-6
Fader movement time measurement
Check movement of motor fader (Calibration in advance required) Auto
●
List of check items
*1 Judgment is OK if communication with the test program is possible.
*2 Check each panel visually if necessary as checking runs automatically.