PERIODIC MAINTENANCE AND MINOR REPAIR
6-37
6
4. Install the brake caliper by install-
ing the bolts.
NOTE:
Make sure that there is enough space
between the brake pads before install-
ing the brake caliper onto the brake
disc.
5. Tighten the wheel axle to the spec-
ified torque.
6. Tighten the wheel axle pinch bolt A
and pinch bolt B to the specified
torques.
7. Retighten the wheel axle pinch bolt
A to the specified torque.
8. Tighten the brake caliper bolts to
the specified torques.
9. Push down hard on the handlebar
several times to check for proper
fork operation.
EAU25080
Rear wheel
EAUM1773
To remove the rear wheel
WARNING
EWA10820
● It is advisable to have a Yamaha
dealer service the wheel.
● Securely support the motor-
cycle so that there is no danger
of it falling over.
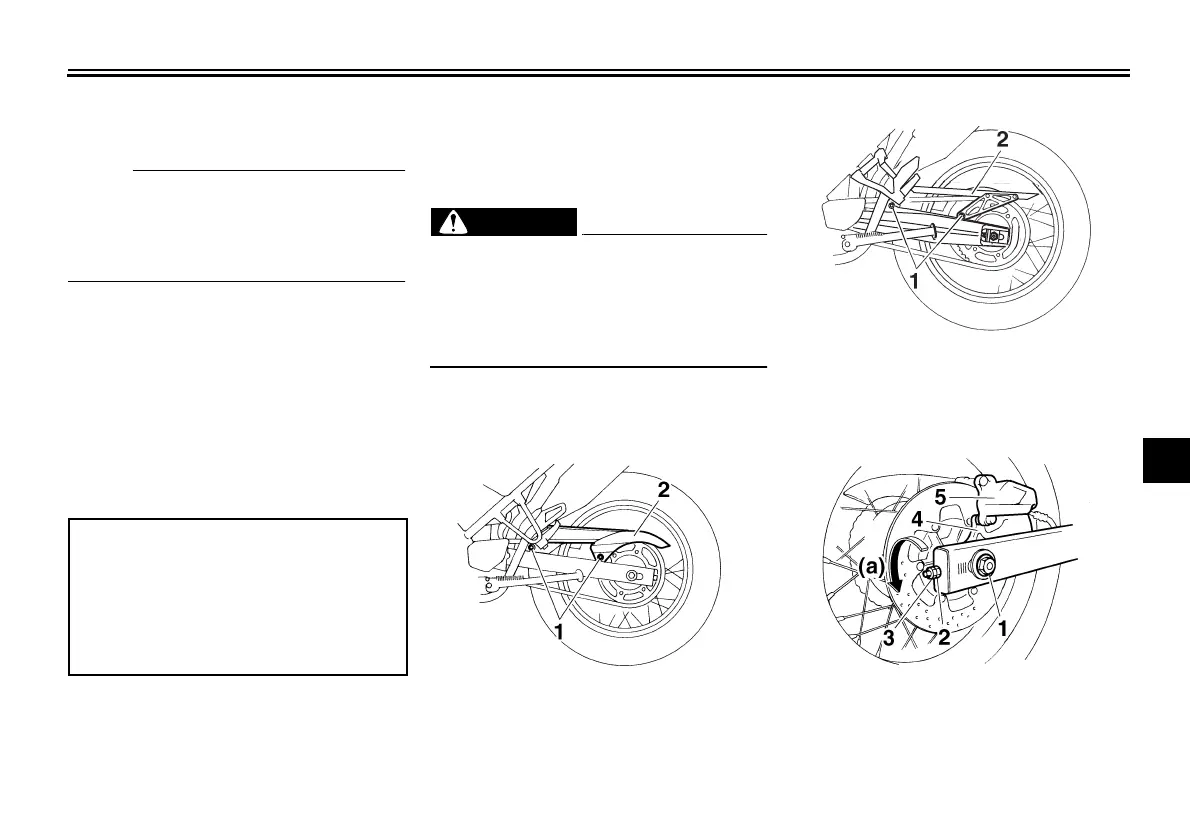
1. Remove the drive chain guard by
removing the bolts.
XT660R
XT660X
2. Loosen the axle nut.
XT660R
Tightening torques:
Wheel axle:
59 Nm (5.9 m·kgf, 43 ft·lbf)
Front wheel axle pinch bolt:
18 Nm (1.8 m·kgf, 13 ft·lbf)
Brake caliper bolt:
40 Nm (4.0 m·kgf, 29 ft·lbf)
1. Bolt
2. Drive chain guard
1. Bolt
2. Drive chain guard
1. Axle nut
2. Drive chain slack adjusting nut
3. Locknut
4. Brake caliper bracket
5. Brake caliper
U5VKE1E0.book Page 37 Tuesday, July 18, 2006 1:00 PM
 Loading...