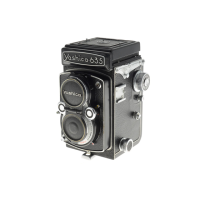
Yashica Twin Lens Reflex Guide - Focal Press January 1964 Page 33 / 55
Scans and Document copyright by Mischa Koning - www.3106.net
This document or parts thereof may not be sold and / or resold in either print form or
electronically without prior written consent from Mischa Koning
Filters for Colour Film
The normal yellow, orange and other filters for black-and-white film must never be used with colour films as they would
give the colour picture a strong overall colour tint.
In daylight and with daylight type film, only a haze filter is required. It is almost colourless but for a slight straw tinge. It
is usefully employed on hazy days and in high altitudes to avoid excessive bluishness of the colour picture, especially with
distant landscapes, seascapes and near water. This filter does not call for any change in exposure. It is also useful for
colour photography with electronic flash as it produces somewhat warmer tones.
Conversion filters are used if a colour film, balanced for one type of light, should be used in another type of light.
The Polarizing Screen
Highly-polished subjects, may reflect glare which obscures the detail. This can be overcome by the polarizing screen.
It has the special property of suppressing so-called "polarized" light. Light reflections from glass, china, enamel, polished
wooden surfaces, water, to a large extent are polarized and can, therefore, be almost extinguished by placing the polarizing
filter in proper position over the lens.
The filter must be rotated in front of the finder lens to find out its best position and then transferred to the camera lens in
this position. The filter has about a 3 x factor.
The polarizing screen is, in addition, particularly useful in colour photography where it darkens a blue sky.
EXPOSURE
Exposure means to expose the film in your camera to light. The dose or light any film needs to produce the right sort of
image depends on how sensitive that film is to light. A fast film is more sensitive than a slow film.
Once your choice of film is settled, the basic condition of exposure is settled with it. You are now left with the problem of
scaling the light you find in front of your camera to the amount your film needs.
Your job is to judge the light reflected from the subject you are about to photograph. Your grandfather as an amateur
photographer used to take into account his geographical position, the time of the year. the hour of the day, the state of the
sky, as well as the tone of the subject itself, and by so adding one thing to another size up the light reflected from the
subject. The experienced professional, of course, hardly ever worked that way. He just had a look and he knew.
Today a light meter or exposure meter does the same for any photographer. It takes a took, it measures the light and it lets
you know. In fact, it does more than that. It translates the light measured into terms of photographic exposure. It does so
by presenting you with the choice of aperture numbers and shutter speeds, sorting them out in pairs.
Aperture and Shutter Speed
The aperture number or f stop controls the amount of light allowed to enter through the lens. These numbers run in a
series: 2.8-4-5.6-8-11-16-22. Each higher stop number lets through half the light of the next lower number (next larger
stop).
The shutter speed controls the length of time for which the lens is kept open to light. Shutter speed figures represent
fractions of a second: 2 = 12 second, 4¼ second . . . 500 = 1/500 second.
The actual exposure is a product of these two: "how much" and 'how long". A large amount of light striking the film for a
short time may produce all image similar to that produced by a small amount or light striking the film for a longer time.
Hence the choice from a series of balanced aperture-shutter combinations offered by your exposure meter: more or less
open apertures paired with more or less quick shutter speeds, and more or less stopped down apertures paired with more or
less slow shutter speeds.
 Loading...