a
Chat
Pickup
groups
Pickup
groups
Pickup groups
icku
Videocall
i
eoca
Videocall
Videocall
3-wa
3-way
conferencing
-wa
conferencin
Communicator
Communicator
Communicator
Pro
rammable buttons
Programmable
buttons
Busy
line
field
Busy
line
field
Busy
line
field
Presence
resence
ara
e
rin
in
Paralell
ringing
Unconditional
call forwarding
Unconditional
call forwarding
all forwardin
oice
ail
Voice
mail
Voice
mail
oice
ai
Receptionist
application
Mobility
Calling line
identification
restriction
Calling line
identification
restriction
Calling line
identification
restriction
PC communicator
obile phone
ommunicato
Mobile phone
communicator
Mobile
hone
communicato
r
obile phone
ommunica
or
Mobile phone
communicator
Mobile phone
communicator
ttendant
Attendant
Attendant
Attendant
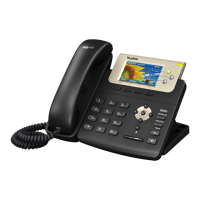
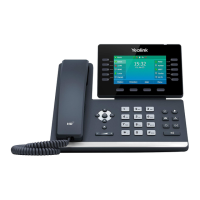
Yealink
SIP-T32G
Before you start using the telephone
Package content: Telephone set, Receiver,
Twisted receiver cord, Telephone stand,
Instructions for installation and use. Insert
the telephone stand into four holes on the
underside of the telephone set (so that the
telephone can stand on the desk). If you
want to mount the telephone on the wall,
you have to disjoint the stand, turn the upper
section 180 degrees and join the stand again
together. Attach one end of the receiver cord
to the receiver and the other end to the socket
on the telephone marked with receiver. Attach
the LAN cable (black cable) to the socket
on the underside of the telephone marked
"Internet" and attach the other end of this
cable to internet modem, router or switch.
If you have only one LAN socket available, it
should be used for connecting the telephone
and the PC should then be connected to the
telephone (to the socket on the underside of
the telephone set marked "PC").
If your network does not support PoE (Power
on Ethernet), it is necessary to use a telephone
feed adaptor (an optional accessory). The
telephone will then start up and the message
“Starting…please wait…" will appear on
the display. This may take several minutes
during which the telephone updates itself and
it may also restart itself. Then it should be
possible to sign up to the network.
Right in the telephone a list of telephone
contacts has been made ready for you
to use. To open the list of contacts for the
first time you have to enter your assigned
telephone number and the password. You
will receive these details on the delivery of
the service. Enter the telephone's Menu and,
using the arrows and OK button, select the
following options: Menu
Settings
Broadsoft settings menu
Broadsoft
contacts setting. Here, using again the
arrows, select "Item 1" and click OK.
In the item "Password" enter the same
password that you use to sign on the portal
centrex.gts.cz. The Name is your
telephone number. Here you may be able
to adjust the Virtual Switchboard service
according to your needs. Help can be accessed
using the "Help" button in the right upper
corner. Other instructions are also accessible
here in the item "To Download".
1. Making a call
Lift the receiver or press the
"Loudspeaker" button and enter the
required telephone number using the nu-
meric keypad and confirm by pressing the
context-dependent button "Call". To end
the call, press again the "Loudspeaker"
button or put down the receiver.
2. Control functions
• Navigation button is used for moving
in the menu. Button OK is used to
confirm the dialling option. There are
also the following types of buttons on
the telephone – the context-dependent
buttons and the programmable buttons.
The functions of programmable buttons
are set: User line, Business con-
tacts, Personal contacts. The func-
tions of the context-dependent buttons
are changed automatically depen-
ding on the operating condition of the
telephone.
• Menu can be browsed using navigation
buttons or direct dials as every direct
dial is numbered. The manual will also
describe the so-called sequence, mea-
ning initiation of a configuration menu
using the context-dependent “Menu”
button and pressing direct options 1-9
confirmed by the OK button. I.e.: the
Menu-2-4-1 sequence means pressing
the MENU, 2, OK, 4, OK, 1, OK buttons.
You can return to default status using
the Back-Back-Leave context-based
button.
• Context-dependent button Hold - puts
a call on hold (with music)
• Context-dependent button Transfer
Volume
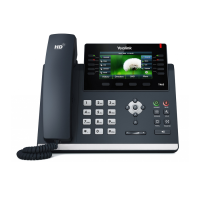
Adjustment Bar
Soft Keys
DTMF Keypad
Navigation
Keys
Power
Indication LED
Speaker
Redial
Transfer
Line Keys
Message
Headset