98
Implant Placement
Implants (Sterile)
XiVE plus Implant
Contents: Screw Implant,
2
TempBase,
2
Cover Screw
2
260122
–
•
D 3.0/L 11
260123 –
•
D 3.0/L 13
260125 –
•
D 3.0/L 15
260131
–
•
D 3.4/L 9.5
260132 –
•
D 3.4/L 11
260133 –
•
D 3.4/L 13
260135 –
•
D 3.4/L 15
260138 –
•
D 3.4/L 18
260140 –
•
D 3.8/L 8
260141 –
•
D 3.8/L 9.5
260142 –
•
D 3.8/L 11
260143 –
•
D 3.8/L 13
260145 –
•
D 3.8/L 15
260148 –
•
D 3.8/L 18
260150 –
•
D 4.5/L 8
260151 –
•
D 4.5/L 9.5
260152 –
•
D 4.5/L 11
260153 –
•
D 4.5/L 13
260155 –
•
D 4.5/L 15
260158 –
•
D 4.5/L 18
260160 –
•
D 5.5/L 8
260161 –
•
D 5.5/L 9.5
260162 –
•
D 5.5/L 11
260163 –
•
D 5.5/L 13
260165 –
•
D 5.5/L 15
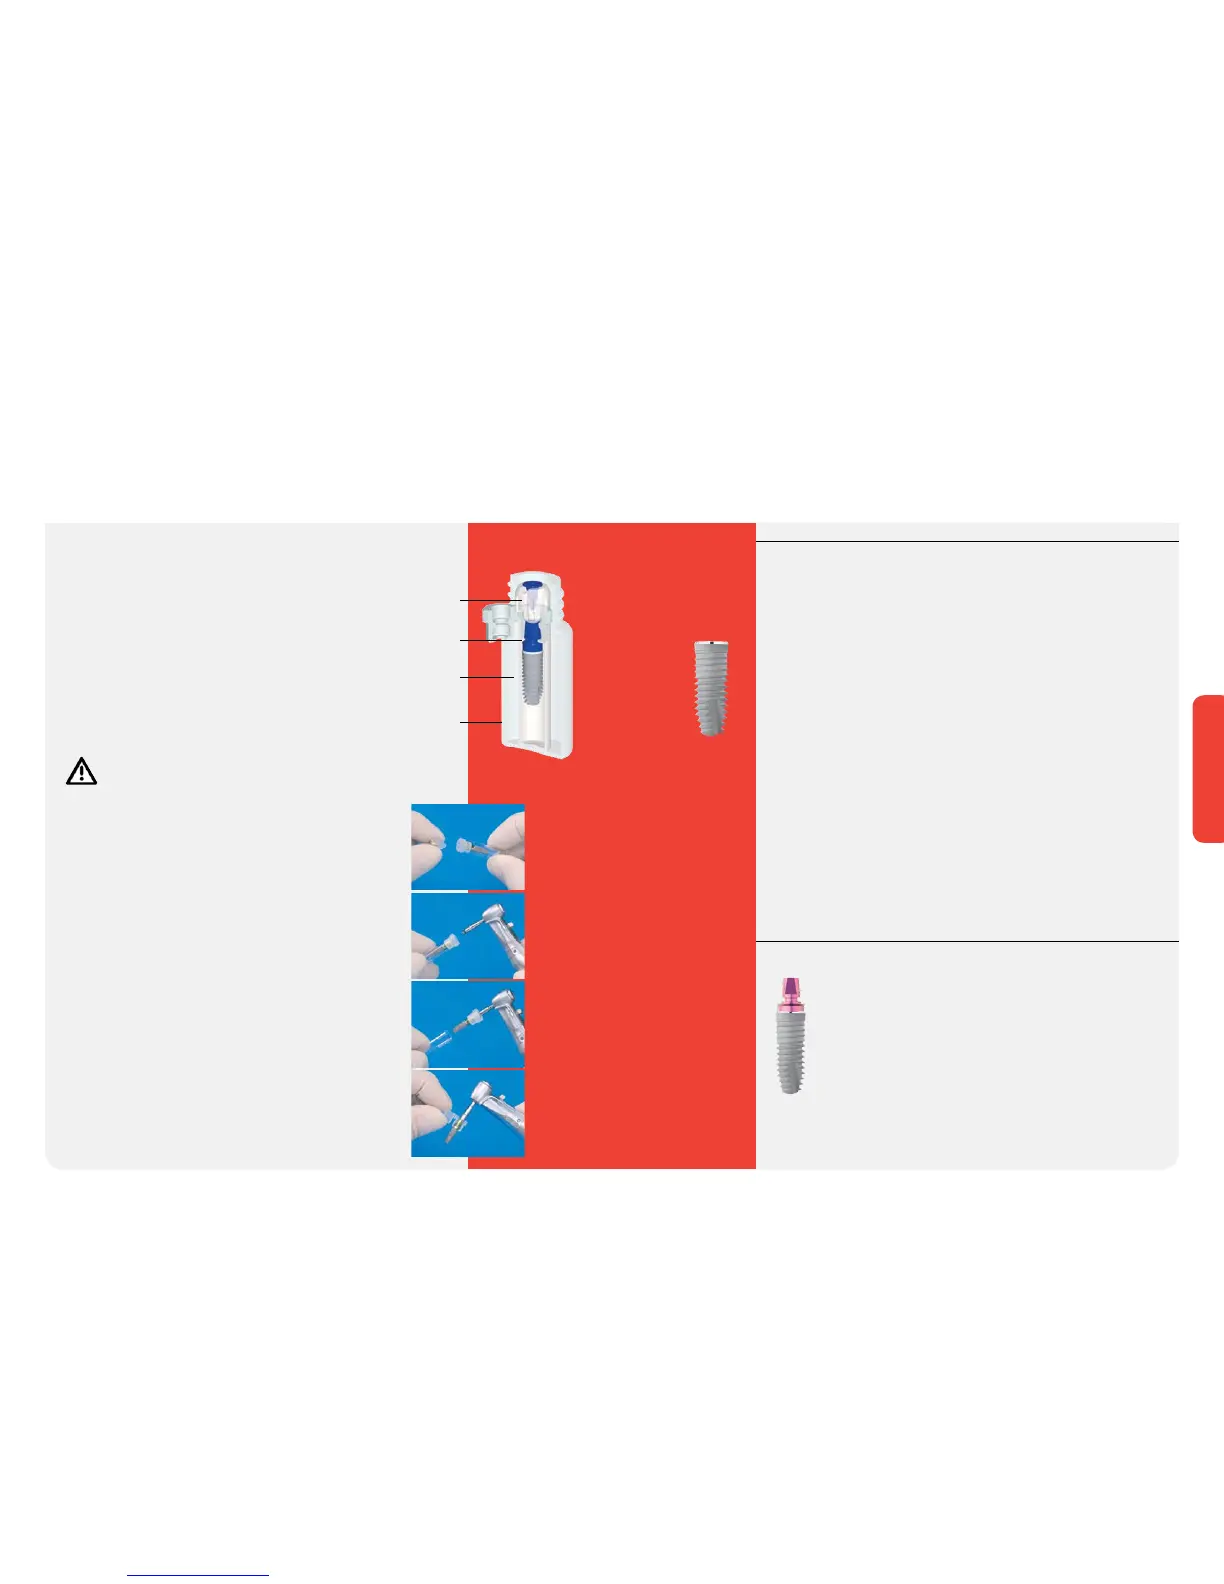
FRIADENT STERILE PACKAGING FOR XiVE PLUS IMPLANTS
All FRIADENT Implants are gamma sterilized and packed in, sealed transparent double
vials. An adhesive label seals the color-coded cap to the non-sterile outer vial. The
outermost blister pack is also non-sterile.
•
Transparent Outer Vial (Non-Sterile) –
Provides clear view of contents
• Color-Coded Cap (Non-Sterile) –
Identifies the implant length
• Sterile Inner Vial with Implant Retaining Stopper –
Provides fast, safe, no-touch placement of the implant
• Removable Labels –
Provide easy and reliable documentation
THE XiVE DELIVERY SYSTEM OFFERS “TOUCH-FREE”
IMPLANT DELIVERY:
1. Remove the outer vial cap (non-sterile) and drop the sterile inner vial onto
the surgical tray.
2
. Remove the silicone stopper from the sterile inner vial. The implant cover screw
is located in the silicone stopper of the sterile inner vial.
3
. Place the XiVE ratchet or hand piece seating instrument D 3.4 into the internal
hex of the FRIADENT TempBase.
4
. Remove the implant via the TempBase. Try to avoid touching the inner vial
with the implant.
5
. By doing so, the plastic implant holder splits and falls away.
6. Insert the XiVE plus Implant, as outlined in the Instructions For Use.
All XiVE plus Implants are pre-mounted with the FRIADENT TempBase for delivery of
the implant to the osteotomy.
To rotate the XiVE plus Implant into place, use the FRIADENT Implant Driver for either
the ratchet or hand piece. Once the implant is seated, the TempBase Retaining Screw
is loosened with the 0.9 mm FRIADENT Hex Driver. Then the TempBase is removed,
or utilized for temporary restoration.
The cover screw for XiVE plus Implants is located in the silicone stopper of the inner
sterile vial.
Cover screws are placed with the 0.9 mm FRIADENT Hex Driver.
The undamaged label indicates that the sterile package
has not been opened and ensures product sterility.
FRIADENT Sterile Packaging
for XiVE plus Implants
PROD. NO. DESCRIPTION
XiVE
®
plus
Implant System
Silicone Stopper:
Contains Implant
Cover Screw
Plastic Implant Holder
Inner Vial (Sterile):
Contains Implant
and TempBase
(Pre-Mounted to Implant)
Outer Vial
(Non-Sterile)
 Loading...