5
Preventative Maintenance (cont.)
Cleaning the Media Path using a Swab and Alcohol/Water Mix
CAUTION – Remove all rings, watches, hanging necklaces, identification badges, or other
metallic objects that could touch the printhead or drop into the media cartridge slot.
CAUTION – Before proceeding, discharge any built-up static electricity by touching the printer’s
metal back plate near its power switch or by using an anti-static wriststrap and mat.
CAUTION – The printhead may be hot and could cause severe burns. Allow the printhead to
cool.
Use the swab from a Preventative Maintenance Kit (part # 47362) or a clean swab dipped in a
solution of isopropyl alcohol (90%) and deionized water (10%).
4a.) Press the Eject button and remove the media cartridge from the printer.
4b.) Turn off the printer power
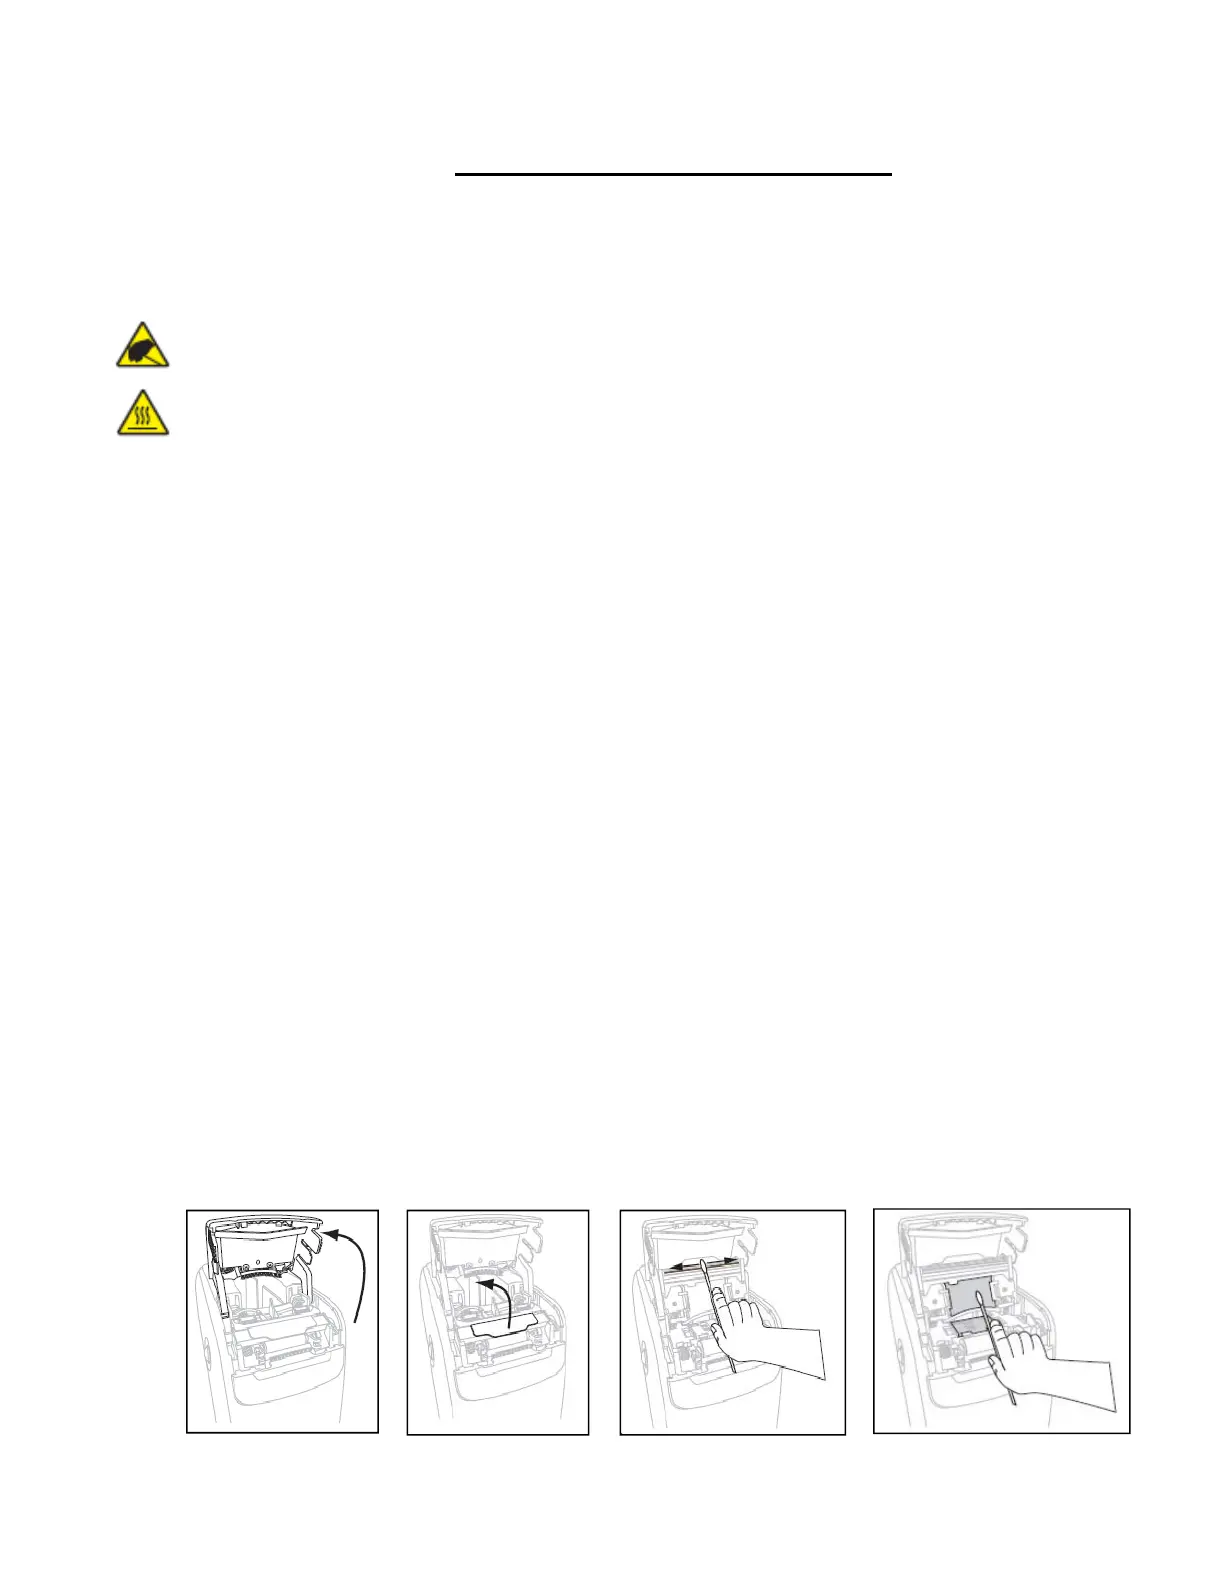
4c.) Refer to Figure 4. Press both upper cover release buttons simultaneously; the upper cover
will partially open.
4d.) Refer to Figure 6. Rotate the upper cover up and back.
4e.) Refer to Figure 7. Grasp the metal lever plate on the printhead assembly and rotate
upward to expose the printhead elements.
4f.) Refer to Figure 8. Using the swab from the Preventative Maintenance Kit or a swab dipped
in the alcohol solution, wipe along the brown strip on the printhead assembly from end to end.
Allow the solution to evaporate.
4g.) Refer to Figure 9. Using the swab, wipe the media chute surfaces. Allow the solution to
evaporate.
4h.) Refer to Figure 10. Rotate the two side clips on the platen roller upward.
4i.) Refer to Figure 11. Remove the platen roller from the printer.
4j.) Refer to Figure 12. Using the swab, thoroughly clean the platen roller. Allow the solution to
evaporate.
4k.) Refer to Figure 13. Place the platen roller back into its place in the printer.
4l.) Refer to Figure 14. Secure the platen roller by rotating the two side clips back into place.
4m.) Refer to Figure 15. Align the snap tabs on the bottom of the media chute with the slots in
the printer chassis.
4n.) Refer to Figure 16. Press down on the metal lever plate to snap the printhead assembly
back into place.
4o.) Refer to Figure 17. Close the upper cover.
4p.) Turn on the printer power and reinsert the wristband cartridge. Dispose of the used swab.
Figure 6 Figure 7 Figure 8 Figure 9
 Loading...


