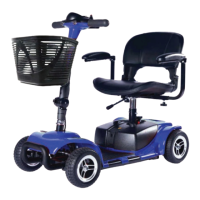
Figure 2. Out of the box the front and the rear of the scooter come
preassembled for your convivence. To begin assembly, loosen the tiller
adjustment knob, raise the tiller to the desired angle, and retighten the tiller
adjustment knob. Unscrew the tiller lock located at the bottom right of the
scooters tiller.
Figure 3. Unscrew and remove the battery locking screw and tab from the
scooter.
Figure 4. Check to see if the power connection wire is fully secured. You
may have to screw it in securely ensuring that there is a consistent flow of
power from the battery to the scooter.
Figure 5. Insert the battery box into the scooter. Zip’r recommends inserting
the battery box at a 45-degree angle downwards. Make sure that the battery
box is flush both at the bottom and top with the body of the scooter.
Figure 6. After ensuring that the battery box is flush with the body of the
scooter press firmly at the rear of the scooter on both sides making sure
that there is no unevenness between the scooter and battery box.
 Loading...