1. Locate the manual freewheel lever (see the diagram above).
2. Push forward on the manual freewheel lever to disable the drive and brake systems. You may
now push your mobility scooter.
3. Push the manual freewheel lever backwards to re-engage the drive and brake systems; this
takes your mobility scooter out of freewheel mode.
WARNING! When your mobility scooter is in freewheel mode, the braking system is
disengaged.
• Disengage the drive motors only on a level surface.
• Ensure the key is removed from the key switch.
• Stand to the side of the scooter to engage or disengage freewheel mode. Never sit on a
scooter to do this.
• After you have finished pushing your mobility scooter, always return it to the drive mode
to lock the brakes.
To Engage or Disengage the Drive System
1. Locate the lever on the rear section of the scooter (see the diagram above).
2. Pull the two levers toward the rear of the mobility scooter to engage the drive motors (drive
mode).
3. Push the two levers toward the front of the mobility scooter to disengage the drive motors
(freewheel mode).
WARNING! Do not use the freewheel lever as a tie-down point to secure this product.
Anti-Tip Wheels
The anti-tip wheels are an integral and important safety feature of your mobility scooter. They
are bolted to the frame at the rear of the mobility scooter.
PROHIBITED! Do not remove the anti-tip wheels or modify your mobility scooter in any
way.
WARNING! The anti-tip wheels may cause interference with the smooth transition of
your mobility scooter when ascending or descending a curb.
Battery Pack
Your mobility scooter is equipped with an innovative, easy-to-remove battery pack. A handle on
the top of the battery pack makes it easy to lift the pack off of the mobility scooter. The battery
pack contains two rechargeable batteries, and the main circuit breaker (reset button).
Assembly & Disassembly
The following are the steps required to assemble your Zip’r mobility scooter.
Disassembly can be achieved by following all of the steps in the reverse order.
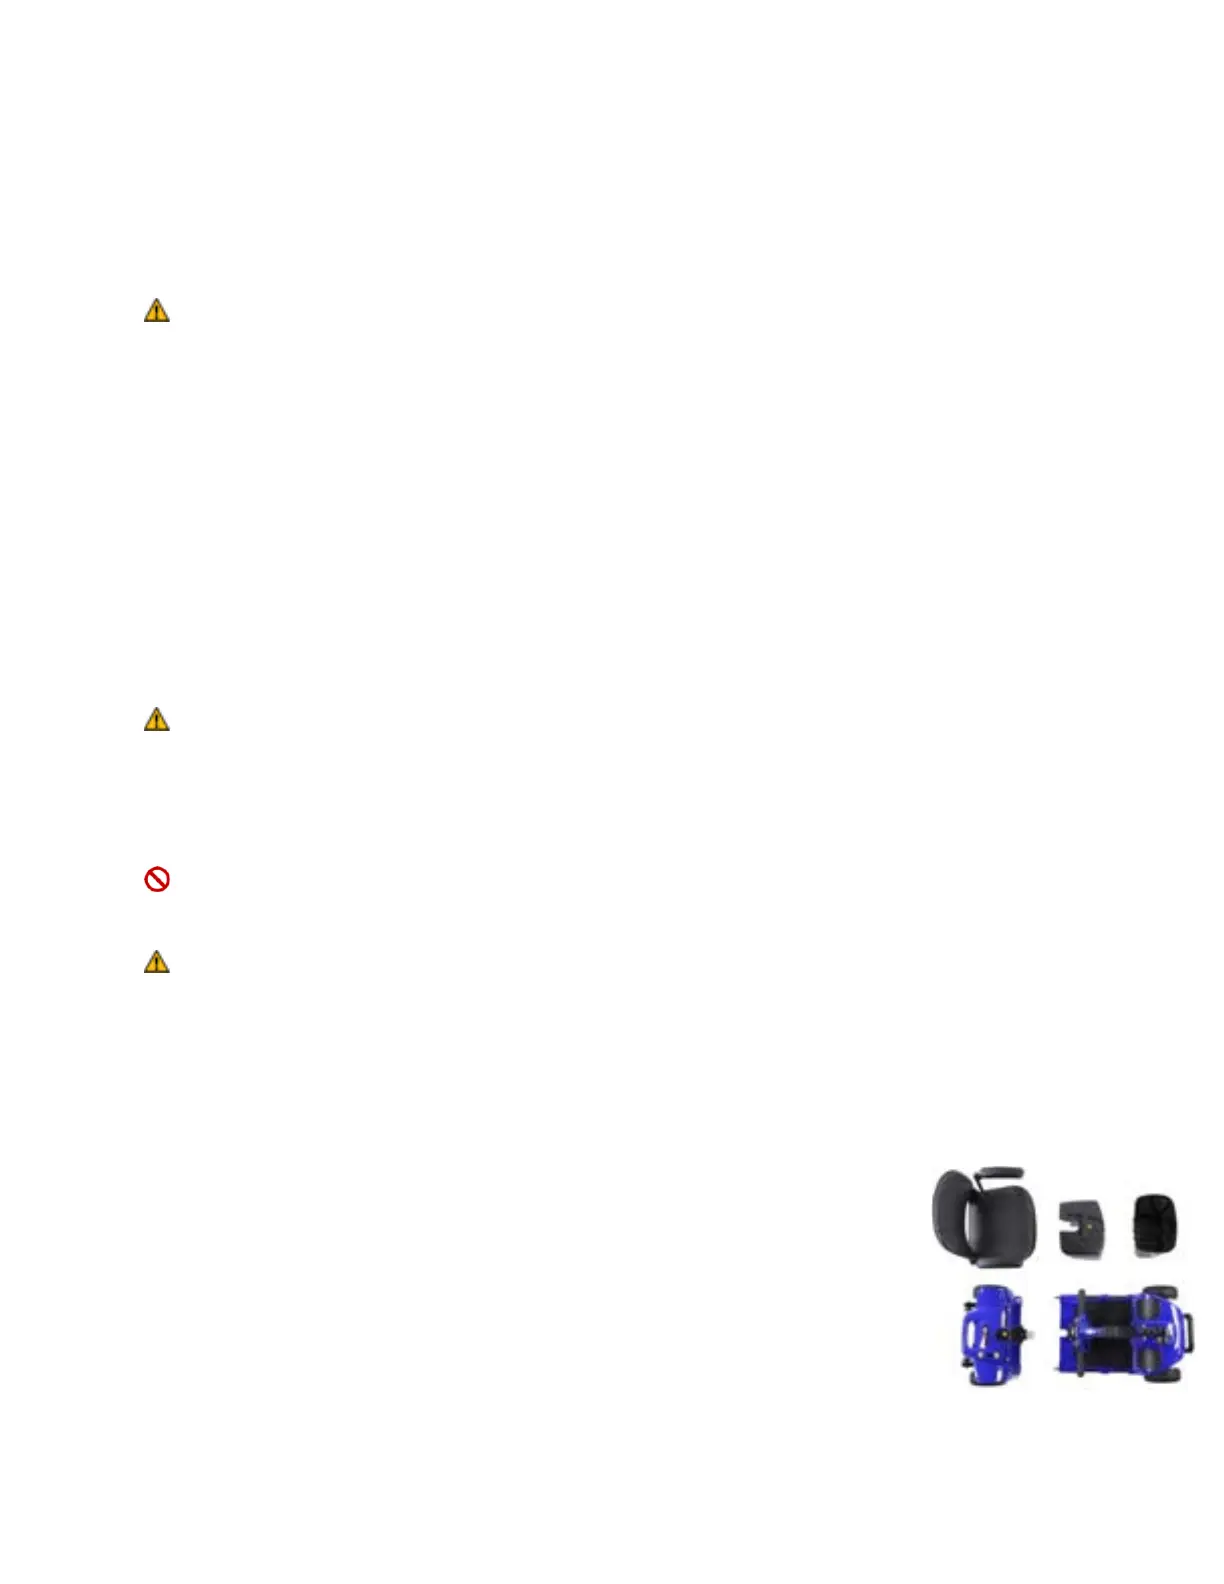
Figure 1. There are five main sections that need to be assembled: Front frame,
rear frame, battery box, seat post, and the seat.
 Loading...