7
7.1 Windows XP
1. Open network connections and right click Wireless Network Connections, then click properties.
2. Under preferred networks, click the wireless network you want to remove and select “Remove”
7.2 Windows Vista
1. Click “Start”, right click “Network” and then select “Properties”
2. Find the task list for the “Network and Sharing Centre” dialogue box and click “Manage Wireless
Networks”.
3. Select the old connection you wish to remove from the list and select “Remove”
7.3 Windows 7 and 8
1. Open your Control Panel and select “Network and Sharing Centre” and then click on “Manage
Wireless Networks”
2. Select the old connection you wish to remove from the list and select “Remove”
7. Removing Wireless Networks
Back to contents page
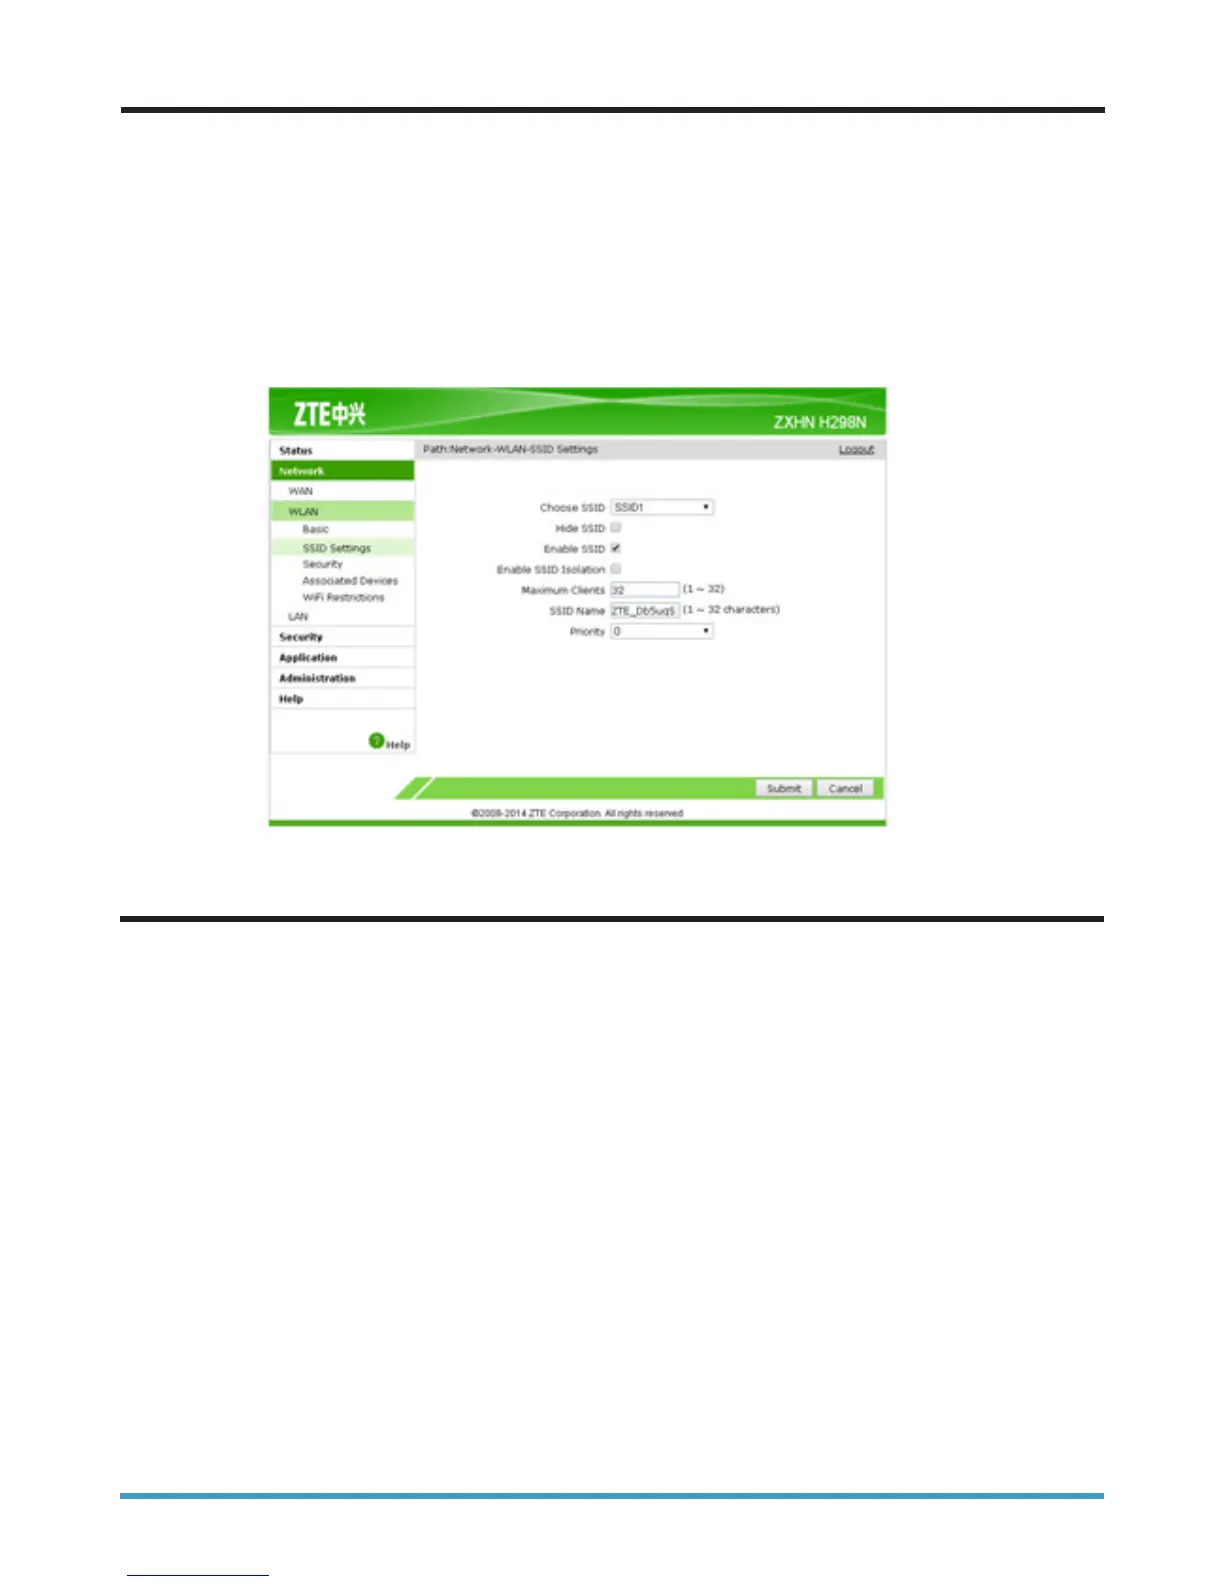
The wireless network name (SSID) is the name your router shows, enabling you to see your own network
to connect. Changing the wireless name can sometimes correct or fix errors with wireless networks.
1. Connect your router to your computer or laptop using an Ethernet Cable
2. Launch the wireless router’s administration webpage by typing the address http://192.168.1.254 into
your web browser. When prompted, enter the username admin and the password quick
3. On the router’s homepage, click Network, then WLAN and then SSID settings.
4. You can then change the network name (SSID) here.
6. Changing the Wireless Network Name (SSID)
 Loading...