24 CHAPTER 2: INSTALLING THE SWITCH
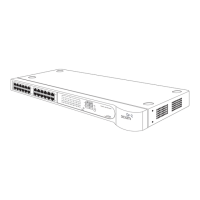
Figure 4 Fitting a bracket for rack-mounting
You must use the screws supplied with the securing brackets. Damage
caused to the unit by using incorrect screws invalidates your warranty.
4 Repeat steps 2 and 3 for the other side of the Switch.
5 Insert the Switch into the 19-inch rack and secure with suitable screws
(not provided). Ensure that ventilation holes are not obstructed.
6 Connect network cabling.
Placing Units On
Top of Each Other
If the Switch units are free-standing, up to four units can be placed one
on top of the other. If you are mixing a variety of Switch and Hub units,
the smaller units must be positioned at the top.
If you are placing Switch units one on top of the other, you must use the
self-adhesive rubber pads supplied. Apply the pads to the underside of
each Switch, sticking one in the marked area at each corner. Place the
Switch units on top of each other.
DUA1745-0AAA02.book Page 24 Monday, August 9, 2004 11:51 AM
 Loading...