KL II Series User Manual 18
Note: Start the installation from the
middle to the two sides. During the
installation process, ensure the flatness
of the splicing of the cabinet frames.
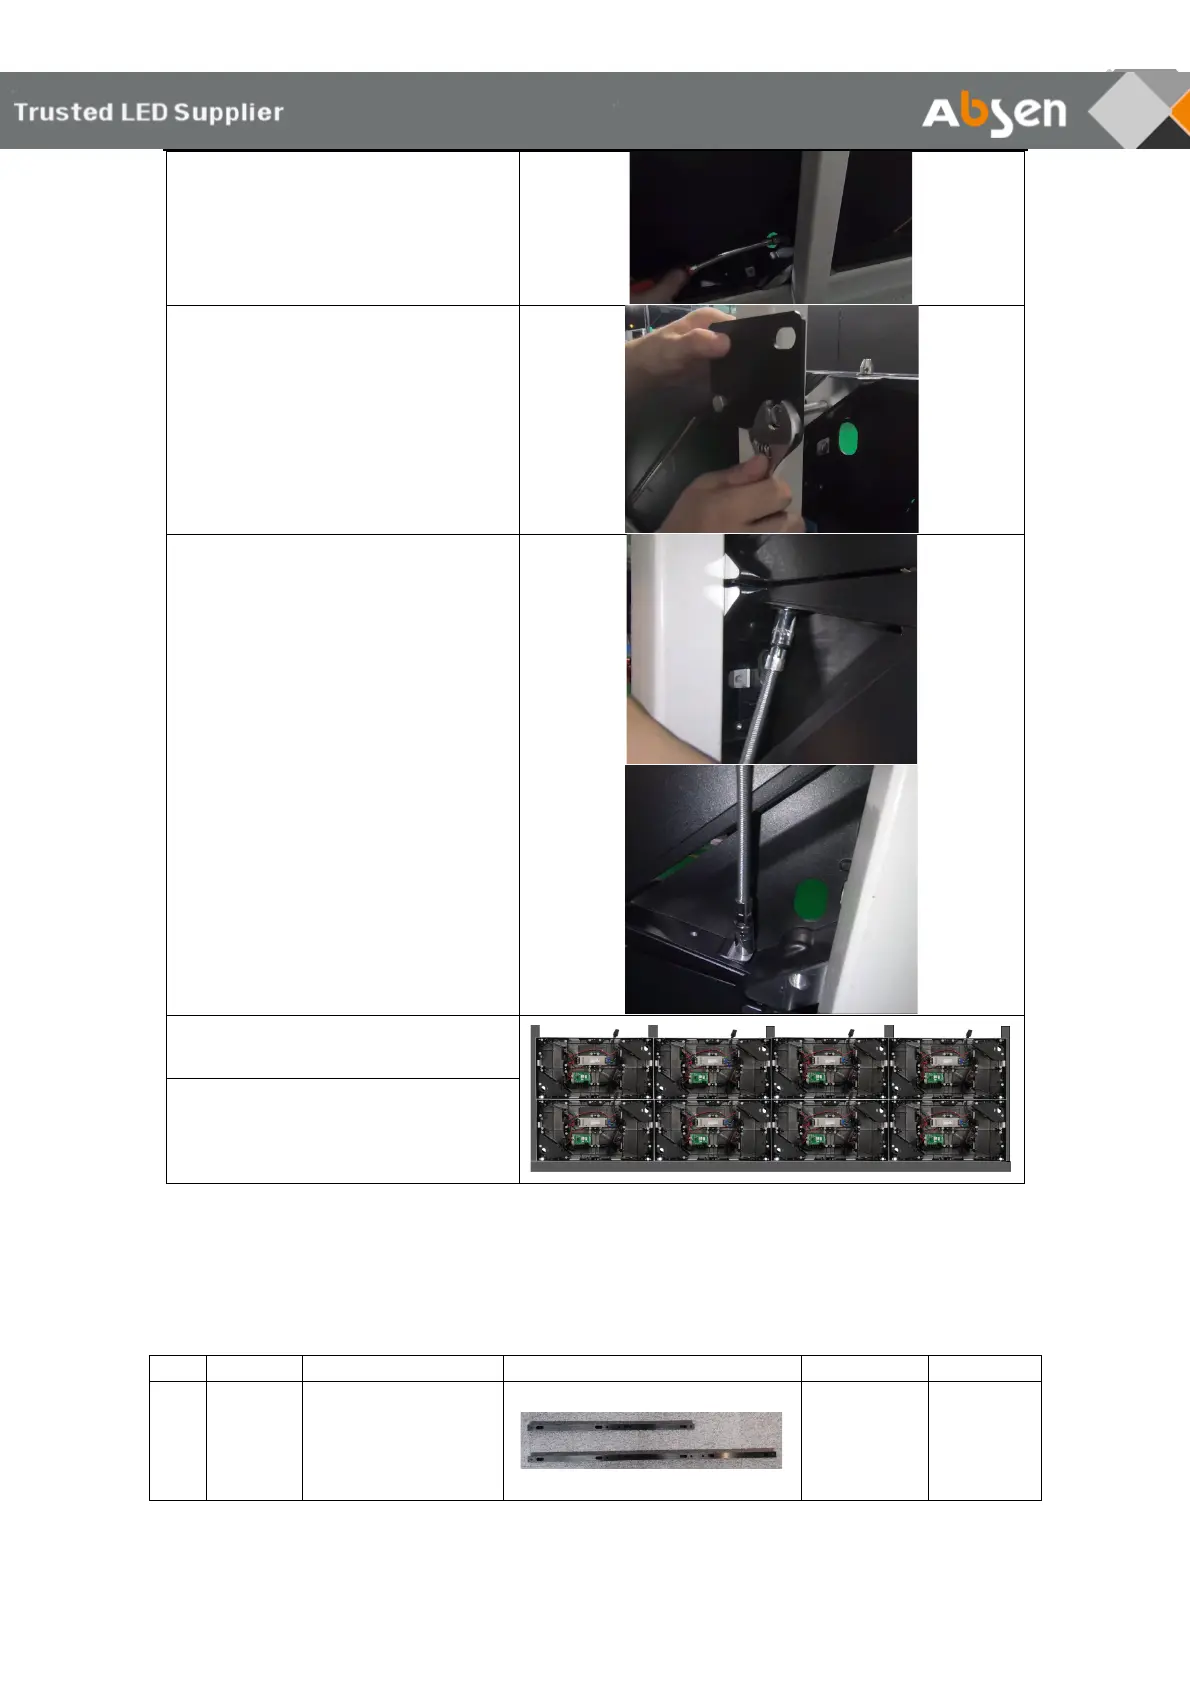
Step 2:
Place the connecting plate behind the
square tube, insert the M8*10mm bolt
from the connecting plate hole and lock it
to the cabinet installation hole, and then
use a spanner to tighten the bolt.
Note: In the process of tightening the
bolts, make sure that the joints of the
structure are flat.
Step 3:
Install the second layer, fix LED cabinets
with M6x30mm bolts between top and
bottom, and then tighten them with a
socket hexagon wrench;
Note: During the installation process,
ensure the flatness of the splicing of the
cabinet frames
Step 4:
Follow the above steps to complete the
installation of all cabinet frames
Step 5:
Install the cabinet power cord and
network cable and ensure that they are
correct, then install the LED modules
4.2 Wall-mounted installation
The accessories required for the wall-mounted installation of KL II series are as follows:
Length:720mm
(2 in1)
Length:1080mm
(3in1)
Used to
connect fixed
cabinet
combination
 Loading...