Installation
17
MXD/T-700 7" Modero X Series® Touch Panels
Installing the MXD-700 into a wall
The MXD-700 comes with a clear plastic backbox (designed to attach the panel to most standard wall materials. This
backbox has two locking tabs (one on top and one on bottom) to help lock the backbox to the wall. These locking tabs
are only extended AFTER the backbox is inserted into the wall. (FIG. 17).
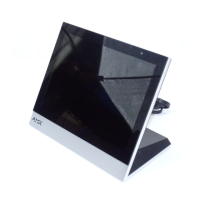
FIG. 16 Rear of the MXD-700 (with RJ45 connection extended)
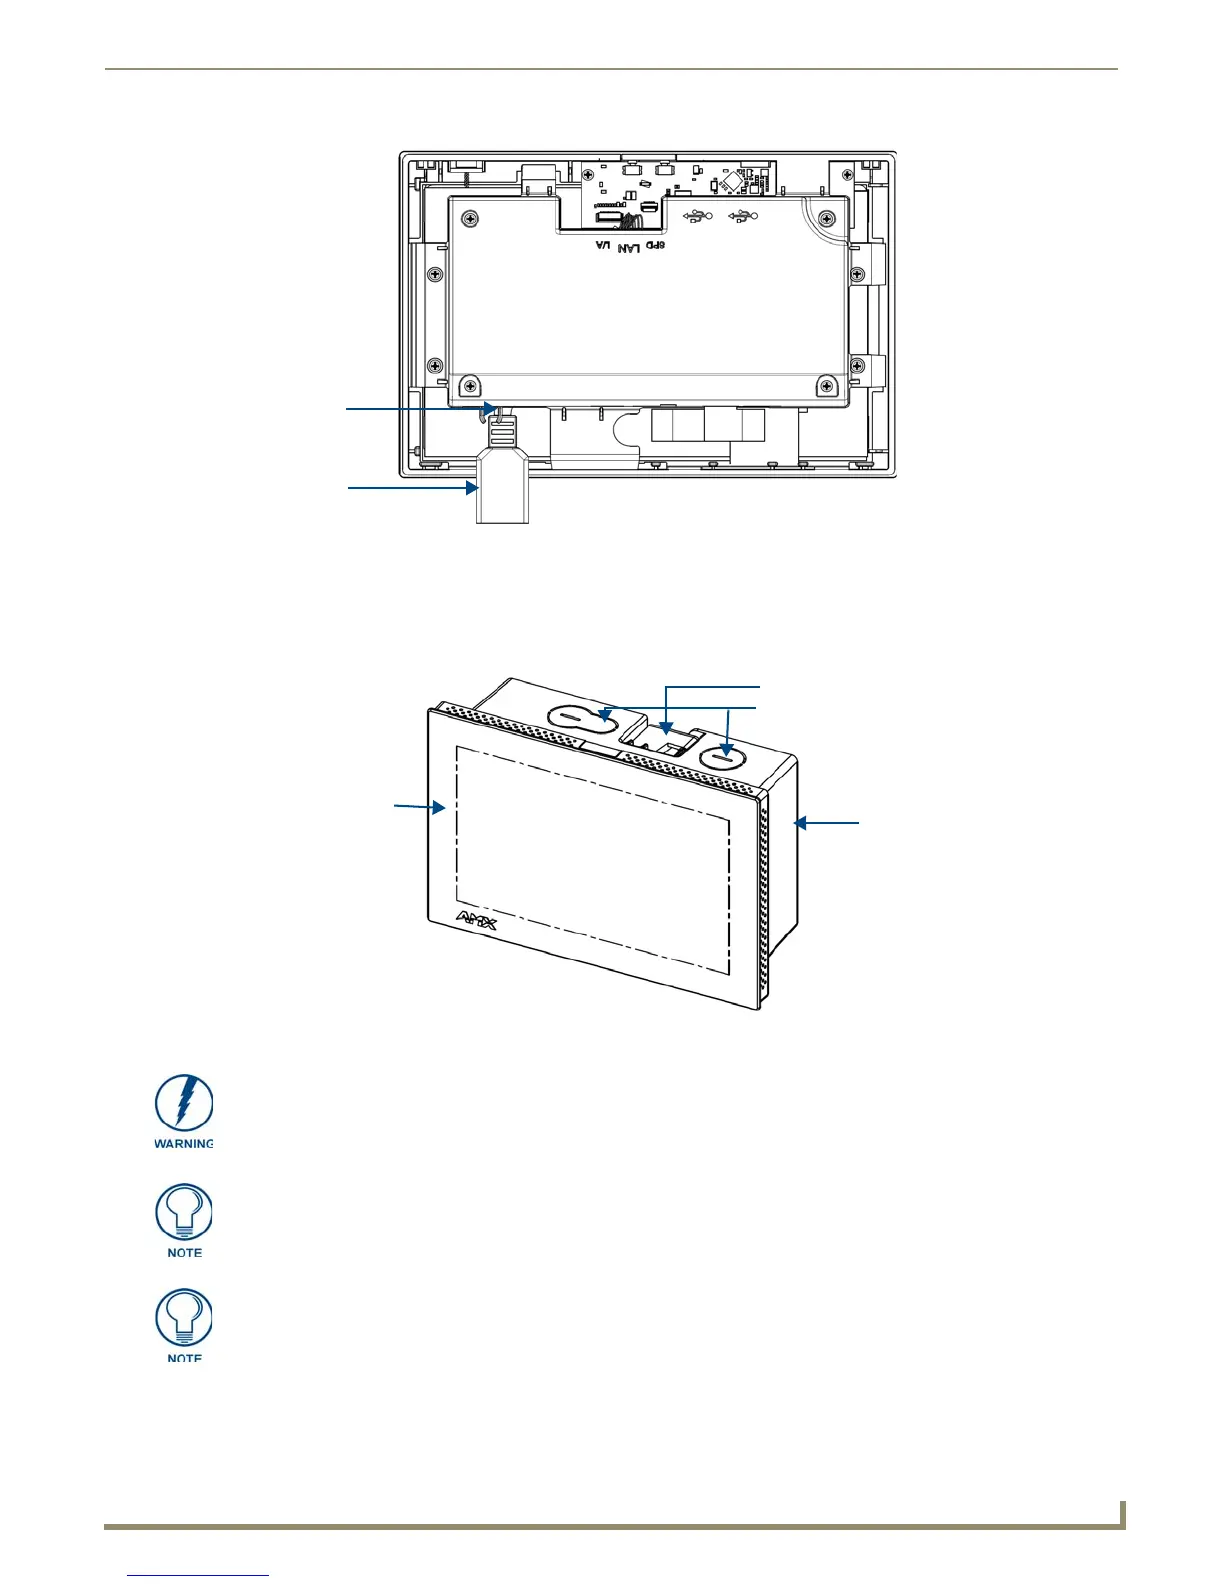
FIG. 17 Oblique view of MXD-700 (Landscape)
MXD-700
(front)
Back box
Back box knockouts
Locking tab
When installing the backbox, make sure that the assembly is in the correct position
and in the correct place. Once the locking tabs are extended and locked into place,
removing the backbox may be difficult without having access to the back of the wall
or causing damage to the wall.
For typical mounting surfaces, such as drywall, use the locking tabs as the primary
method for securing the back box to the surface. For thin walls or solid surfaces, use
mounting screws (not included).
In order to guarantee a stable installation of the MXD-700, the thickness of the wall
material must be a minimum of .50 inches (1.27cm) and a maximum of .875 inches
(2.22cm). The mounting surface should also be smooth and flat.

 Loading...