67
use and maintenance RS 50
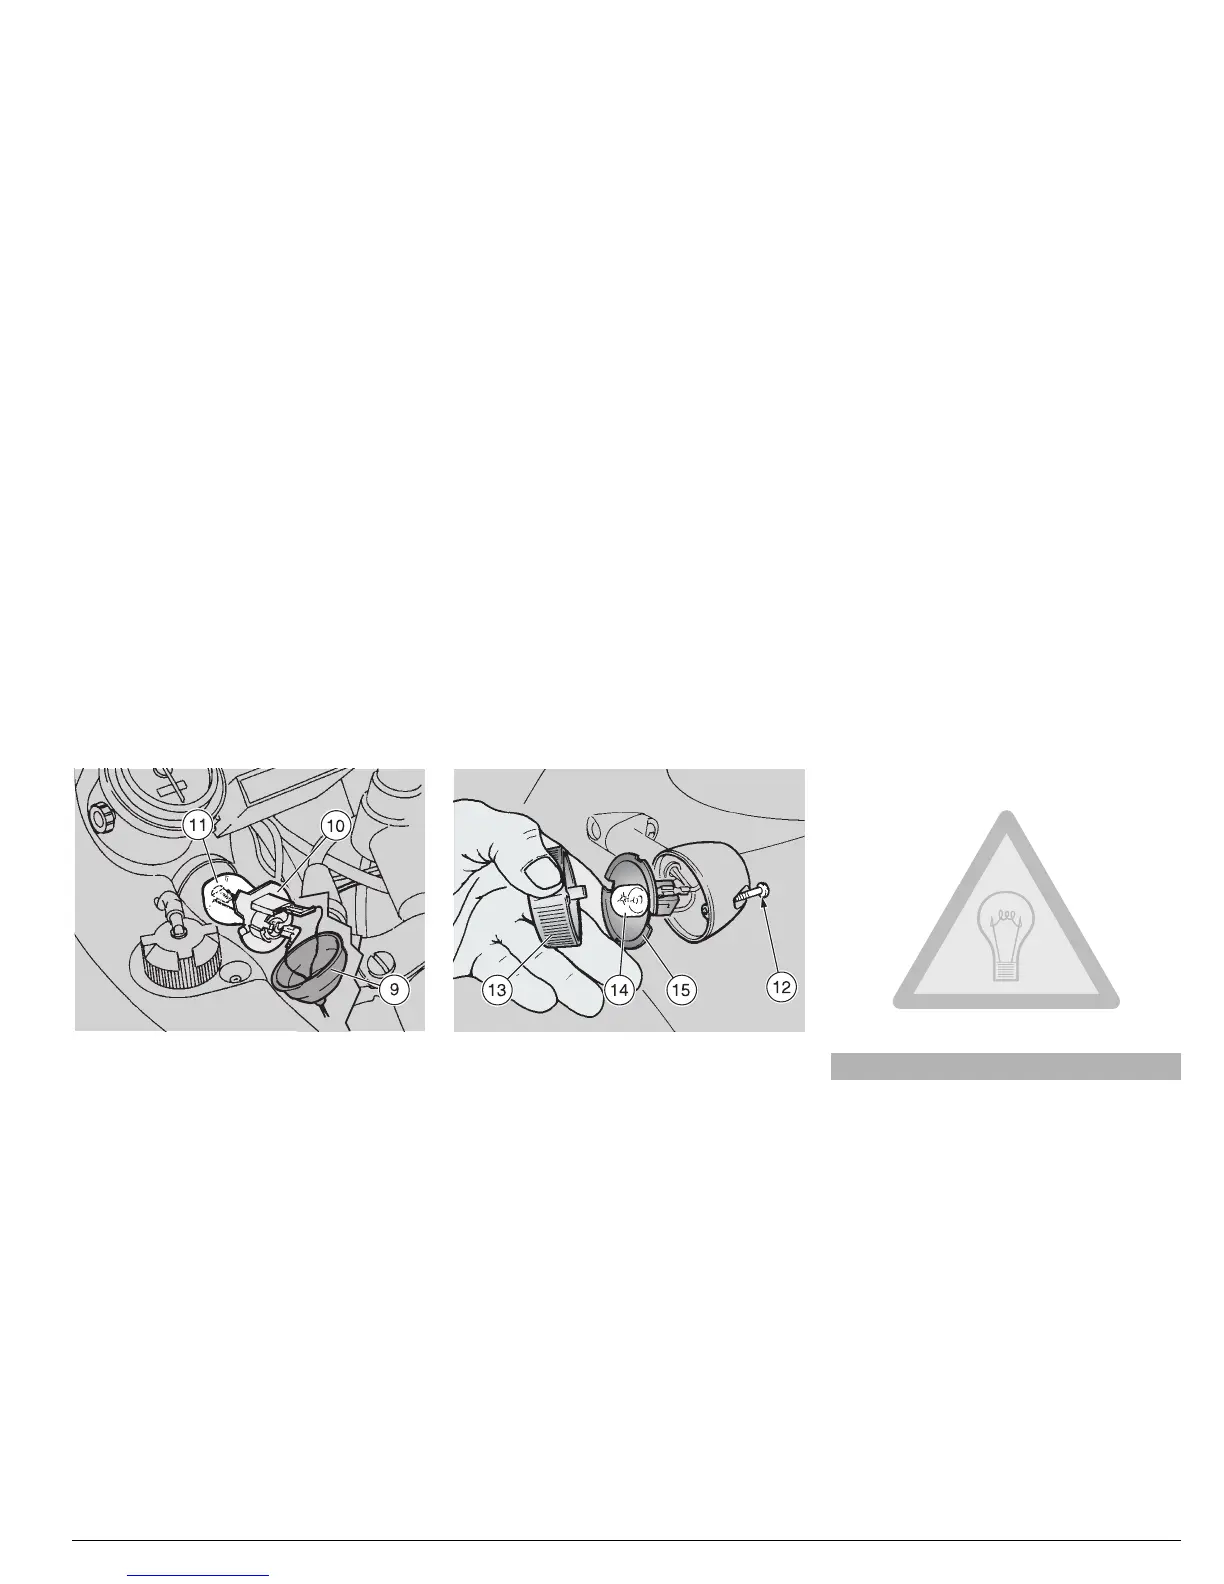
LOW BEAM BULB
NOTE Extract the bulb sockets one by
one, in such a way as to avoid positioning
them incorrectly during the reassembly.
If the bulb sockets must be removed at the
same time, take care to reassemble them
in the correct position.
◆
Working on the rear left side of the front
part of the fairing, move the protection el-
ement (9) with your hands.
◆
Rotate the bulb socket (10) anticlockwise
and extract it.
◆
Press the bulb (11) moderately and ro-
tate it anticlockwise.
◆
Extract the bulb from its seat.
NOTE Insert the bulb in the bulb socket,
making the relevant positioning seats coin-
cide.
◆
Correctly install a new bulb of the same
type.
CHANGING THE FRONT AND REAR
DIRECTION INDICATOR BULBS
Carefully read p. 65 (BULBS).
NOTE Before changing a bulb, check
the fuse, see p. 62 (CHANGING THE
FUSE).
◆
Position the vehicle on the stand.
◆
Unscrew and remove the screw (12).
NOTE While removing the protection
screen, proceed carefully in order not to
break the cog.
◆
Remove the protection screen (13).
NOTE Upon reassembly, correctly posi-
tion the protection screen in its seat.
CAUTION
Tighten the screw (12) moderately and
carefully, to avoid damaging the protec-
tion screen.
◆
Press the bulb (14) slightly and rotate it
anticlockwise.
◆
Extract the bulb from its seat.
NOTE Insert the bulb in the bulb socket,
making the two bulb pins coincide with the
relevant guides on the socket.
◆
Correctly install a new bulb of the same
type.
NOTE If the bulb socket (15) goes out of
its seat, insert it correctly, making the bulb
socket opening coincide with the screw
seat.
 Loading...