FOR MODELS: JGW, JGR AND JGJ SECTION 5 - MAINTENANCE
PAGE 5 - 20 1/01
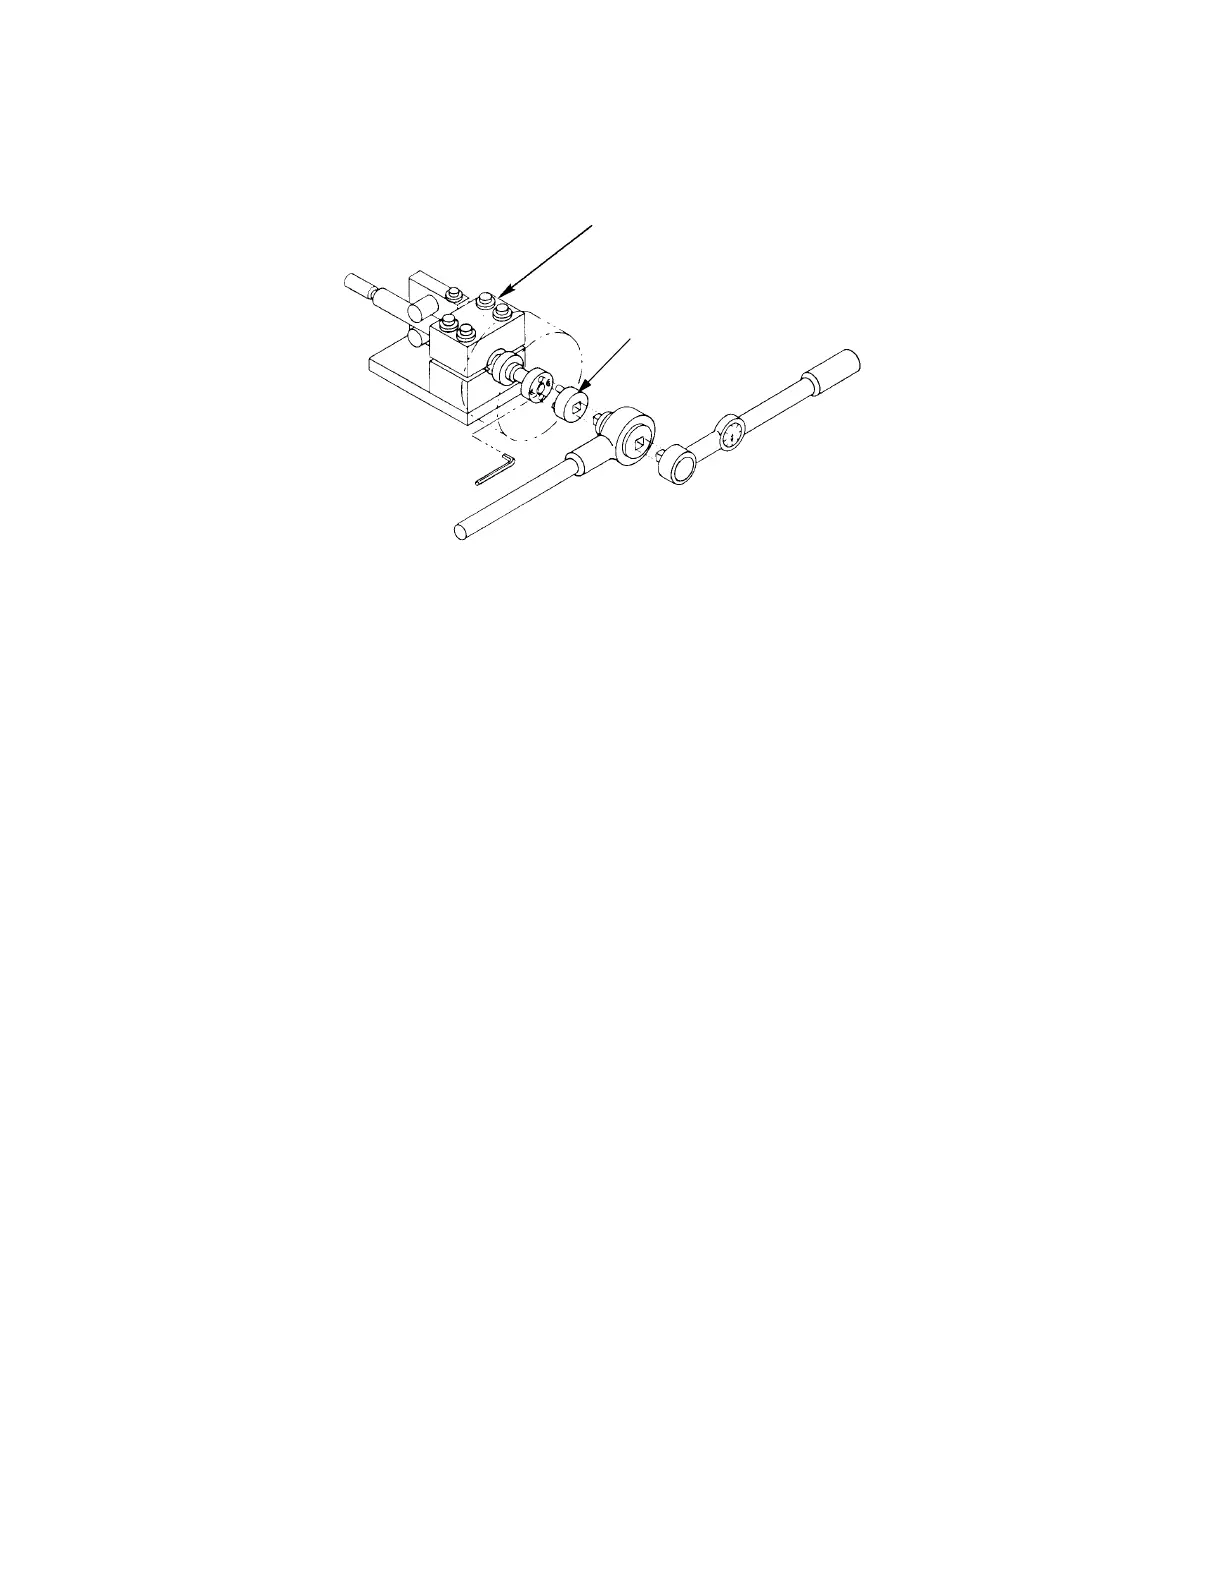
1. Clamp the piston and rod assembly in the special Clamping Fixture (D-0961),
using the bushing for a 1-1/2” rod size (see Figure 5-12:). Tighten the four 12-
point cap screws to prevent the rod from turning. The fixture will properly hold
the piston rod to prevent damage to the parts and promote safety during disas-
sembly and reassembly. The Clamping Fixture must be securely bolted down to
prevent it from turning with the piston rod. It should be at a convenient height of
approximately three feet or 0.9 meters. Remove the setscrews from the piston
nut. Although the piston nut has been staked to lock the setscrews, they can be
forced out, by turning with an Allen wrench, past the small lip that has been
formed.
2. Remove piston nut using piston nut spanner (see Figure 7-1: on page 7-3).
NOTE: A SMALL AMOUNT OF GAS PRESSURE CAN BUILD UP WITHIN THE PISTON
DURING OPERATION. THIS WILL VENT WHEN THE PISTON NUT IS LOOS-
ENED.
3. After the piston nut has been removed, the piston and collar will slip off the end
of the rod.
Reassembly
1. Clean all piston and rod assembly parts thoroughly. Be sure piston is internally
clean and dry.
2. Inspect parts for nicks, burrs or scratches and dress surfaces with a fine grit
stone as required.
3. Inspect the piston rod threads and collar shoulder. Threads should be clean and
free of burrs. Install the collar and nut onto the piston rod to verify that the inside
diameter firs and rotates freely. Run the piston nut down by hand until the rod
threads protrude to verify freedom of thread engagement. Remove nut and col-
lar.
FIGURE 5-12: PISTON AND ROD CLAMPING FIXTURE
Part Num-
ber
D-0961
Spanner bolts
onto piston nut
 Loading...