REFRIGERANT PIPE CONNECTION
4. Refrigerant pipe connection
Oblique
。
90
Roughness
Burr
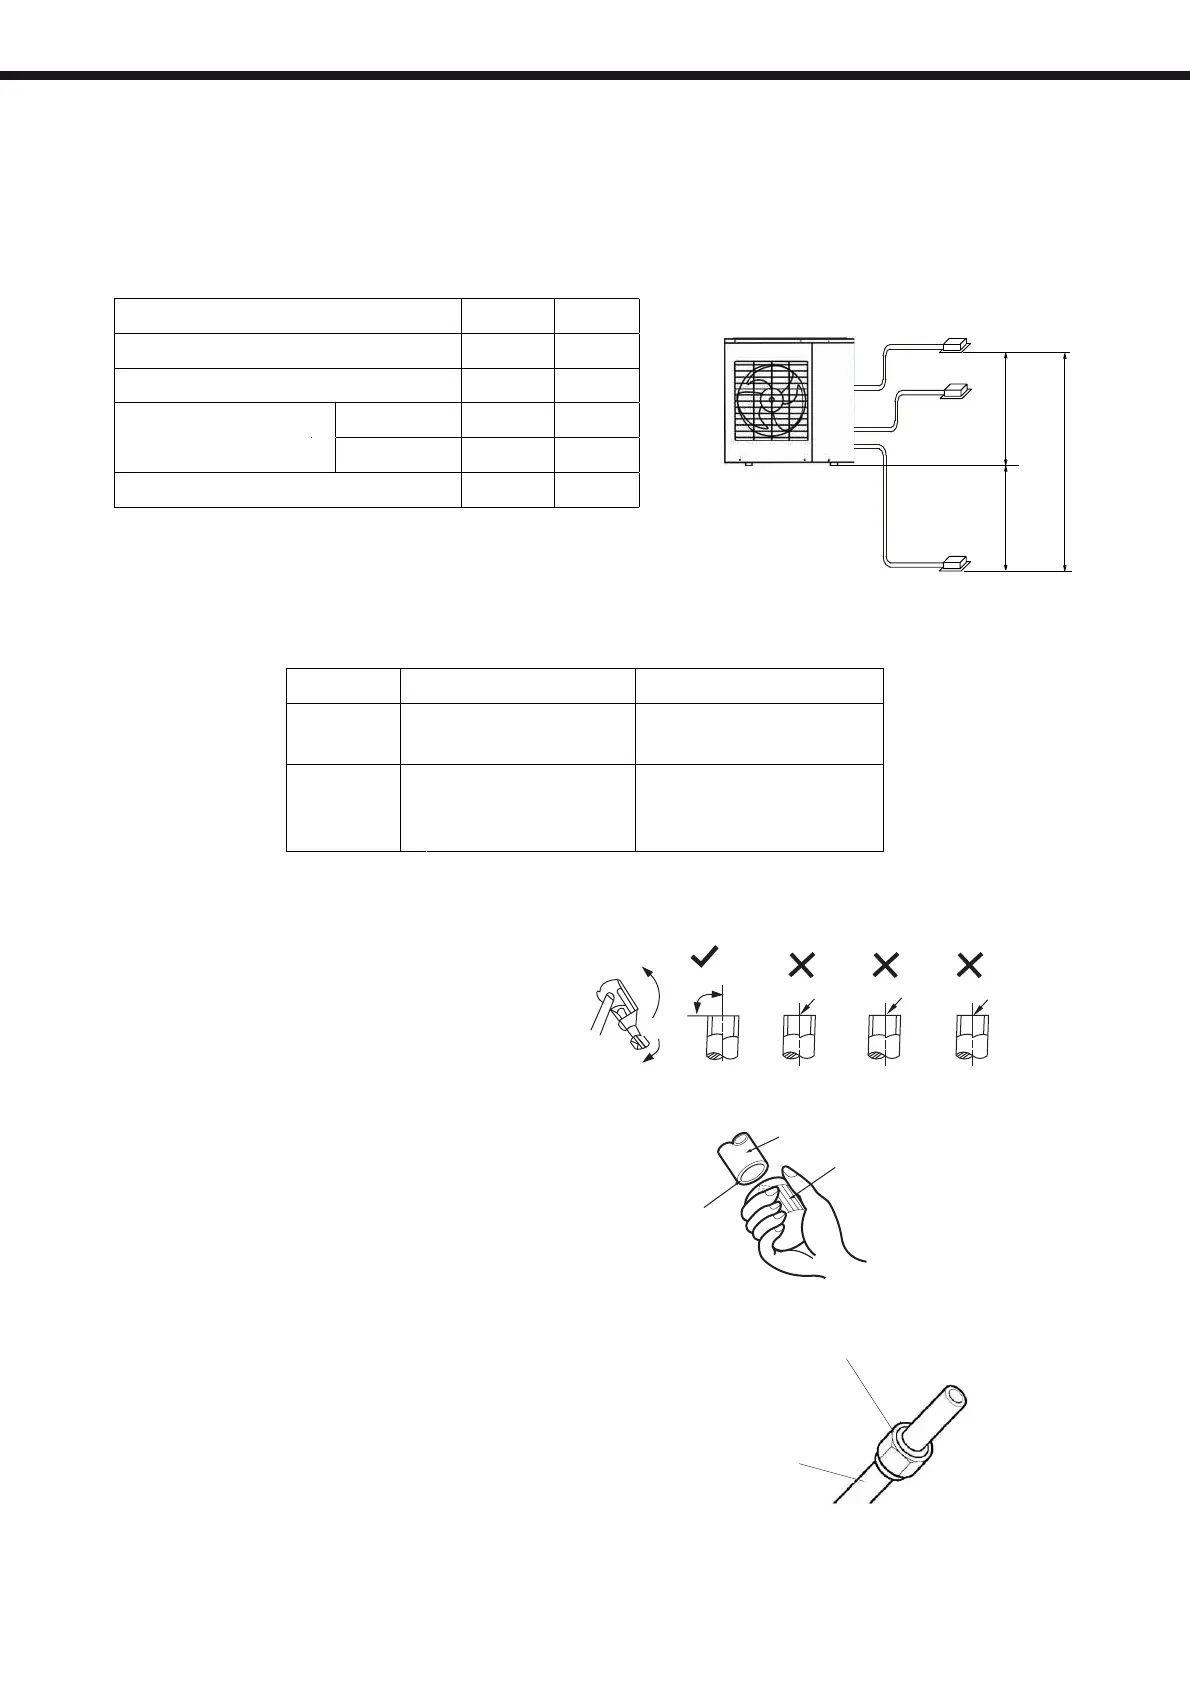
Main cause for refrigerant leakage
is due to defect in the flaring work.
Carry out correct flaring work
using the following procedure:
A: Cut the pipes and the cable.
1. Use the piping kit accessory or pipes
purchased locally
.
2. Measure the distance between the indoor
and the outdoor unit.
3. Cut the pipes a little longer than the
measured distance.
4. Cut the cable 1.5m longer than the pipe
length.
1. Flaring work
Pipe
Reamer
Point down
F
ig.54
Fig.55
B: Burr removal
1
. Completely remove all burrs from the cut
cross section of pipe/tube.
2. Put the end of the copper tube/pipe in a
downward direction as you remove burrs in
order to avoid dropping burrs into the tubing.
F
lare nut
Copper tube
F
ig.56
C: Putting nut on
R
emove flare nuts attached to indoor and
outdoor unit, then put them on pipe/tube
having completed burr removal.(not possible
to put them on after flaring work)
Additional charge (R410A)
M
ax. Length for all rooms (m)
OU higher than IU
OU lower than IU
Max. Length for one indoor unit (m)
Max. height different between
indoor and outdoor unit (m)
Max. height different between indoor units (m)
Before installing, make sure that the height difference, the length of refrigerant pipe and number of bends
between indoor and outdoor units, meet the following specifications.
Outdoor unit
Indoor unit
Charged until
Total Liquid Length 1/4":
22 x (Total length - 15)
(Total Liquid Length 1/4")
Additional
charge
UNIT
AM2
(2 to 1)
AM3
(3 to 1)
Max. lenght:
5m
10m
10m
Max. height difference:
Indoor unit
Indoor unit
Note: If the outdoor unit is installed above the indoor units and the sum
of all the tanks is more than 7m, an oil trap must be installed in the
gas pipe every 3 meters.
AM2 (2 to 1)
(g
)
UNIT
10m 15m
AM3 (3 to 1)
(Total Liquid Length 1/4")
Total Liquid Length 1/4":
22 x (Total length - 10)
38
10
15
40
20 20
15 15
15
10
*(1)
60
 Loading...