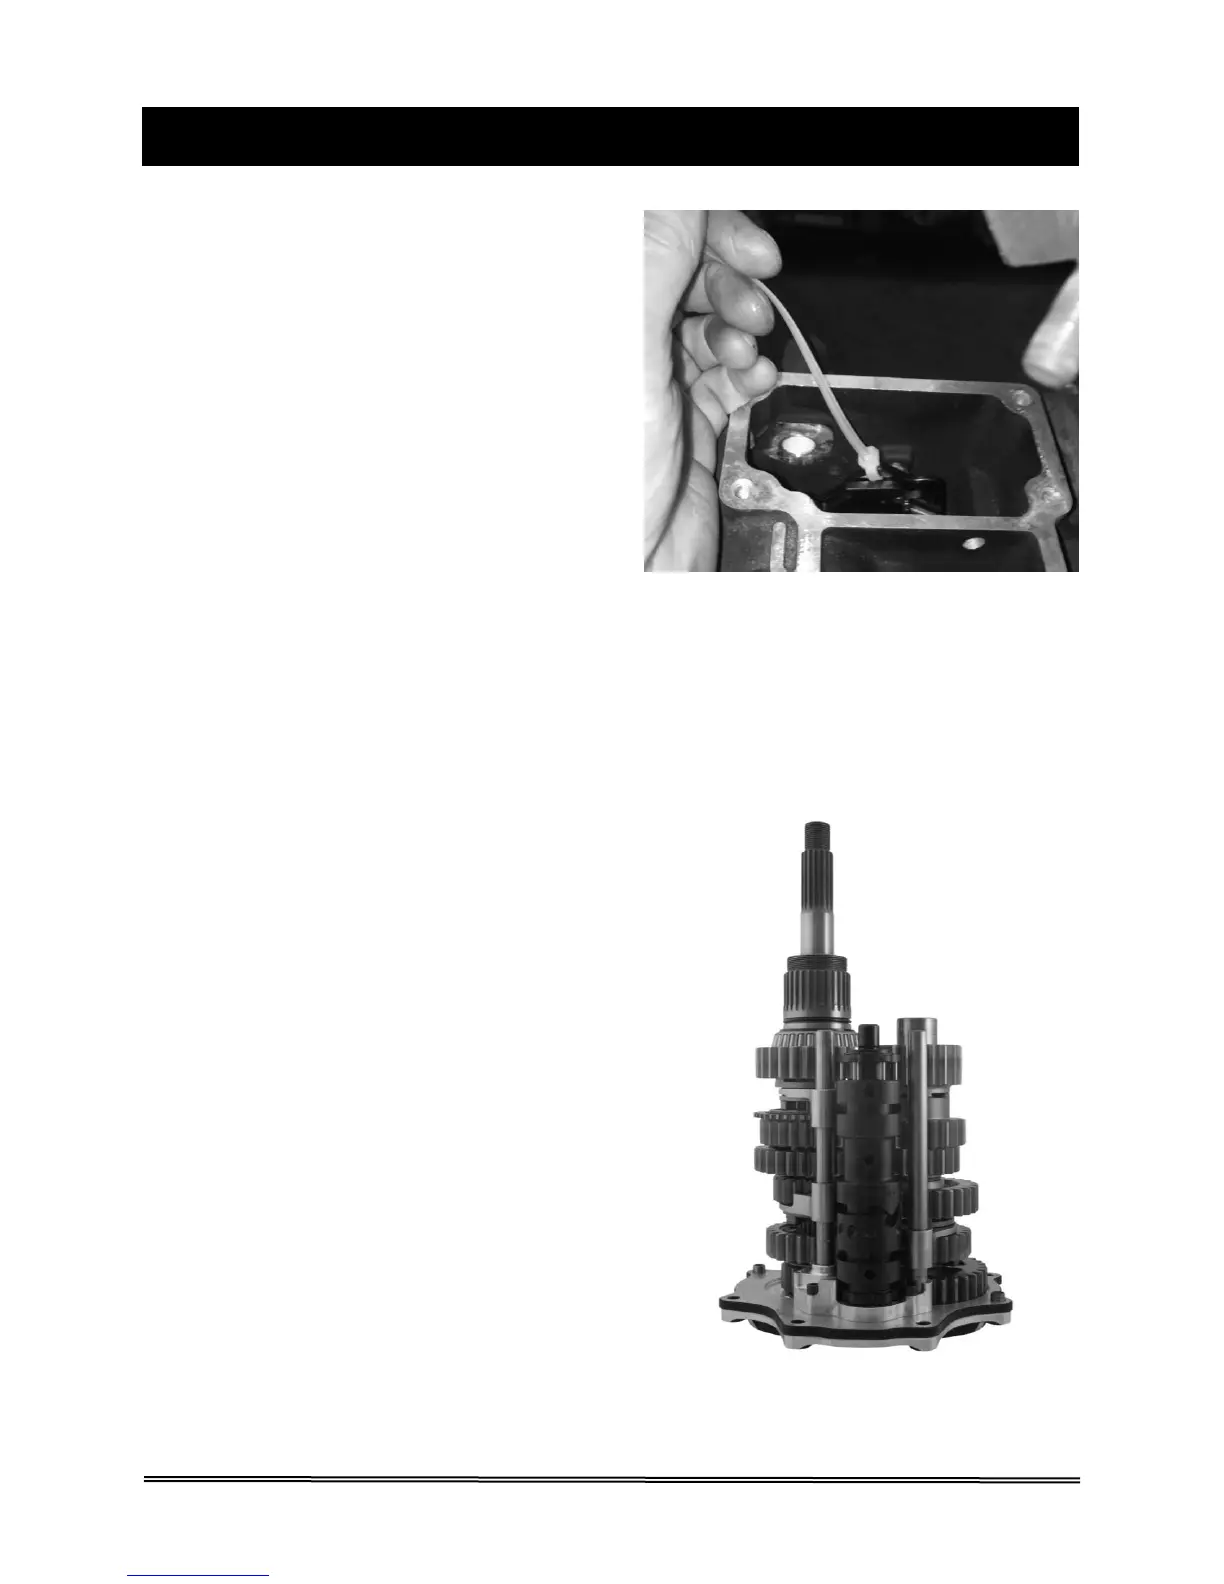
FIGURE 24 | LEAVE THE ZIP TIE ON THE SHIFTER
PAWL UNTIL AFTER THE GEARSET IS INSTALLED
AND THE BOLTS ARE TORQUED
1. If you removed the stock centering pin
to clean the case, reinstall it with red
threadlocker. Install the GrudgeBox
shifter pawl along with the new seal,
washer, and 7/16” retaining ring just like
a stock shifter pawl is installed. Do not
remove the zip tie because it is placed
on the pawl to keep the active plate
retracted during gearset installation into
the case; see figure 24.
2. The time has come to stuff the gearset
(figure 25) into the transmission case.
Before that is done, take time to ensure
no debris or tarantulas have found their
way into the case. Check that the two
bearing door dowels came out of the
case with old bearing door. Locate the
new bearing door gasket onto the
dowels of the GrudgeBox bearing door.
Generously apply transmission lube to
the last 6” of the mainshaft, end of the
countershaft, countershaft bearing,
tapered roller bearings, and the
bearings/seal in the main drive gear.
Do not remove the black rubber cap
from the end of the mainshaft. Its
function is to protect the seal in the
main drive gear as the gearset is
installed.
 Loading...