5
SAVE THESE INSTRUCTIONS
Safety Warnings and Instructions
WARNING: Shock hazard. When drilling or driving into walls, oors or wherever live
electrical wires may be encountered, DO NOT TOUCH ANY METAL PARTS OF THE TOOL!
Hold the tool only by the plastic handle(s) / housing to prevent shock.
• DonotlockthetoolONwhendrillingbyhand.RefertoOperatingInstructions-SwitchingOnandOff.
• Hold drill rmly with both hands to control the twisting action of the drill. If your drill is
equipped with a side handle, always use the side handle.
WARNING: Drillmaystall(ifoverloadedorimproperlyused)causingatwist.Alwaysexpect
the stall. Grip the drill firmly to control the twisting action and prevent loss of control which could
cause personal injury. If a stall does occur, release the trigger immediately and determine the
reasonforthestallbeforere-starting.
• Alwaysunplugthedrillwhenattachingorremovingaccessories.Whenattachingaccessories
inthedrillchuck,handtightenthekeylesschuckfirmly.
READ ALL INSTRUCTIONS
Operating Instructions
WARNING: To reduce the risk of serious personal injury, read, understand and follow
all safety warnings and instructions prior to using tool.
WARNING: It is important to support the work properly and to hold the drill rmly to
prevent loss of control which could cause personal injury. If you have any questions on
how to properly operate tool, call: 1-800-544-6986.
WARNING: Do not attempt to tighten drill bits (or any other accessory) by gripping
the front part of the chuck and turning the tool on. Damage to the chuck and personal
injury may occur when changing accessories.
WARNING: To reduce the risk of injury, always unplug drill from power supply before
making any adjustments or changing accessories.
WARNING: To reduce the risk of injury, let the tool work at its own pace. Do not overload.
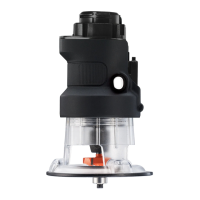
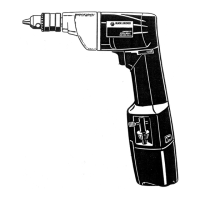
OPERATING: POWER UNIT
TRIGGER SWITCH & FORWARD/REVERSE SLIDER
Theforward/reverseslider(1)isusedtocontrolthedirectionthechuck(6)spin-fowardtodrive
scres, reverse to remove screws. It is located above the variablespeedtrigger(2).Toreverse
the motor, release the trigger FIRST, then push the slider to the right hand side of the tool when
viewing from the rear. After any reversing operations, return lever to the forward position. Never
change the direction of rotation while the motor is running.
• ThePowerUnitisturnedONandOFFbypullingandreleasingthetrigger.Thefartherthe
trigger is depressed, the higher the speed of the Power Unit.
• Aforward/reversecontrolsliderdeterminesthedirectionofthetool.
• Toselectforwardrotation,releasethetriggerswitchanddepresstheforward/reversecontrol
button to the left.
• Toselectreverse,depresstheforward/reversecontrolbuttontotheright.
NOTE: When changing the position of the control button, be sure the trigger is released.
INSTALLING AND REMOVING TOOL ATTACHMENTS - FIGURE A
WARNING: Shock hazard. Under no circumstances should this product be used near water.
WARNING: Burn hazard. Moving parts within the Power Unit become hot during use.
Avoid contact with moving parts within Power Unit when removing and installing accessories.
WARNING: To reduce the risk of injury, turnoffandunplugthetoolbeforemakingany
adjustments or removing or installing attachments or accessories. Remove any accessory from
the tool attachment before removing or installing the attachment.
WARNING: To reduce the risk of injury, do not place fingers or any other object inside
thePowerUnit,otherthantheattachmentsdesignedtoworkwiththePowerUnit.

 Loading...