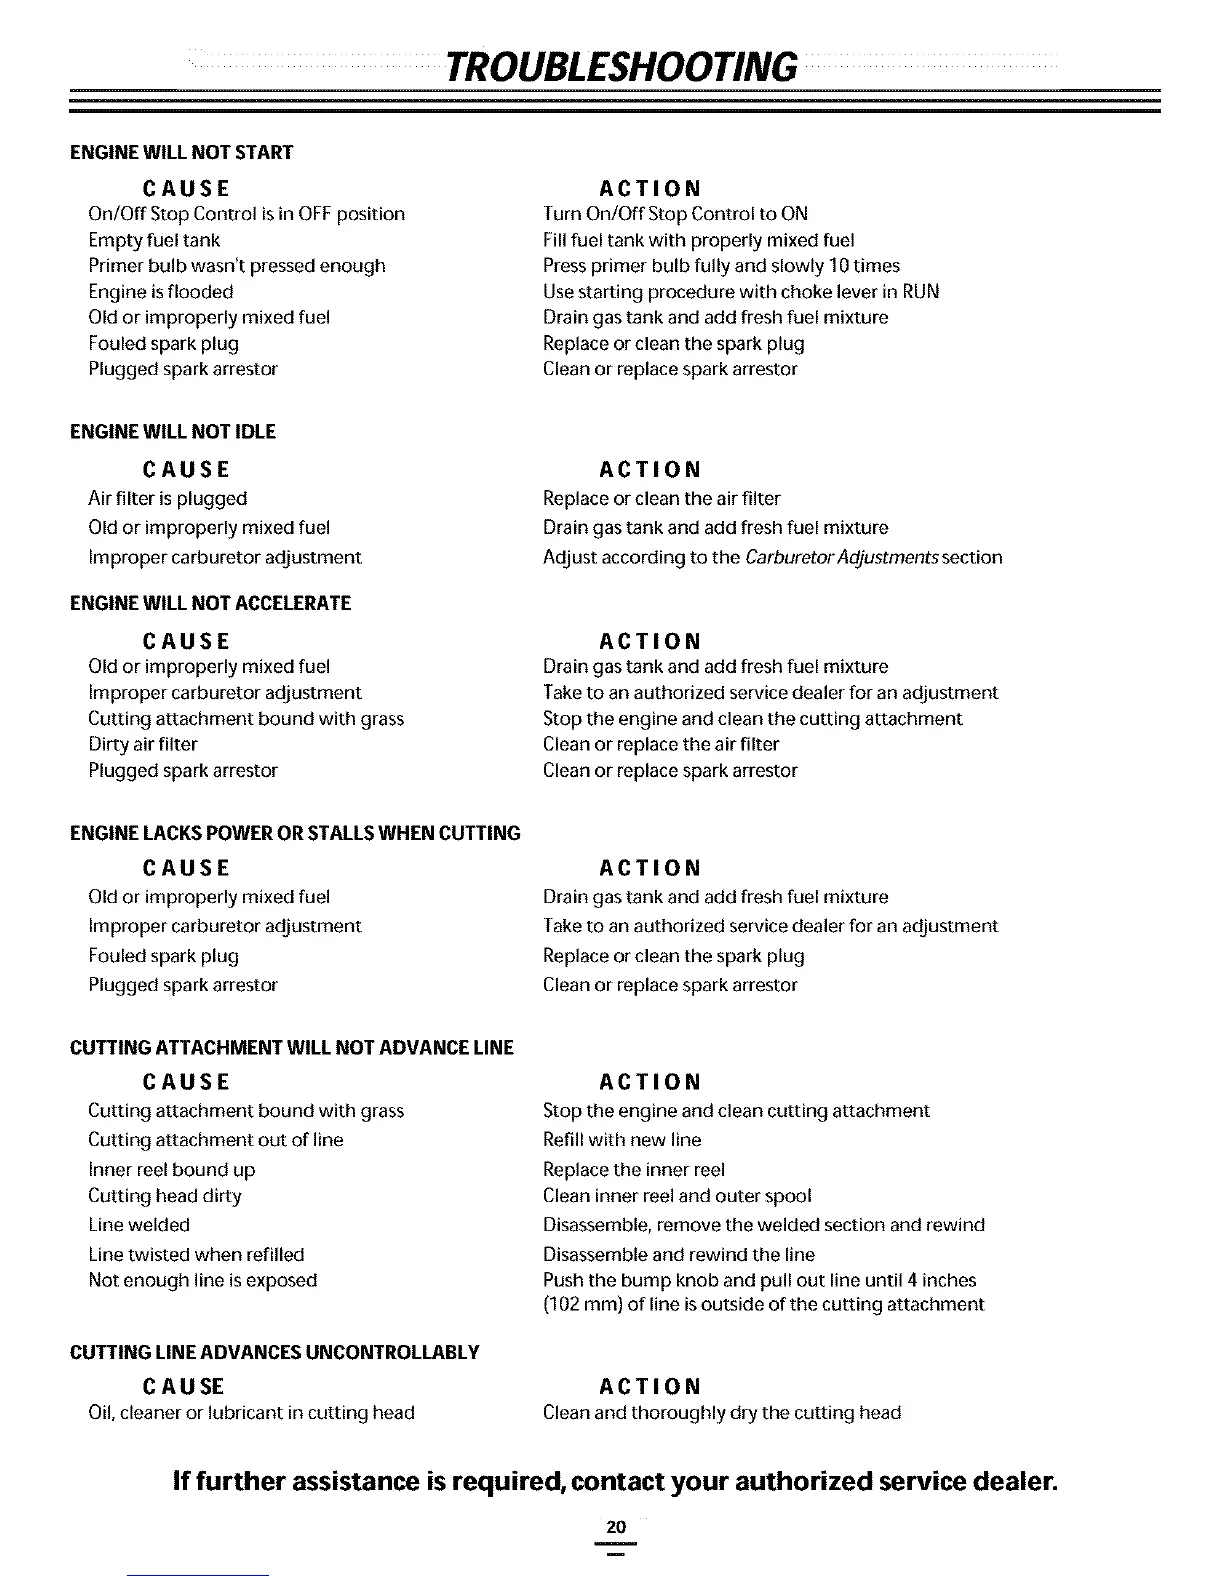
TROUBLESHOOTING
ENGINEWILL NOT START
CAUSE
On/Off Stop Control is in OFF position
Empty fuel tank
Primer bulb wasn't pressed enough
Engine is flooded
Old or improperly mixed fuel
Fouled spark plug
Plugged spark arrestor
ACTION
Turn On/Off Stop Control to ON
Fill fuel tank with properly mixed fuel
Press primer bulb fully and slowly I 0 times
Use starting procedure with choke lever in RUN
Drain gas tank and add fresh fuel mixture
Replace or clean the spark plug
Clean or replace spark arrestor
ENGINEWILL NOT IDLE
CAUSE
Air filter isplugged
Old or improperly mixed fuel
Improper carburetor adjustment
ENGINEWILL NOT ACCELERATE
CAUSE
Old or improperly mixed fuel
Improper carburetor adjustment
Cutting attachment bound with grass
Dirty air filter
Plugged spark arrestor
ACTION
Replaceor clean the air filter
Drain gastank and add fresh fuel mixture
Adjust according to the CarburetorAdjustmentssection
ACTION
Drain gas tank and add fresh fuel mixture
Take to an authorized service dealer for an adjustment
Stop the engine and clean the cutting attachment
Clean or replace the air filter
Clean or replace spark arrestor
ENGINE LACKSPOWERORSTALLSWHEN CUTTING
CAUSE
Old or improperly mixed fuel
Improper carburetor adjustment
Fouled spark plug
Plugged spark arrestor
ACTION
Drain gas tank and add fresh fuel mixture
Take to an authorized service dealer for an adjustment
Replace or clean the spark plug
Clean or replace spark arrestor
CUTTING ATTACHMENT WILL NOT ADVANCE LINE
CAUSE
Cutting attachment bound with grass
Cutting attachment out of line
Inner reel bound up
Cutting head dirty
Line welded
Line twisted when refilled
Not enough line is exposed
CUTTING LINEADVANCES UNCONTROLLABLY
CAUSE
Oil, cleaner or lubricant in cutting head
ACTION
Stop the engine and clean cutting attachment
Refill with new line
Replace the inner reel
Clean inner reel and outer spool
Disassemble, remove the welded section and rewind
Disassemble and rewind the line
Push the bump knob and pull out line until 4 inches
(102 ram) of line isoutside of the cutting attachment
ACTION
Clean and thoroughly dry the cutting head
If further assistance is required, contact your authorized service dealer.
20
 Loading...