2 Climate 5000 – 6720886909 (2018/04)
Safety Precautions
1 Safety Precautions
Read Safety Precautions Before Installation
Incorrect installation due to ignoring instructions can cause serious
damage or injury.
The seriousness of potential damage or injuries is classified as either a
WARNING or CAUTION.
WARNING
This symbol indicates that ignoring instructions may cause serious
injury.
CAUTION
This symbol indicates that ignoring instructions may cause
moderate injury to your person, or damage to your unit or other
property.
This symbol indicates that you must never perform the
action indicated.
WARNING
Do not modify the length of the power supply cord or use an extension
cord to power the unit. Do not share the electrical outlet with other
appliances. Improper or insufficient power supply can cause fire or
electric shock.
When connecting refrigerant piping, do not let substances or gases
other than the specified refrigerant enter the unit. The presence of
other gases or substances will lower the unit’s capacity, and can
cause abnormally high pressure in the refrigeration cycle. This can
cause explosion and injury.
1. Installation must be performed by Qualified Personnel or specialist.
Defective installation can cause water leakage, electric shock or fire.
2. Installation must be performed according to the installation
instructions. Improper installation can cause water leakage, electric
shock or fire. Installation must be carried out by Qualified Personnel
only.
3. Contact Qualified Personnel for repair or maintenance of this unit.
4. Only use the included accessories, parts and specified parts for
installation. Using non-standard parts can cause water leakage,
electric shock, fire and can cause the unit to fail.
5. Install the unit in a firm location that can support the unit’s weight.
If the chosen location cannot support the unit’s weight or is not
installed correctly, the unit may drop and cause serious injury and
damage.
6. Do not use any means to accelerate the defrosting process or to
clean other than those recommended by the manufacturer.
Table of Content
1 Safety Precautions ............................................................ 2
2 Accessories ....................................................................... 4
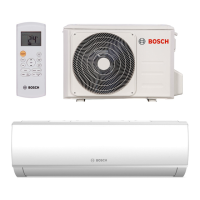
3 Installation Summary - Indoor Unit ...................................... 6
4 Unit Parts .......................................................................... 8
5 Indoor Unit Installation ...................................................... 9
5.1 Step 1: Select installation location.............................. 9
5.2 Step 2: Attach mounting plate to wall .......................... 9
5.3 Step 3: Drill wall hole for connective piping .................. 9
5.4 Step 4: Prepare refrigerant piping ............................ 10
5.5 Step 5: Connect drain hose ..................................... 11
5.6 Step 6: Connect signal cable ................................... 12
5.7 Step 7: Wrap piping and cables ................................ 13
5.8 Step 8: Mount indoor unit ....................................... 13
6 Outdoor Unit Installation .................................................. 14
6.1 Step 1: Select installation location............................ 14
6.2 Step 2: Install drain joint ......................................... 15
6.3 Step 3: Anchor outdoor unit .................................... 15
6.4 Step 4: Connect signal and power cables ................... 16
7 Refrigerant Piping Connection ......................................... 18
7.1 Important Note on Pipe Length ................................ 18
7.2 Connection Instructions – Refrigerant Piping ............. 18
7.2.1 Step 1: Cut pipes ................................................... 18
7.2.2 Step 2: Remove burrs ............................................. 18
7.2.3 Step 3: Flare pipe ends ........................................... 18
7.2.4 Step 4: Connect pipes ............................................ 19
8 Air Evacuation ................................................................. 21
8.1 Evacuation Instructions .......................................... 21
8.2 Note on Adding Refrigerant ..................................... 21
9 Electrical and Gas Leak Checks ......................................... 23
9.1 Electrical Safety Checks .......................................... 23
9.2 Gas Leak Checks.................................................... 23
10 Test Run .......................................................................... 23
11 European Disposal Guidelines .......................................... 24
12 Information Servicing ...................................................... 25
 Loading...