Climate 5000 – 6720886909 (2018/04) 21
Air Evacuation
8 Air Evacuation
MC MC
Fig. 38.
Preparations and Precautions
Air and foreign matter in the refrigerant circuit can cause abnormal rises
in pressure, which can damage the air conditioner, reduce its efficiency
and cause injury. Use a vacuum pump and manifold gauge to evacuate
the refrigerant circuit, removing any non-condensable gas and moisture
from the system.
Evacuation should be performed upon initial installation and when unit
is relocated.
Before performing evacuation
f Check to ensure that both high- pressure and low-pressure pipes
between the indoor and outdoor units are connected properly in
accordance with the Refrigerant Piping Connection section of this
manual.
f Check to make sure all wiring is connected properly.
1.15 Evacuation Instructions
Before using the manifold gauge and vacuum pump, read their operation
manuals to familiarize yourself with how to use them correctly.
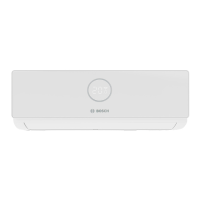
High pressure valve
Pressure gauge
Charge hose
Vacuum pump
Low pressure valve
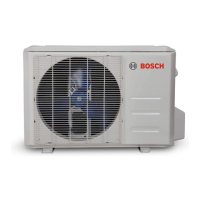
-76cmHg
Low pressure valve
Pressure hose /
Charge hose
Compound gauge
Manifold Gauge
Fig. 39.
1. Connect the charge hose of the manifold gauge to service port on
the outdoor unit’s low pressure valve.
2. Connect another charge hose from the manifold gauge to the
vacuum pump.
3. Open the Low Pressure side of the manifold gauge. Keep the High
Pressure side closed.
4. Turn on the vacuum pump to evacuate the system.
5. Run the vacuum for at least 15 minutes or until the Compound
Meter reads -76cmHG (-10
5
Pa).
6. Close the Low Pressure side of the manifold gauge and turn off the
vacuum pump.
7. Wait for 5 minutes, then check that there has been no change in
system pressure.
8. If there is a change in system pressure, refer to Gas Leak Check
section for information on how to check for leaks. If there is no
change in system pressure, unscrew the cap from the packed valve
(high pressure valve).
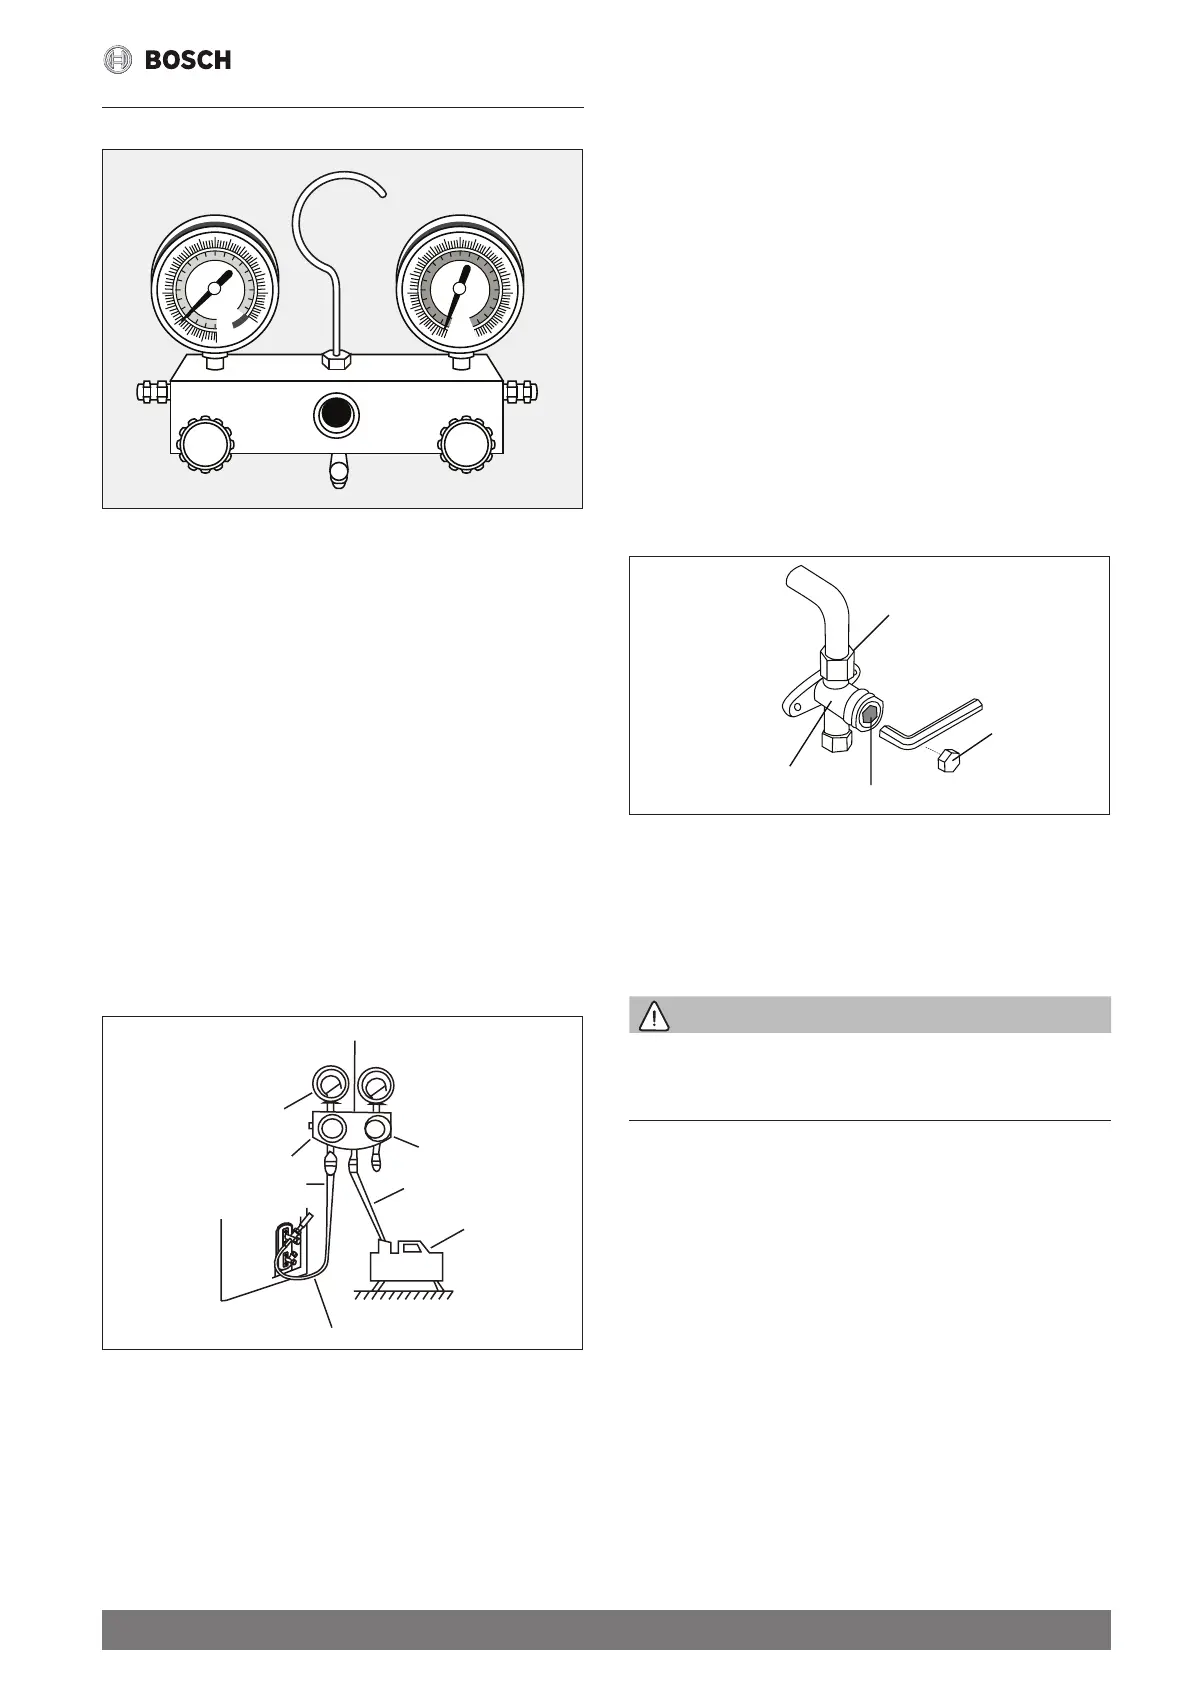
9. Insert hexagonal wrench into the packed valve (high pressure valve)
and open the valve by turning the wrench in a 1/4 counterclockwise
turn. Listen for gas to exit the system, then close the valve after 5
seconds.
10. Watch the Pressure Gauge for one minute to make sure that there
is no change in pressure. The Pressure Gauge should read slightly
higher than atmospheric pressure.
11. Remove the charge hose from the service port.
Flare nut
Valve body
Valve stem
Cap
Fig. 40.
12. Using hexagonal wrench, fully open both the high pressure and low
pressure valves.
13. Tighten valve caps on all three valves (service port, high pressure,
low pressure) by hand. You may tighten it further using a torque
wrench if needed.
WARNING
OPEN VALVE STEMS GENTLY
When opening valve stems, turn the hexagonal wrench until it hits
against the stopper. Do not try to force the valve to open further.
1.16 Note on Adding Refrigerant
Some systems require additional charging depending on pipe lengths.
The standard pipe length is 5m. The refrigerant should be charged from
the service port on the outdoor unit’s low pressure valve. The additional
refrigerant to be charged can be calculated using the following formula:
 Loading...