EasyManuals Logo

Brother FS-40 User Manual

Brother FS-40
196 pages
To Next Page IconTo Next Page
To Previous Page IconTo Previous Page
Page #41 background imageLoading...
Page #41 background image
2 - 26
Electrical parts and motors
Basics of Assembly
3 Attachment of Foot controller jack assy
1. Insert the foot controller jack assy. 1 from the inside of the rear cover
assy..
2. Attach the jack nut 2 from the outside of the rear cover assy., and secure
the foot controller jack assy. 1.
*Key point
Pass the lead wire of the foot controller jack assy. 1 between
the main motor sub assy. and the rear cover assy..
1
2
4 Attachment of Inlet assy
1. Set the inlet assy. 1 and the inlet presser 2 to the rear cover assy. with the
screw 1.
1
Torque
0.78 – 1.18 N·m
2
1
1
1
Taptite, Cup B
M4X14

Table of Contents

Questions and Answers:

Question and Answer IconNeed help?

Do you have a question about the Brother FS-40 and is the answer not in the manual?
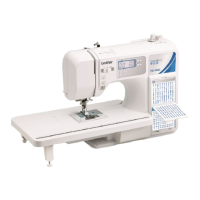
Brother FS-40 Specifications

General IconGeneral
Stitch Number40
Buttonhole Styles5
DisplayLCD
LightingLED
TypeElectronic
Needle ThreadingAutomatic
Adjustable Stitch LengthYes
Adjustable Stitch WidthYes
Maximum Stitch Width5 mm
Maximum Stitch Length4 mm
Reverse SewingYes
Free ArmYes
Start/Stop ButtonYes
Speed ControlYes
BobbinTop-loading
Sewing Speed750 stitches per minute

Related product manuals