!
PH
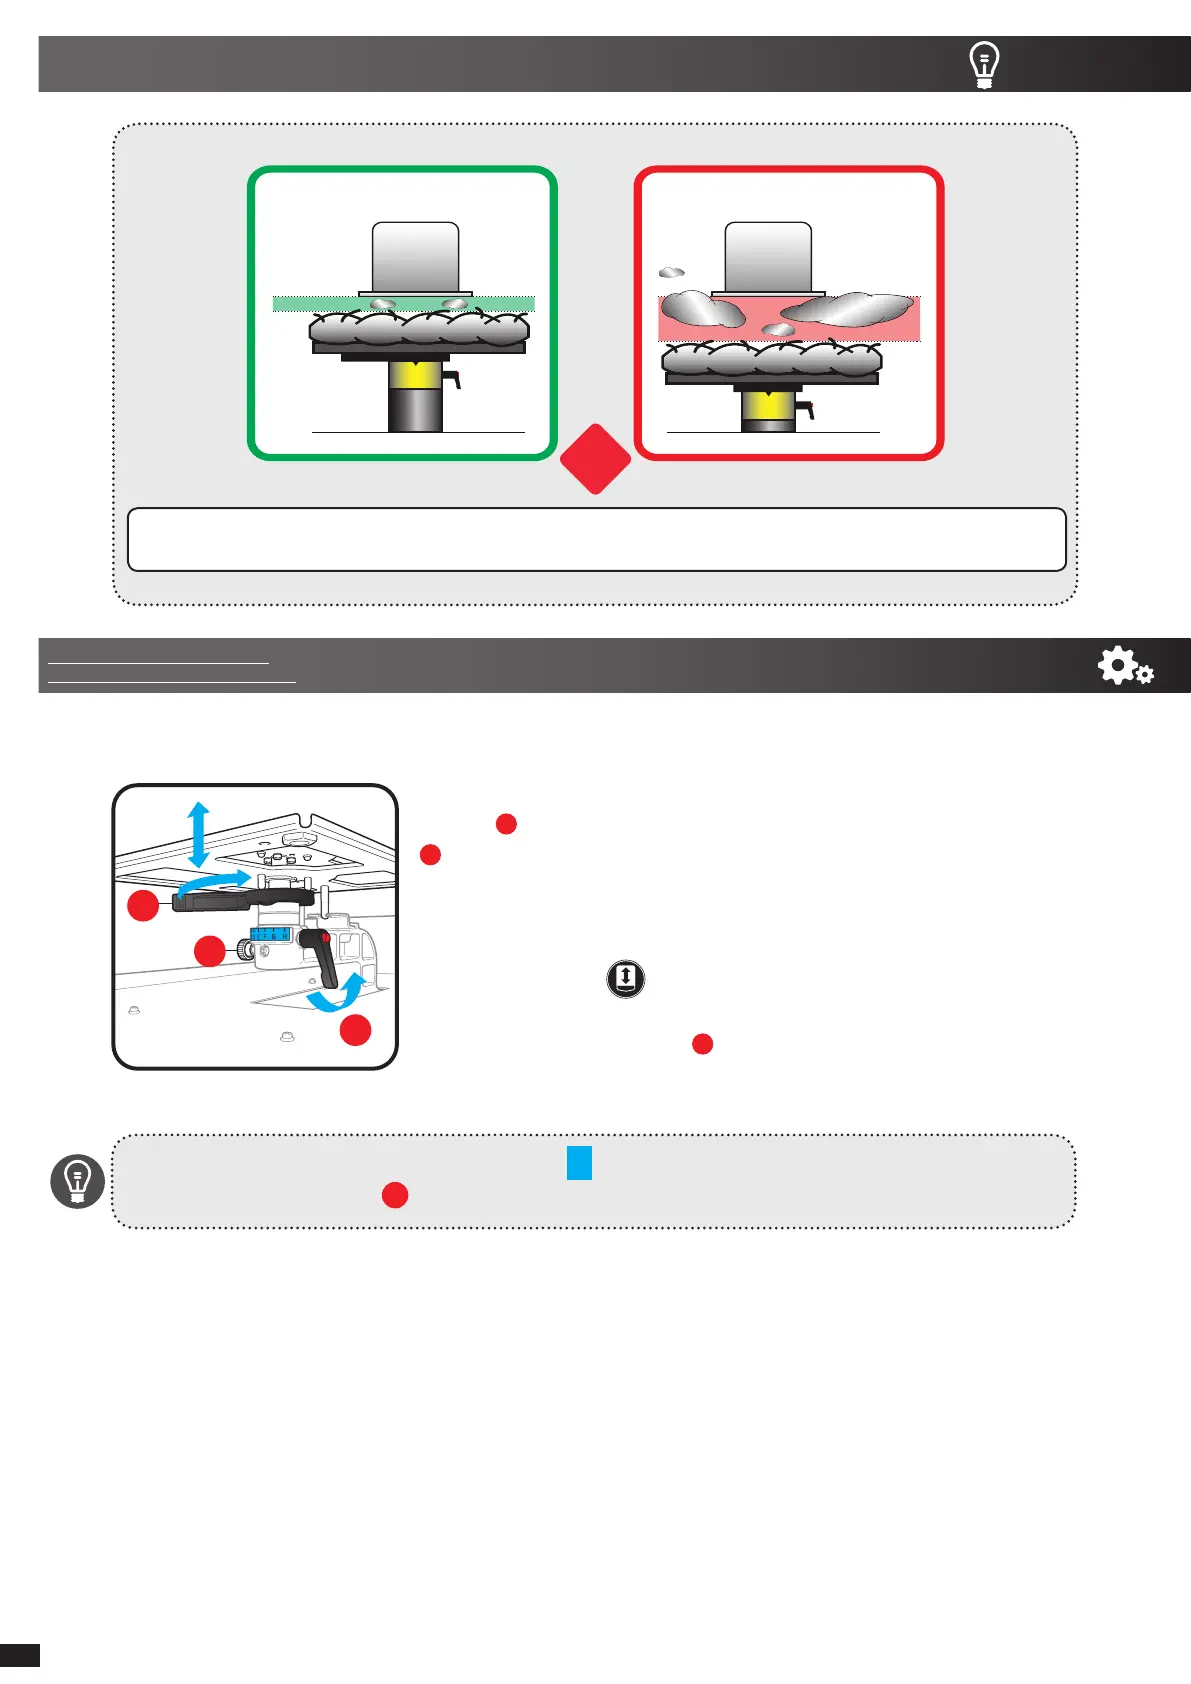
A
3 mm
PH
F
10 mm
Ink Mist
Ink Mist
GOOD BAD
To adjust the platen height, loosen the Platen Fixing
Lever and move the Platen Height Adjustment Lever
. to a lower position. Re-tighten the Platen Fixing Lever
if you are happy with new distance. Flaten down all the
wrinkles of the fabric.
To check if the new textile is not detected by the sensor,
push the button and repeat the process if needed.If
you need to to decrease the gap further, remove 1 or 2
collars, loosen the knob and push down the platen
bearing by 1 or 2 steps.
Re-attach everything and tighten the Platen Fixing Lever
BEST PRACTICE FOR PRINTING >>> A MUST!
ALWAYS KEEP THE CLOSEST DISTANCE BETWEEN THE PRINTHEADS AND THE SURFACE OF THE GARMENT.
IT IS VERY IMPORTANT FOR THE LONGEVITY OF YOUR PRINTER.
if you need to print above the hem and seams, choose UNI-directional printing to keep quality.
Don't forget to return the platen to the A position after printing on thicker material.
Always leave the knob tight after changing position.
ADJUSTING THE HEIGHT OF THE PLATEN
To achieve optimum printing quality when a thicker textile is used, adjust the platen
height relative to the thickness of the textile.
1
2
3
3
6
Link to the Document: Use of
the Platen and Platen Mechanism
 Loading...