+
!"#$%&'() ** !'$$%&'( *)
Lerchenfeldstr. 9 87600 Kaufbeuren Tel.: +49(0)8341 / 9764-0 Fax: +49(0)8341 / 67806
30
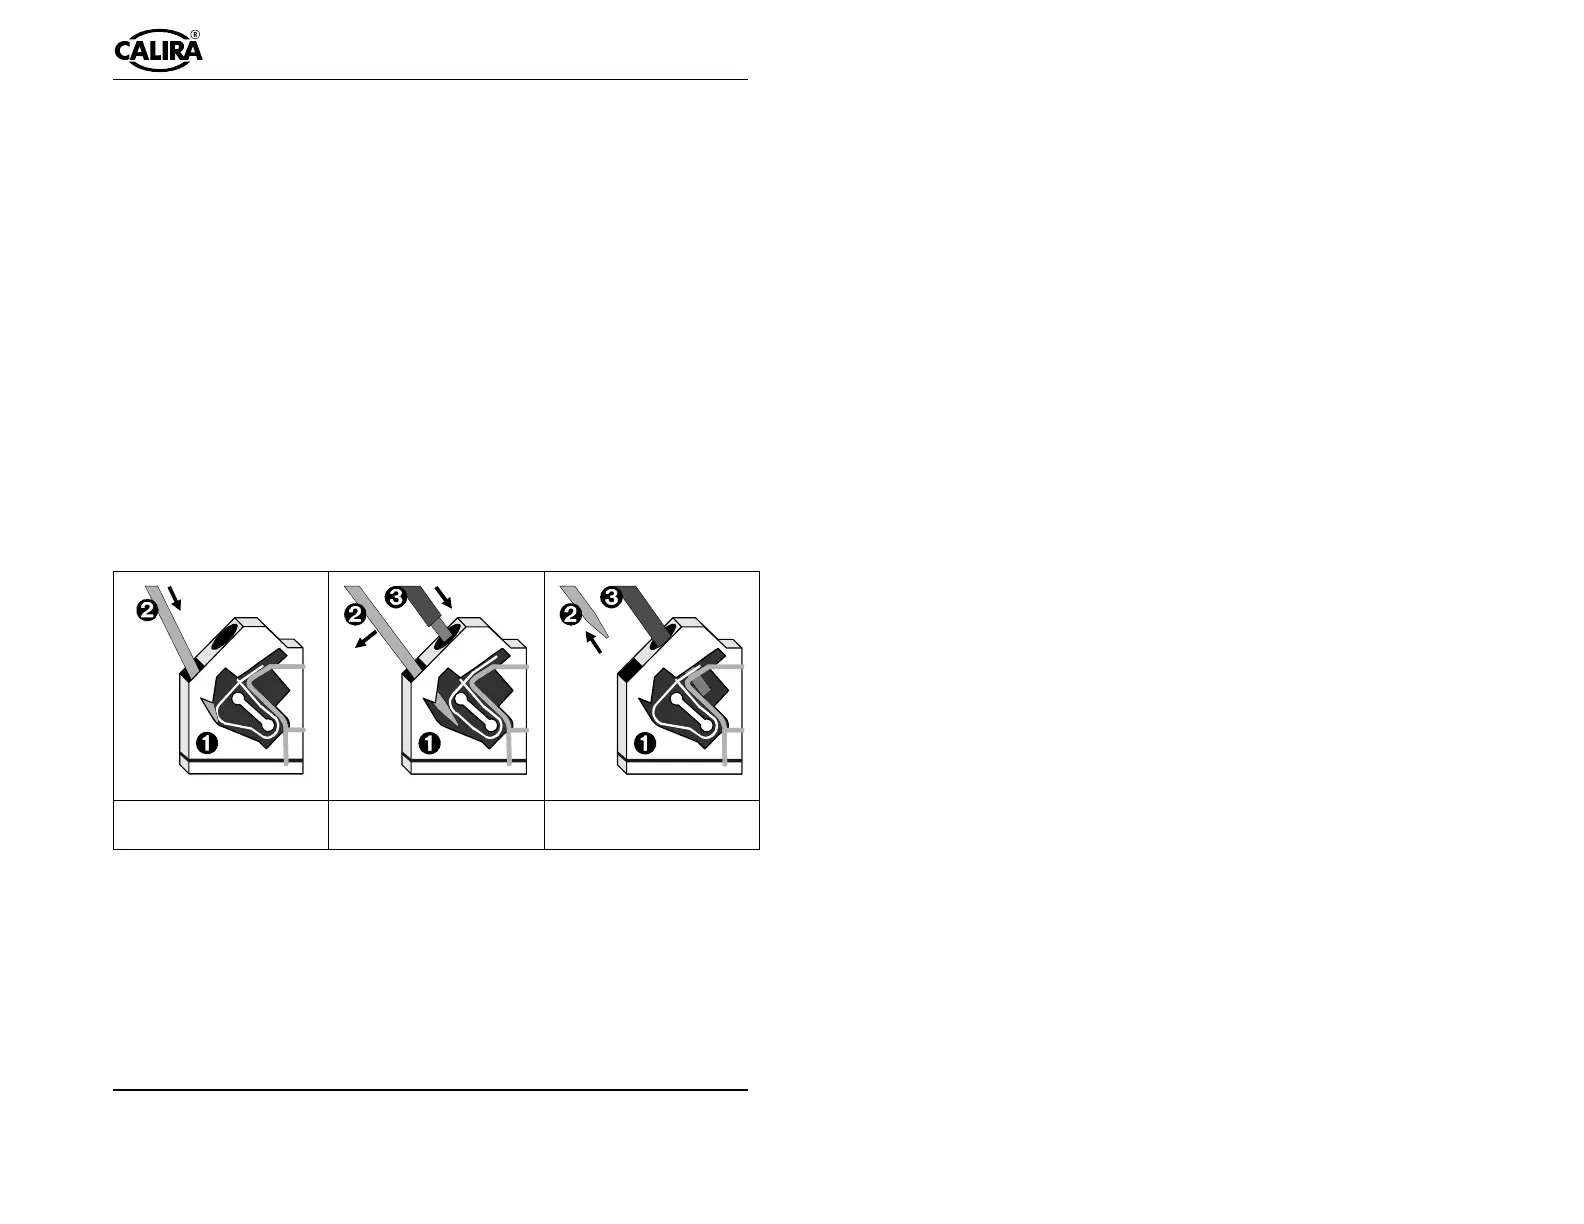
Handling of the cage tension spring clamps
Prepare the connection cable for the 230 Volt electrical equipment. Insulation
must be removed from 11 mm at the end of the cable. Cable end sleeves are
not required.
The following pictures show the basic method of handling cage tension
spring clamps. The version fitted in your device can differ in detail from
these diagrams, but the fundamental method remains the same. The cage ten-
sion spring clamp can be opened with the help of a suitable flat screwdriver.
To do so, insert the flat screwdriver into the lower, square opening (fig. 5) and
open the cage tension spring clamp (fig. 6). The clamping element of the
spring in the round opening opens.
Insert the cable into the cage tension spring clamp up to the isolation (round
opening, fig. 6) and pull out the flat screwdriver (fig. 7). The cage tension
spring clamp closes again and the cable is securely clamped.
Repeat the procedure for all connections.
Make sure that the cable ends sit firmly in the cage tension spring clamps!
!" !" !"
Cage tension spring
clamp
Flat screwdriver Cable
 Loading...