19
ENG
“EVD ice” +0300038EN - rel. 1.1 - 23.04.2018
Programming
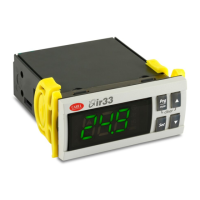
When opening the program, the device to be congured needs to be
selected: EVD mini. The Home page then opens, oering the choice
between starting a new project or opening an existing project. If using
the program for the rst time, choose new project.
Fig. 8.b
The following options are then available:
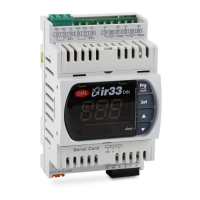
1. Directly access the list of parameters saved in EEPROM: select “RS485”;
The operations are performed in real time (ONLINE mode), at the top
right set network address 1 and choose the guided procedure for USB
port recognition, then go to “Device setup”;
Fig. 8.c
2. Selec t the model from the range based on the rmware version and list of
conguration parameters (EVDMINI0000E0X_R*.*). These operations
are performed in OFFLINE mode.
Menu
The pages marked 1) can be accessed wither Online or Oine, while
those marked 2) are Online only.
1
2
Fig. 8.d
The operations that can be performed on the pages marked 1) depend
on the rst selection made.
Note: to access the Online help press F1.
Ref. Description
Home Select operating mode
Online à RS485 (rear connector)
Oine à Device model
Online Oine
Device setup Read instant values of control
parameters
Select Load to load a list of
project parameters (.hex), modify
and save a new project.
Setup summary Display the default values for the current list of parameters
Custom setup See online help.
Update device Select list of parameters and
then Upload to controller
-
Upload
rmware
Select rmware and Upload -
Synoptic and
graphs
Overview with position of
probes and probe and su-
perheat readings in real time
-
Tab. 8.a
8.4 Restore default parameters
To restore the default parameter values on the controller:
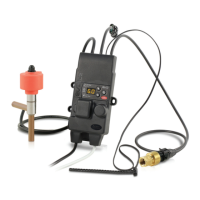
1. Establish an RS485 serial connection between the computer and the
driver. The LEDs on the USB/RS485 converter will ash;
Fig. 8.e
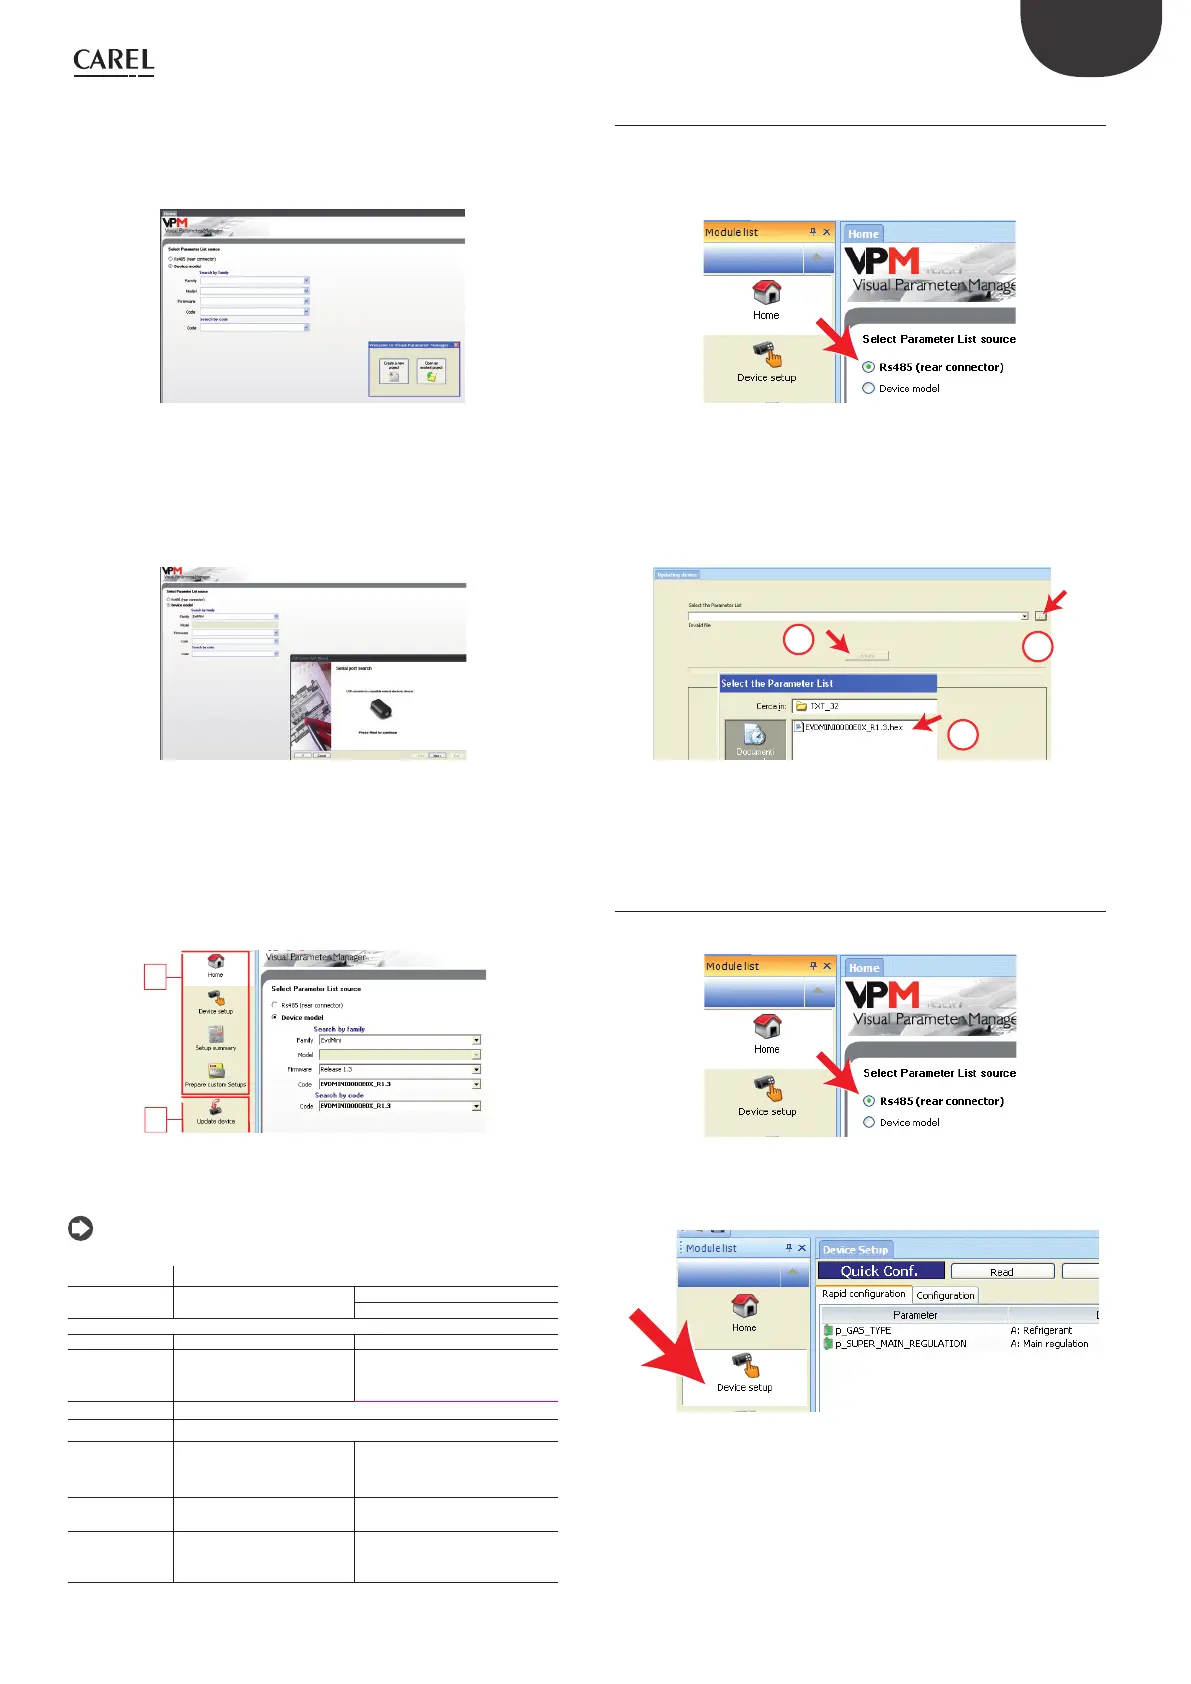
2. Select “Update device” and:
a. Click button (A) to open the drop-down menu;
b. Select the list of parameters corresponding to the controller’s
rmware version: “EVDMINI***.hex”;
c. Click “Update” to load the parameters to the list and immediately
after restore the controller parameters to the default value.
C
B
A
Fig. 8.f
3. Go to “Device setup”: the program automatically reads the default
parameters saved on the controller.
8.5 Setup by direct copy
1. On the Home page select RS485 (rear connector);
Fig. 8.g
2. Go to “Device setup”;
Fig. 8.h
 Loading...