Helpline No 0844 801 8701 / IRE 189 094 6244
15
8. Using the saw
8.1 On/Off switch (Fig. 7 Item 11)
• Thesawcanbeswitchedonbypressingthegreen
pushbutton “I”.
• Theredpushbutton“0”hastobepressedtoswitch
off the saw.
8.2 Parallel stop
8.2.1 Stop height (Fig. 7-9)
• Theparallelstop(7)suppliedwiththebenchtype
circular saw has two different guide faces.
• Forthickmaterialyoumustusethestoprail(25)
as shown in Fig. 8, for thin material you must use
the stop rail as shown in Fig. 9. When the stop
rail is used in this position, the Cross stop (Fig. 1 /
Item 16) can also be fitted to the parallel stop.
• Tochangetheheightofthestop,slackenthetwo
thumb screws (12) and pull the stop rail off the
carrier rail (26).
• Turnthestoprail(25)180°totheleftortheright,
depending on the required height of the stop, and
plug in back on the carrier rail (26).
• Re-tightenthethumbscrews(12).
8.2.2 Cutting width (Fig. 9)
• Theparallelstop(7)hastobeusedwhenmaking
longitudinal cuts in wooden workpieces.
• Slidetheparallelstop(7)totherightorleftsideof
the saw table (1).
• Theparallelstop(7)canbesettotherequired
dimension with the help of the scale (b) engraved
on the saw table (1).
• Tightenthetwothumbscrews(12)inordertofix
the parallel stop (7).
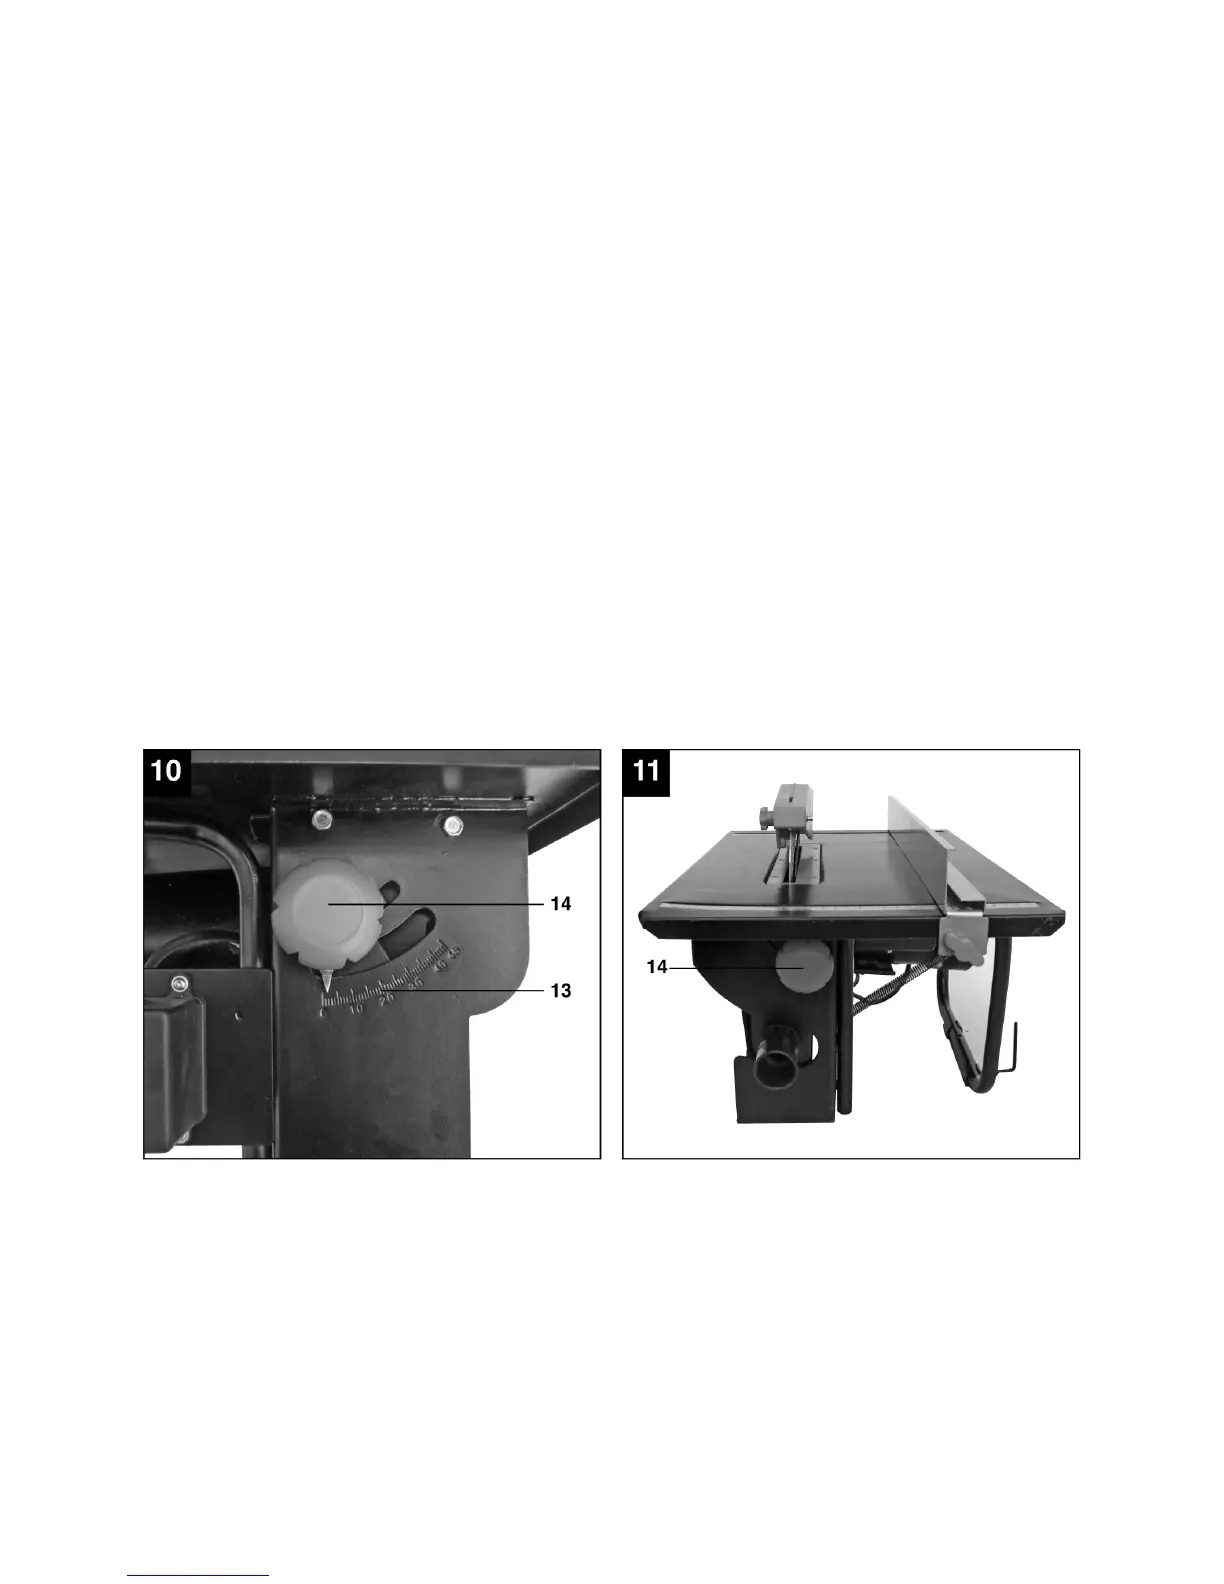
8.3 Adjusting the angle (Fig. 10/11)
• Slackenthestar-gripknobs(14).
• Youcannowadjusttheblade(4)totherequired
Angle (see scale (13)) by sliding the two star-grip
knobs.
• Re-tightenthestart-gripscrews(14).
 Loading...