Maintenance Manual 22
PEFS F3 Maintenance Manual, Version 1.2, Feb 2018
© Copyright 2017 Chubb Fire & Security Pty Ltd
Manual Actuators – Service (Item 14)
WARNING: Do not loosen any hose connections or fittings in the LOP actuation system while the system is
pressurised. This will cause the system to discharge. Prior to servicing any LOP actuators ensure the system is
depressurised by depressurising the PEFS F3 cylinders using the Schrader valve fitted to the cylinder Filler Plug
Assembly. Ensure pressure indicators on manual actuator reads zero pressure.
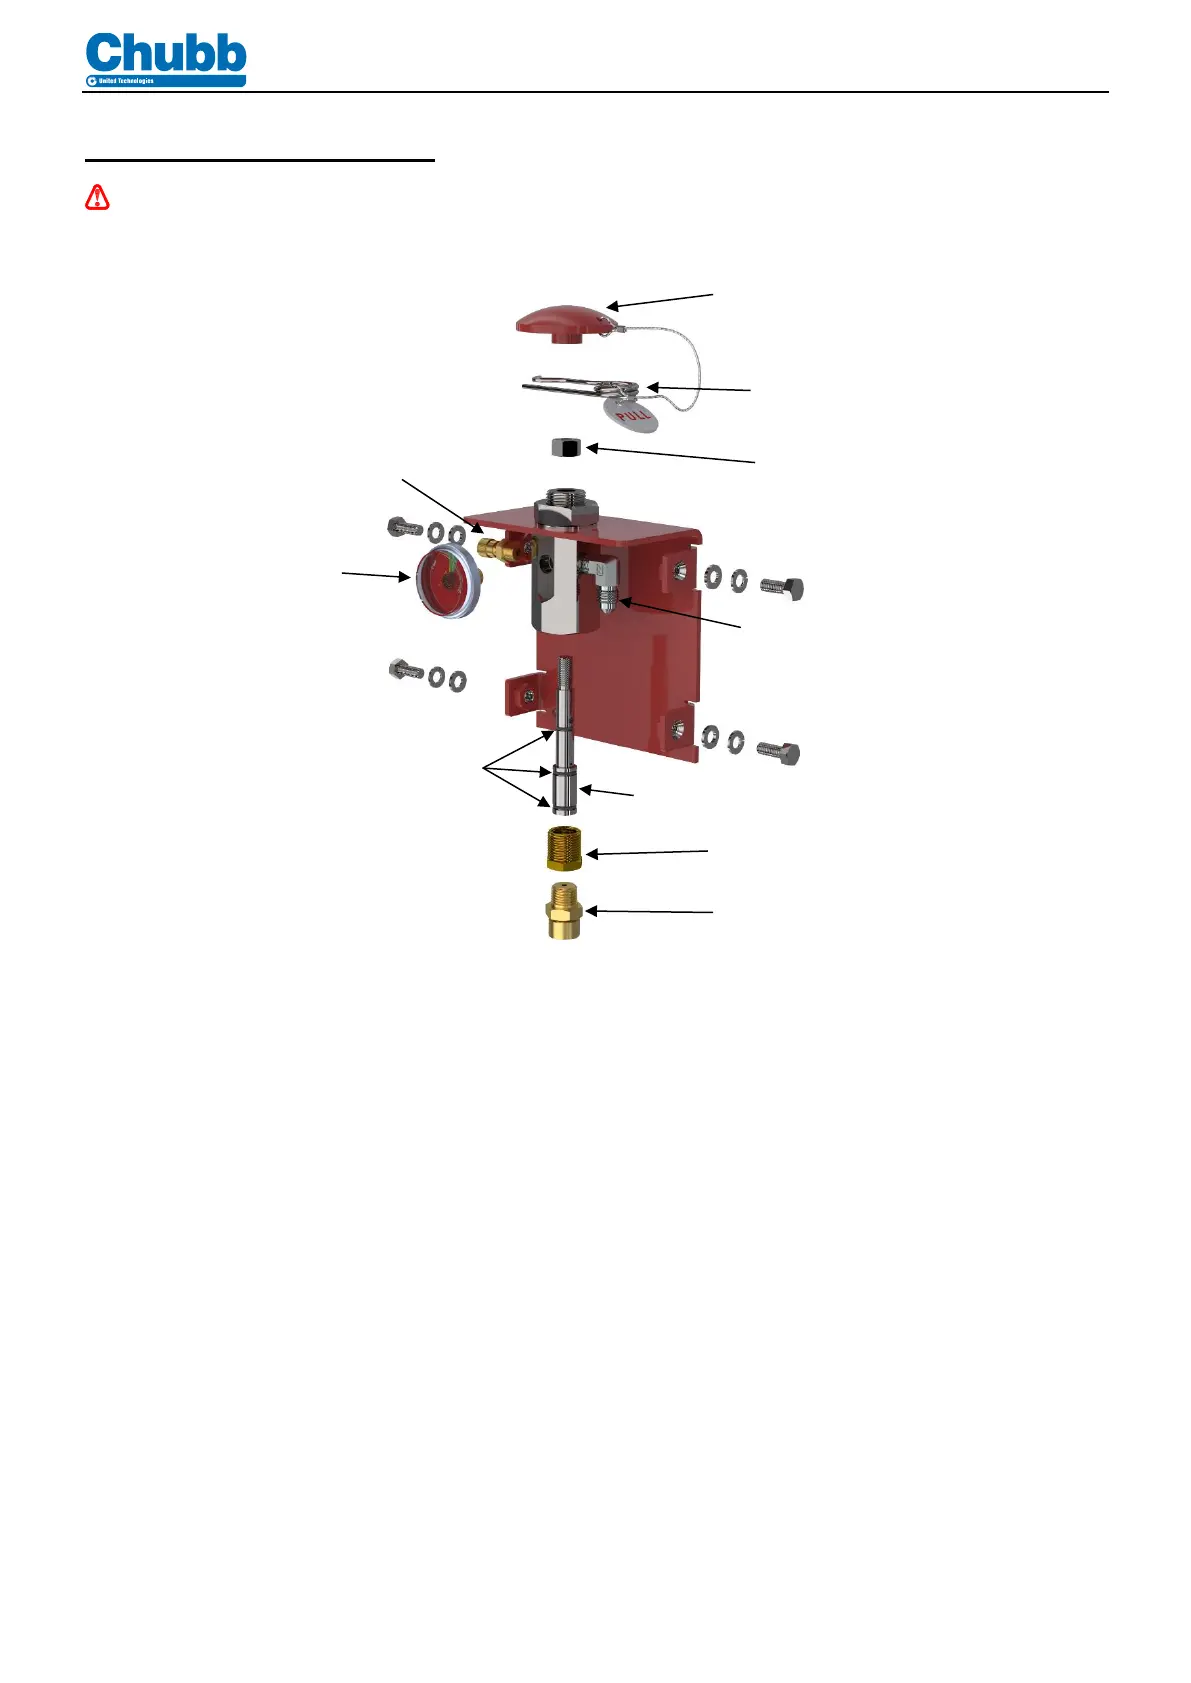
Figure 4
A LOP Actuator Service Kit (Part No: 28038) is available for the purpose of servicing the LOP manual actuator.
1. Remove the actuator cover plate.
2. Remove actuation hose from actuator connection (1).
3. Remove Foil Nozzle (2) and Adaptor (3)
4. Check the Foil Nozzle (2) to ensure its foil seal is intact and not damaged or ruptured. Replace if required.
5. Remove Pull Pin (4)
6. Remove Push Button (5) and Nut (6)
7. Remove valve piston assembly (7) from valve body.
8. Inspect and clean piston o-rings (8) and replace if they show signs of wear or damage. Lubricate using
Molykote 111.
9. Refit valve piston assembly (7) to valve body
10. Ensure that the actuation mechanism moves freely.
11. Refit Nut (6) and Push Button (5). Tighten nut up against Push Button.
12. Refit Pull Pin (4)
13. Refit Adaptor (3) and Foil Nozzle (2). Use Loctite 577 or Loctite 569 on threads
14. Inspect and clean Pressure Indicator (9) and or Schrader Valve (10). Replace if faulty or damaged. Use
Loctite 577 or Loctite 569 on threads
15. Reconnect actuation hose to actuator connection (1).
 Loading...