2-11
Cisco Aironet 1000 Series Lightweight Access Point Hardware Installation Guide
OL-9403-04
Chapter 2 Installing the Access Point
Mounting Overview
Step 7 Attach the cables to the access point.
Note When the access point is powered up and is associated with a controller (Power LED is green,
Alarm LED is off, and the radio LEDs are blinking), the access point is broadcasting its beacon.
Step 8 Repeat the these steps for each access point on a horizontal surface.
After mounting all horizontal surface access points, return to deploying the access points, "Step 3-c" on
page 2-7.
c
Mounting Access Points Using the Ceiling-Mount Clips
When you are mounting the access point under a suspended ceiling, use the ceiling-mount clips to mount
the access point to the suspended ceiling rails.
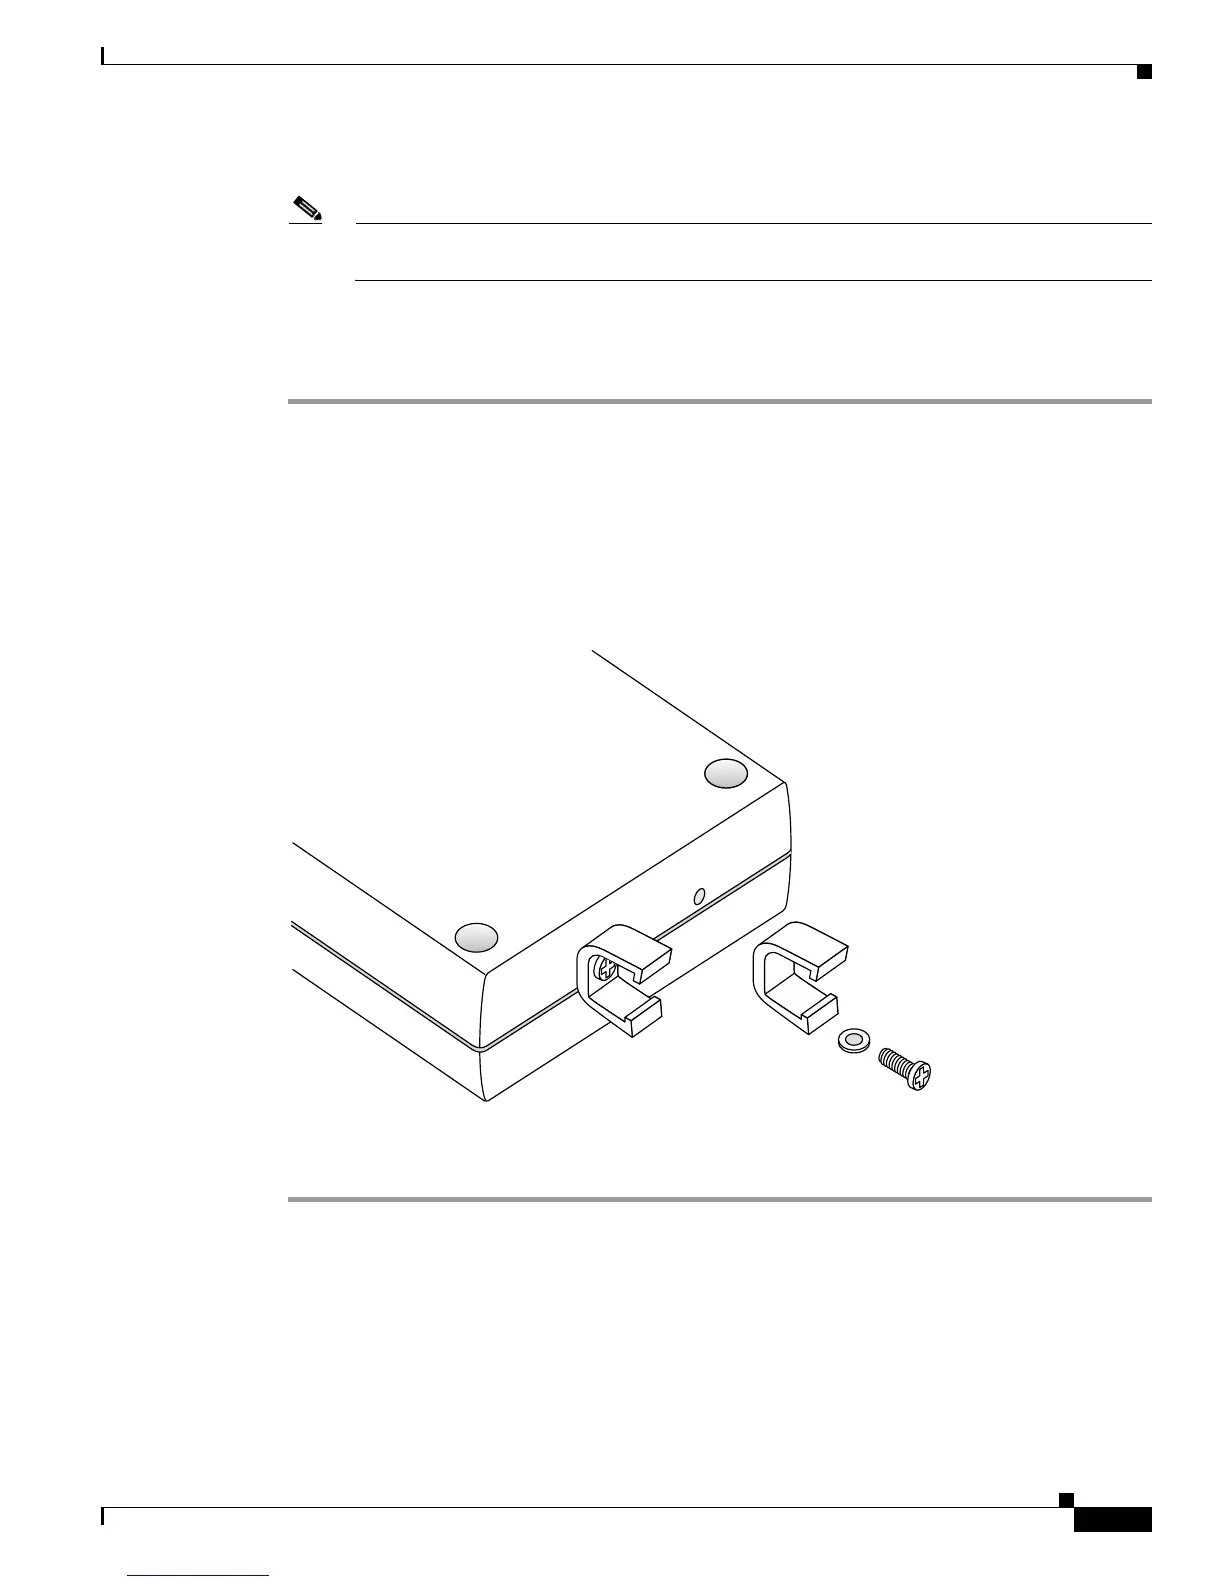
Figure 2-8 Attaching the Ceiling-Mount Clips to the Access Point
Follow these steps to attach the ceiling-mount clips to the access point and mount the access point to
suspended ceiling rails:
Step 1 Copy the MAC address from the label on the access point onto the corresponding location on the access
point location map. MAC addresses have the format 00xxxxxxxxxx.
Step 2 Attach the ceiling-mount clips to the bottom of the access point using the factory-supplied machine
screws and washers (see Figure 2-8).
135665
 Loading...