EasyManua.ls Logo

Cisco ASR1002 - ASR 1002 Router User Manual

Cisco ASR1002 - ASR 1002 Router
38 pages
To Next Page IconTo Next Page
To Previous Page IconTo Previous Page
Page #31 background imageLoading...
Page #31 background image
31
Buffer logging: level debugging, 81 messages logged, xml disabled,
filtering disabled
Exception Logging: size (4096 bytes)
Count and timestamp logging messages: disabled
Persistent logging: disabled
No active filter modules.
Trap logging: level informational, 78 message lines logged
Log Buffer (10000000 bytes):
*Jan 10 06:08:14.713: %CMRP-3-PEM_REMOVE_SHUT: R0/0: cmand: The system will shut down in 5 minutes
*Jan 10 06:08:14.718: %ASR1000_PEM-6-REMPEM_FM: PEM/FM slot P1 removed
*Jan 10 06:08:28.966: %ASR1000_PEM-6-INSPEM_FM: PEM/FM slot P1 inserted
The second is after enabling console logging. Output is at the console (and in the log).
2ru_perf2#conf Configuring from terminal, memory, or network [terminal]?
Enter configuration commands, one per line. End with CNTL/Z.
2ru_perf2(config)#log con
% Ambiguous command: "log con"
2ru_perf2(config)#logg con
2ru_perf2(config)#^Z
2ru_perf2#
*Jan 10 06:08:54.643: %SYS-5-CONFIG_I: Configured from console by console
2ru_perf2#
2ru_perf2# *Jan 10 06:09:05.023: %CMRP-3-PEM_REMOVE_SHUT: R0/0: cmand: The system will shut down in 5
minutes
*Jan 10 06:09:05.026: %ASR1000_PEM-6-REMPEM_FM: PEM/FM slot P0 removed
*Jan 10 06:09:10.500: %ASR1000_PEM-6-INSPEM_FM: PEM/FM slot P0 inserted
2ru_perf2#
Step 5 Replace the AC power supply within five minutes or the system will shutdown
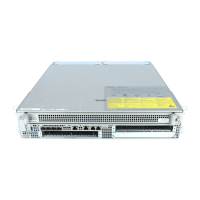
You have removed an AC power supply from the Cisco ASR 1002-F Router and now must replace the AC power supply within
five minutes.
Installing the AC Power Supply
Step 1 Insert an AC power supply in power supply Slot 0 or power supply Slot 1 until it is full seated.
Step 2 Tighten the captive installation screws.
Step 3 At the rear of the router, check that the power switch is in the Off (O) position.
Step 4 Insert the AC power cord into the power inlet and then turn it On (I).
Step 5 To ensure that the AC power cord does not interfere with other cables or wires, dress the AC power cable in one of the
following ways.
a. Leave a small service loop in the AC power cord from the inlet and then secure the power cord through the AC power
supply handle as shown in Figure 17. Or go to 5b.

Other manuals for Cisco ASR1002 - ASR 1002 Router

Question and Answer IconNeed help?

Do you have a question about the Cisco ASR1002 - ASR 1002 Router and is the answer not in the manual?

Cisco ASR1002 - ASR 1002 Router Specifications

General IconGeneral
Form FactorRack-mountable
Maximum Throughput10 Gbps
Operating SystemCisco IOS XE
Product TypeRouter
Product SeriesASR 1000
ModelASR1002
Encryption ThroughputUp to 2.5 Gbps
Memory4 GB DRAM
Power SupplyAC or DC
Interfaces4 x SFP
RedundancyPower supply (optional)
Input Voltage100-240 VAC
Modular Slots2 x SPA slots
Rack Unit Height2U

Summary

Documentation and Resources

Obtaining Documentation and Submitting a Service Request

Cisco ASR 1002-F Router Overview

Prepare for Installation

Prepare for Rack-Mount Installation

Guidance on preparing the chassis for mounting within a rack.

Rack-Mount the Router

Attach the Rack-Mount Brackets—Chassis Front-Mounted

Steps to attach front rack-mount brackets to the router chassis.

Attach the Rack-Mount Brackets—Chassis Rear-Mounted

Steps to attach rear rack-mount brackets to the router chassis.

Four-Post Rack Installation

Instructions for installing the chassis in a four-post equipment rack.

Two-Post Rack Installation

Instructions for installing the chassis in a two-post equipment rack.

Connect the Router to the Network

Console and Auxiliary Port Cable Connections

How to connect console and auxiliary ports using RJ-45 cables.

Management Ethernet Port Cable Connection

Steps for connecting the management Ethernet interface.

Connect the Shared Port Adapter Cables

References to connecting cables for shared port adapters.

Install the Cables Using the Cable-Management Bracket

Instructions for routing and securing cables with brackets.

Start the System

Connect AC Power to the Cisco ASR 1002-F Router

Instructions for connecting AC power to the router.

Connect DC Power to the Cisco ASR 1002-F Router

Instructions for connecting DC power to the router.

Verify Power Supply Operation

Procedures to check if power supplies are functioning correctly.

Start the Cisco ASR 1002-F Router

Steps to power on and initialize the router system.

Configure the Router

Using the Console to Access the CLI

Steps to access the Command Line Interface via the console port.

Configure Global Parameters Using the Set-up Facility

Guide to setting up global system parameters via the setup script.

Save the Running Configuration to NVRAM

Instructions to save current router configuration to non-volatile memory.

Perform Other Configuration Tasks

Guidance on advanced configuration topics and related publications.

After Installation

Powering Off the Cisco ASR 1002-F Router Safely

Procedure to safely shut down and power off the router.

Replace the Shared Port Adapters

Instructions for removing and installing SPAs.

Removing an AC Power Supply

Steps to safely remove an AC power supply unit from the chassis.

Removing the DC Power Supply

Steps to safely remove a DC power supply unit from the chassis.

Installing the DC Power Supply

Instructions for installing a DC power supply unit into the chassis.

Related product manuals