23-inch brackets (RACK-KIT-T1=)419-inch brackets (ACC-KIT-T1=)1
24-inch brackets (RACK-KIT-T1=)5Extension rails and 5 brackets for
four-point mounting, includes 19-inch
brackets (4PT-KIT-T2=)
2
--ETSI brackets (RACK-KIT-T1=)3
Attaching the Rack-Mount Brackets
Before you begin
You can use the minimum recommended number of two screws for installing the rack-mount bracket to each
side of the switch. If required, while mounting, you can use the additional four screws provided in the accessory
kit.
Procedure
Step 1 Use two Phillips flat-head screws to attach the long side of the bracket to each side of the switch for the front
or rear mounting positions.
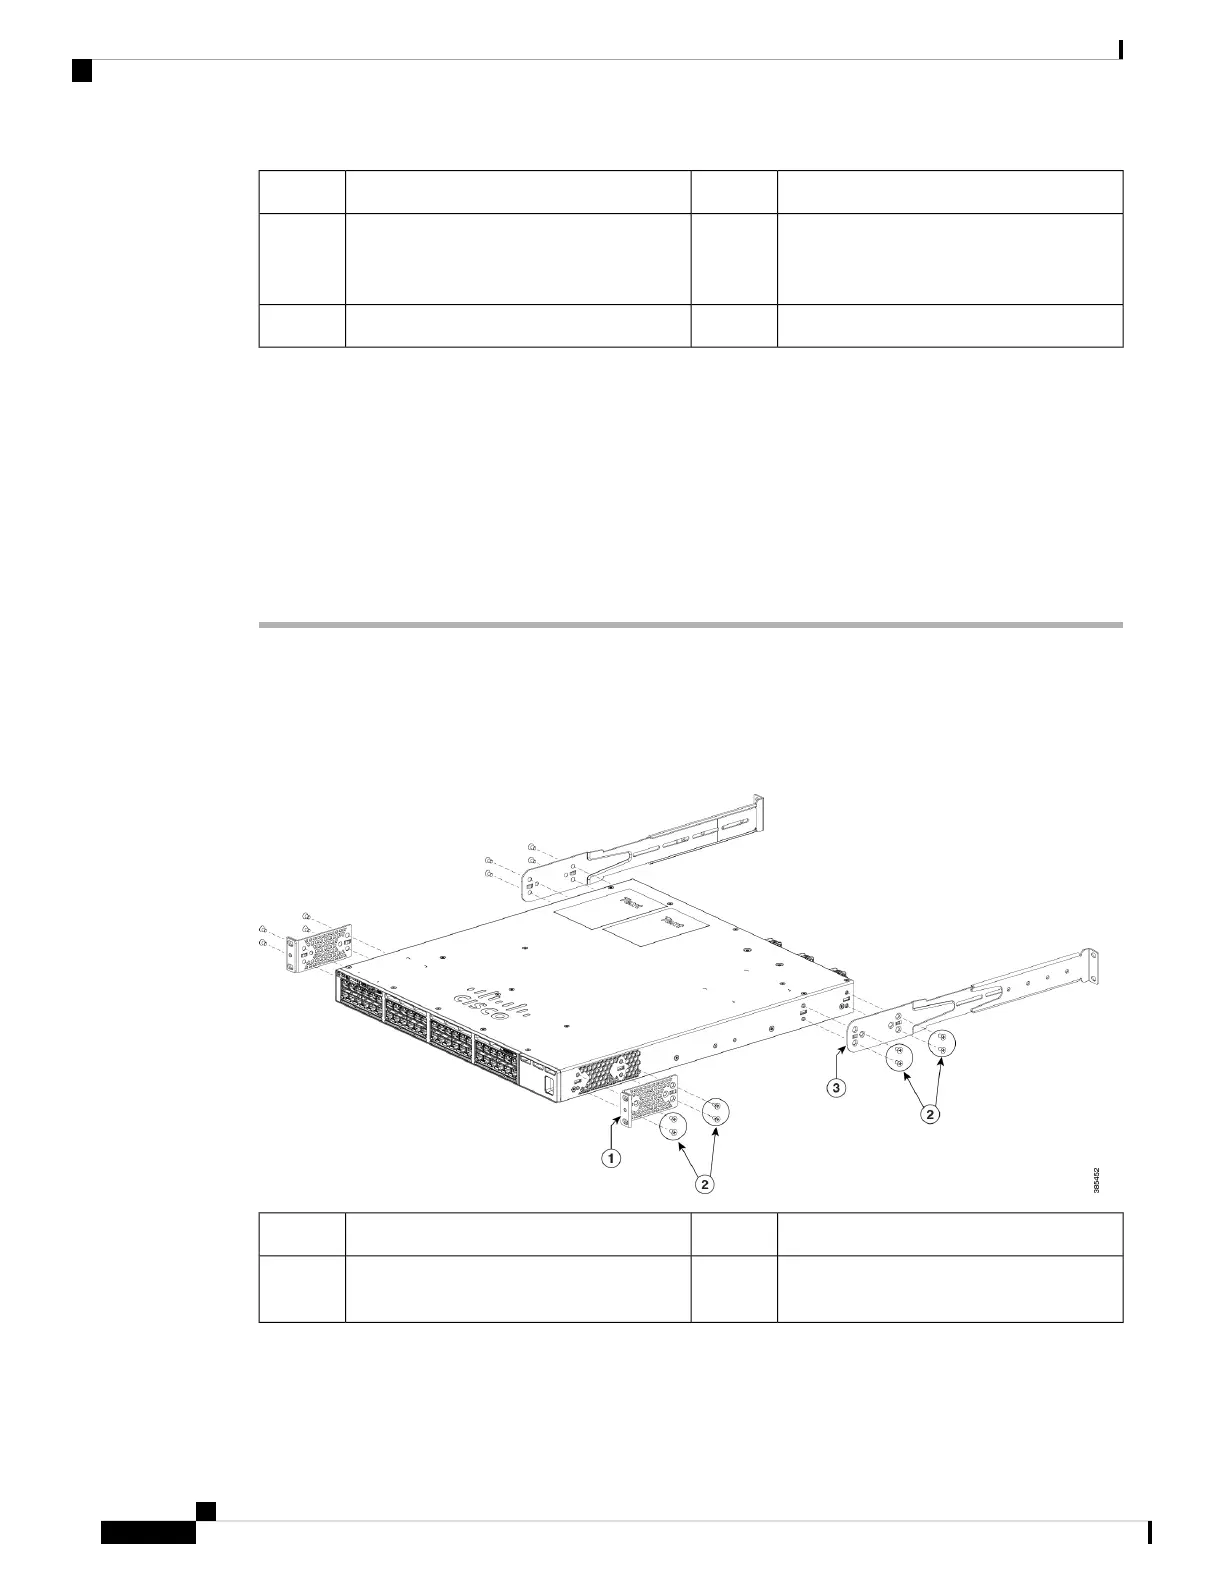
Figure 30: Attaching 19-inches Rack Mount Brackets and Extension Rails
19-inch extension rail319-inch bracket1
--Number-8 Phillips flat-head screws
(48-2927-01)
2
Step 2 For Network Equipment-Building Standards (NEBS) compliant installations, perform the following steps:
Cisco Catalyst 9300 Series Switches Hardware Installation Guide
56
Installing a Switch
Attaching the Rack-Mount Brackets
 Loading...