3
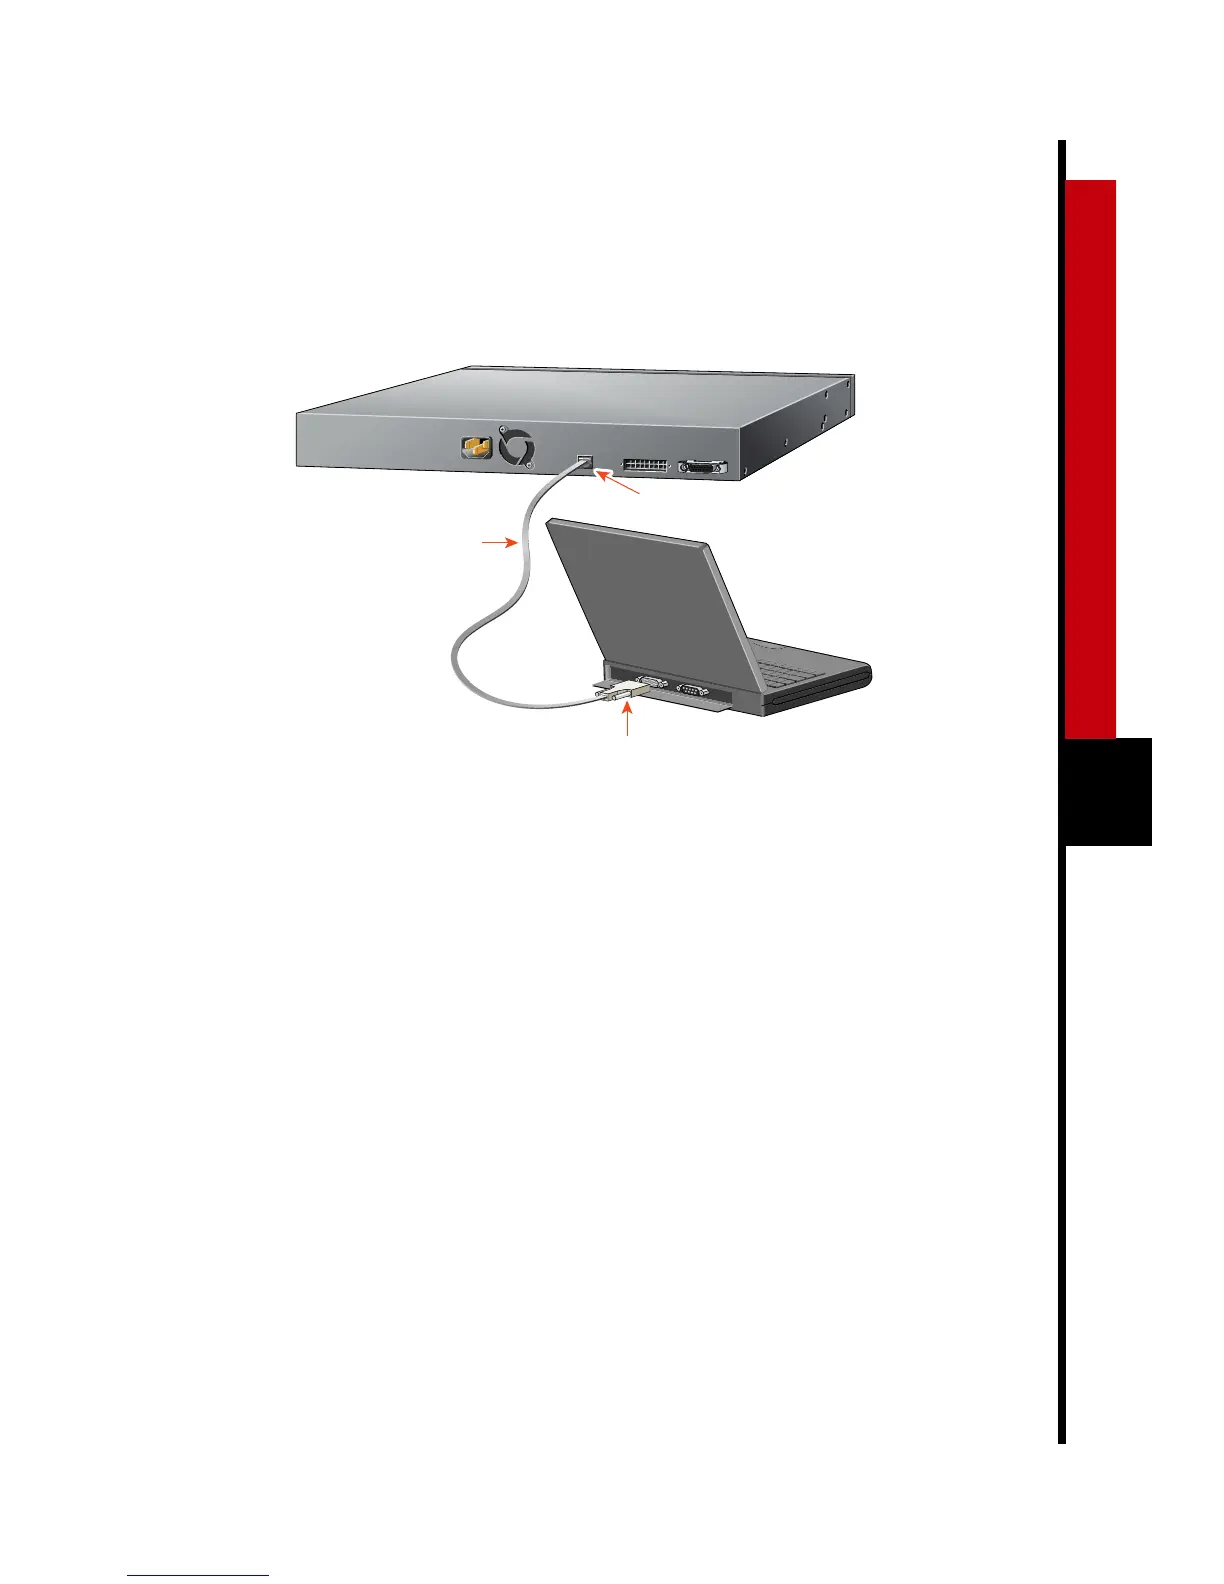
Console port
(RJ-45)
RJ-45-to-RJ-45
rollover cable
RJ-45-to-DB-9 or
RJ-45-to-DB-25 adapter
labeled Terminal
Connect the Console Cable
1 Configure your terminal, PC, or laptop
to match these characteristics of the
CONSOLE port on the switch:
9600 baud, 8 data bits, 1 stop bit,
no parity, and no flow control.
2 Connect the supplied rollover cable to
the CONSOLE port on the switch.
3 Connect the other end of the rollover
cable to your terminal, PC, or laptop
(use an adapter, if necessary).
4 From your terminal, PC, or laptop, start
the terminal emulation program.
Power Up the Switch
1 Connect one end of the power cord to
the switch and the other end to a power
source.
Note: You can use the internal power
supply and/or the Cisco 600W AC
redundant power system (RPS). Attach only
the Cisco RPS (model PWR600-AC-RPS) to
the RPS receptacle.
2 Wait approximately 2 minutes for the
switch to complete its power-on self-test
(POST) and to discover the network.