© 2004 Boson Software, Inc. All Rights Reserved. 20
Advanced Features Tutorial – Using Telnet
This tutorial will demonstrate the advanced mode within the Cisco CCNA Network Simulator. NOTE:
This section assumes you have already gone through the Setup Wizard for Telnet. These advanced
features are optional, and you do not have to complete this lab using the Advanced simulator features to
properly complete the lab or prepare for the CCNA. However, the advanced mode will teach you
valuable skills that will aid you in the field and in the real world. Otherwise, you can complete this lab
using the Basic functionality of the simulator as described in the previous section.
Step 1 - Load the Simulator
To get started, launch the Cisco CCNA Network Simulator.
Select Lab 2 from the “Stand Alone Labs” option within the Lab Navigator.
When the lab description screen loads, click the “Load Lab” button to launch.
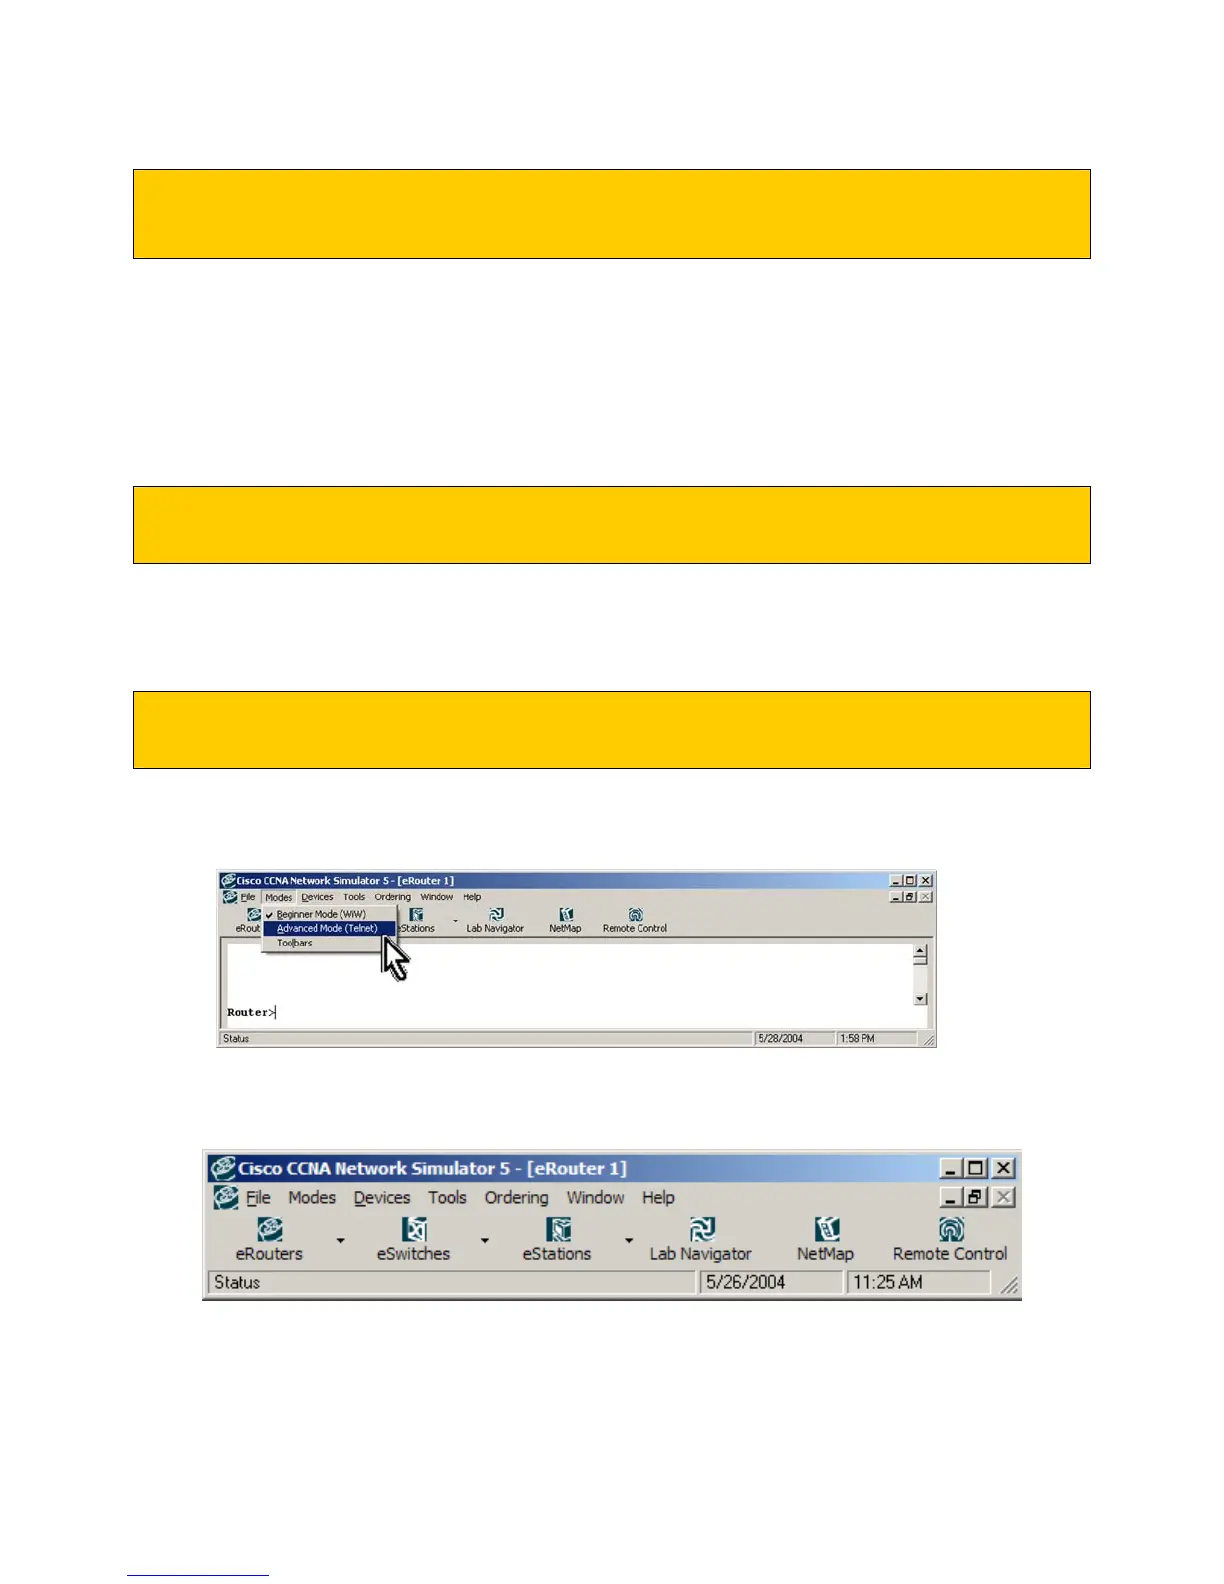
Step 2 - Set Advanced Mode (Telnet)
From within the Cisco CCNA Network Simulator, select the “Advanced Mode (Telnet)” option under the
“Modes” pull-down menu, as follows:
After the Control Panel appears (horizontal toolbar), simply click on the NetMap button to review the
currently loaded default network topology.
The Cisco CCNA Network Simulator Control Panel horizontal toolbar