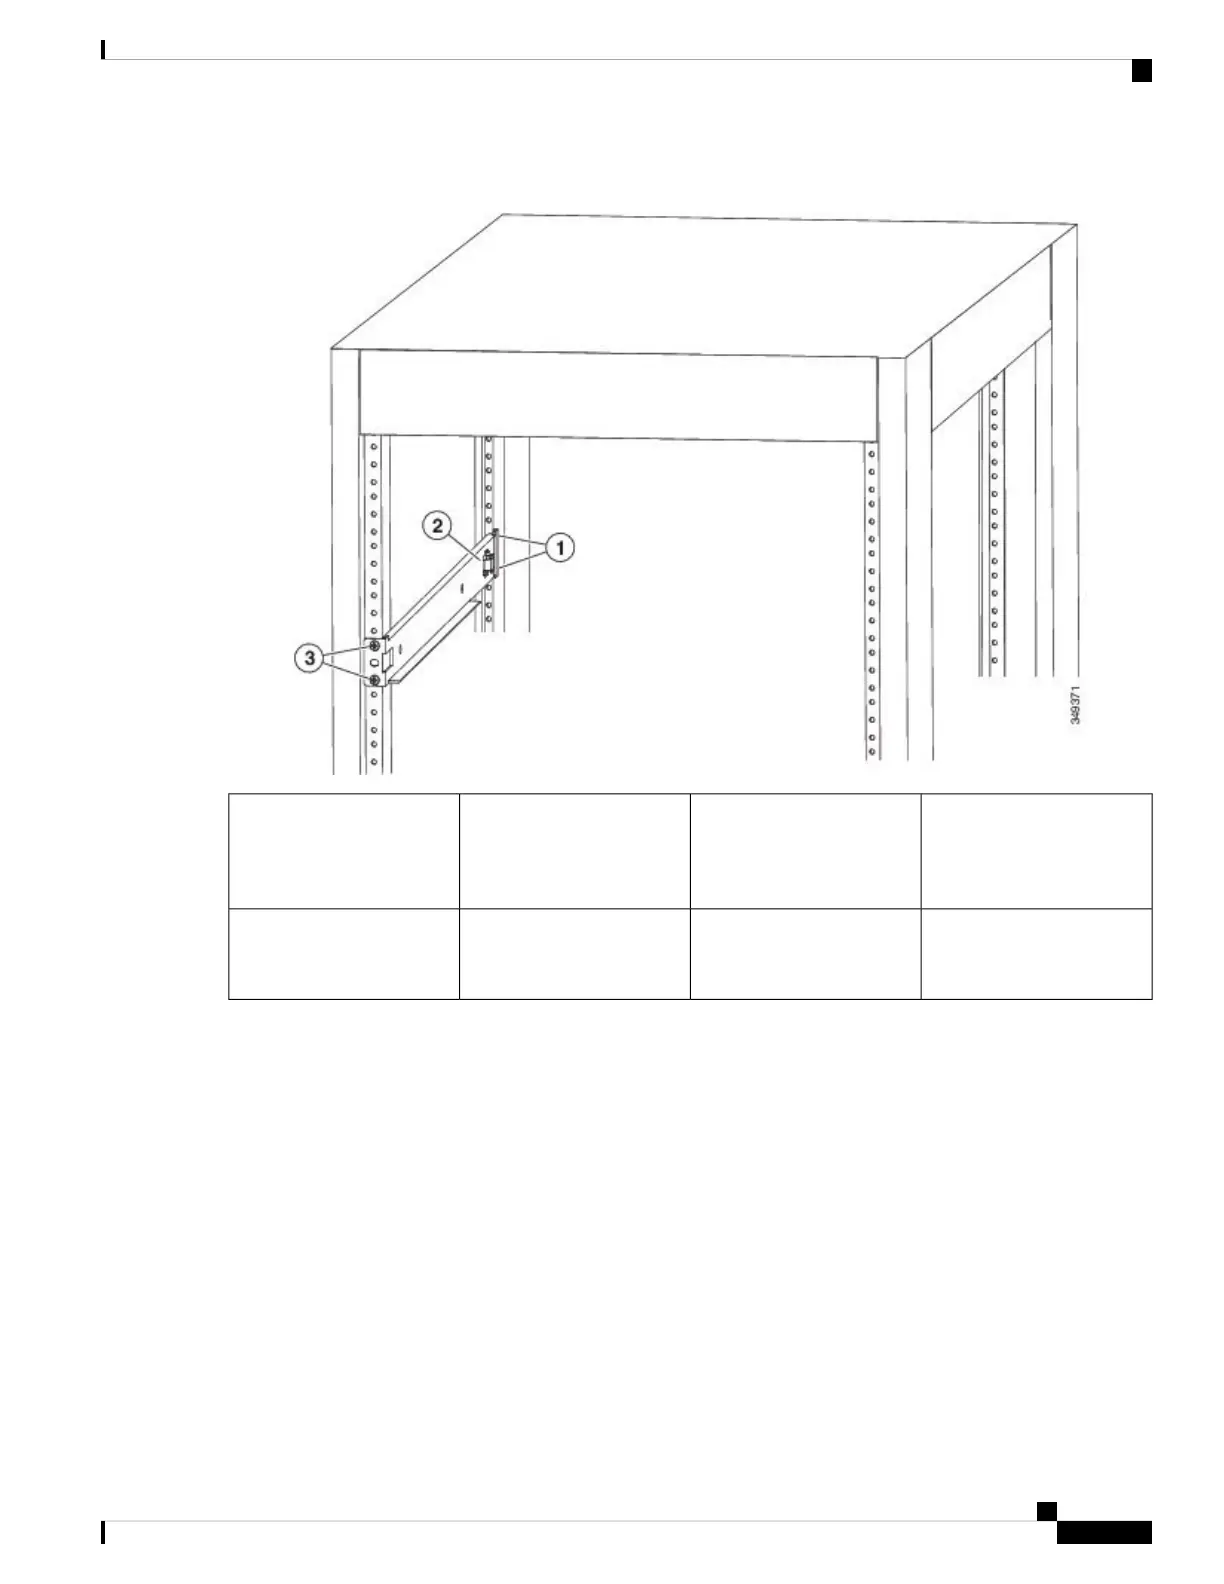
Figure 24: Positioning an Expanding Bottom-Support Rail Set
2 screws holding the front
end of the bottom-support
bracket to the front side of
the rack
32 screws holding one end of
the bottom-support bracket
to the rear of the rack
1
Chassis stop on the
expanding bottom-support
bracket
2
b) Holding the bottom-support rail level, attach the rail to the front and rear vertical mounting rails using four
customer-supplied screws that are appropriate for the rack (use two screws for each vertical mounting rail), and
tighten each screw to the appropriate torque setting for that screw.
Typically, you use one of the following types of screws and the associated torque settings when tightening them:
• M4 screws—use 12 in-lb (1.36 N·m) of torque
• M6 screws—use 40 in-lb (4.5 N·m) of torque
• 10-32 screws— use 20 in-lb (2.26 N·m) of torque
If the rack requires another type of screw, use the appropriate torque setting for that type of screw.
c) Repeat Steps 1a and 1b to attach the other expanding bottom-support rail to the other side of the rack at the same
level as the attached bottom-support rail.
Verify that the two sets of bottom-support rails are level with each other before going to the next step.
Note
Cisco Nexus 3000 Series Hardware Installation Guide
43
Installing the Chassis
Installing a 2 (RU) Chassis in a Four-Post Rack
 Loading...