4
2 Installing the PIX 501
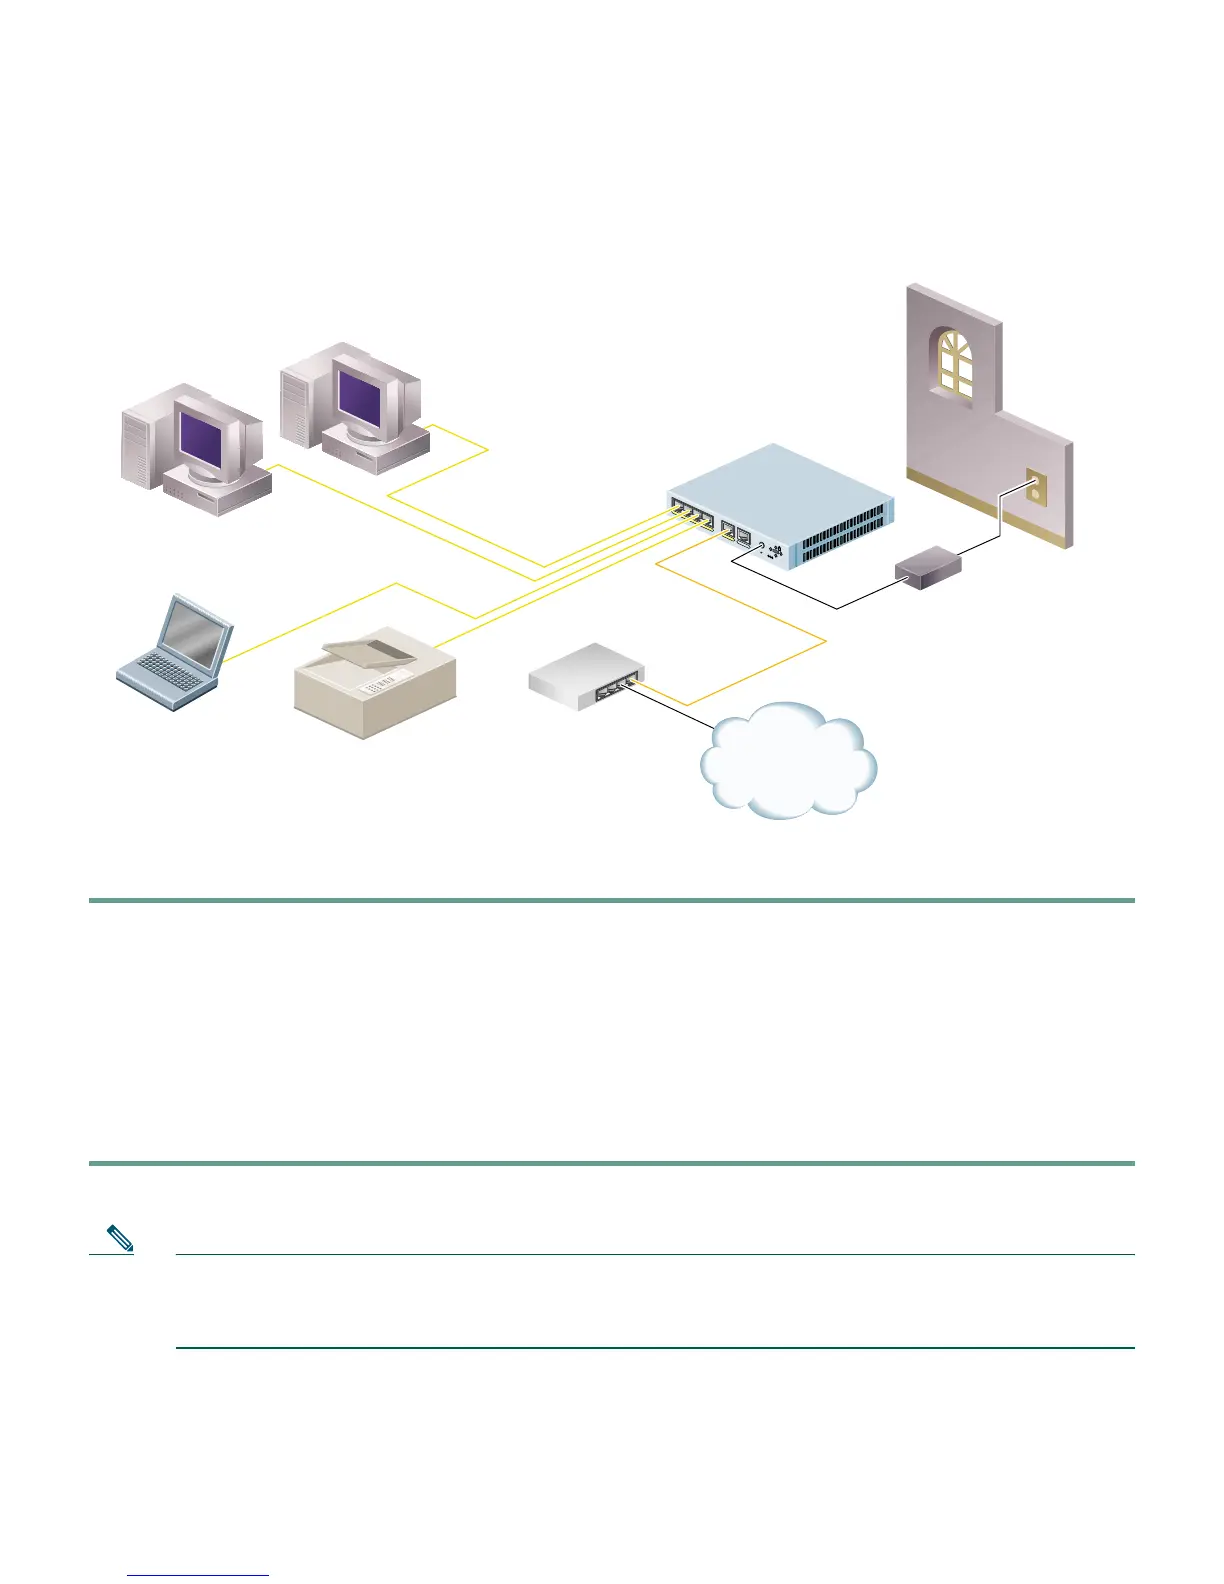
Follow these steps to connect the cables:
Step 1 Place the chassis on a flat, stable surface. The chassis is not rack mountable.
Step 2 Connect Port 0, the outside Ethernet port, to the public network, that is, the Internet:
a. Use the yellow Ethernet cable (72-1482-01) to connect the device to a switch or hub.
b. Use the orange Ethernet crossover cable (72-3515-01) to connect the device to a
cable/DSL/ISDN modem.
Step 3 Connect your PC or other network devices with an Ethernet cable to one of the four switched
inside ports (numbered 1 through 4).
Note Make sure that one of the PCs has TCP/IP installed and is configured to obtain an IP address
automatically through DHCP. Installing TCP/IP and configuring DHCP allows the PC to
communicate with the PIX 501 and the Internet as well as run the PDM Startup Wizard.
P
O
W
E
R
4
3
2
1
0
C
O
N
S
O
L
E
3
.
3
V
4
.5
A
Computer or other
network device
Power
adapter
DSL/Cable/ISDN
modem
Orange
Ethernet
cable
Yellow
Ethernet
cable
PIX 501
Internet
61277
Laptop computer
Printer
 Loading...