4
English
System Startup
1. Remove all packing materials.
2. Place the computer on a stable surface.
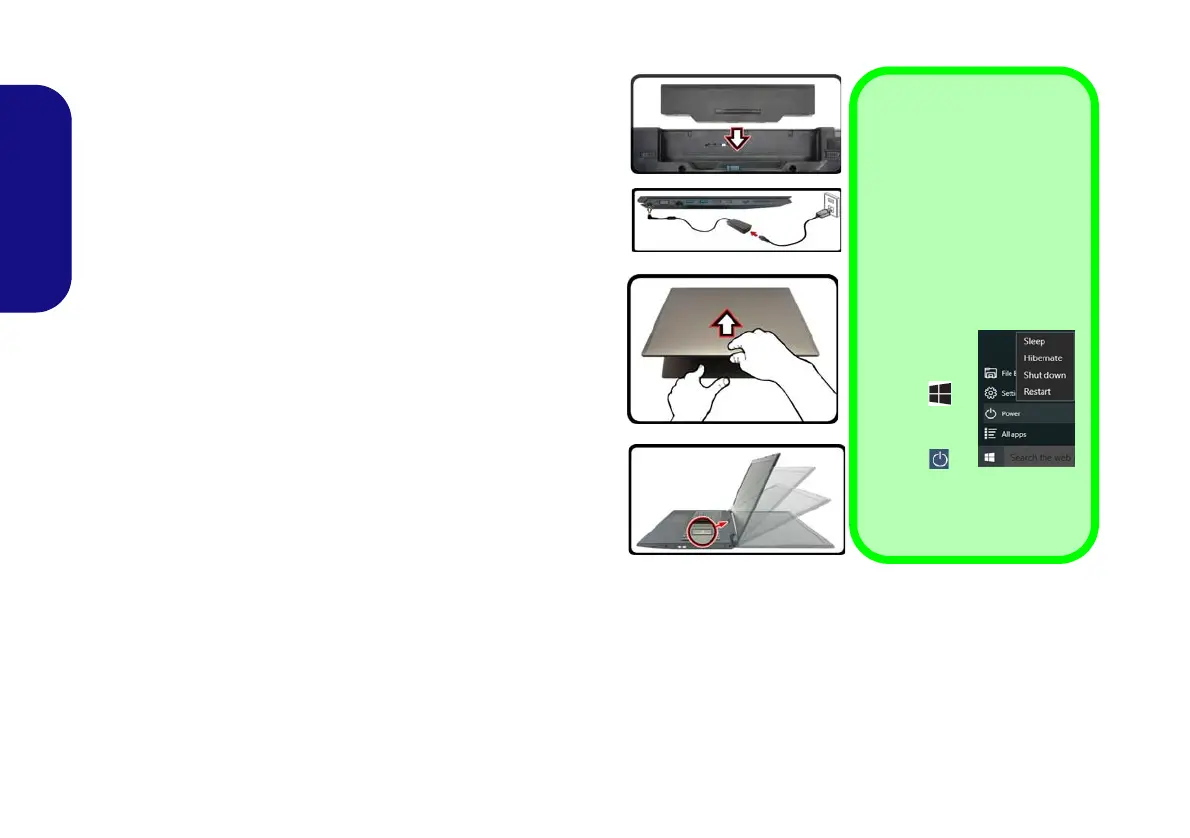
3. Insert the battery and make sure it is locked in position.
4. Securely attach any peripherals you want to use with the computer
(e.g. keyboard and mouse) to their ports.
5. When first setting up the computer use the following procedure
(as to safeguard the computer during shipping, the battery will be
locked to not power the system until first connected to the AC/DC
adapter and initially set up as below):
• Attach the AC/DC adapter cord to the DC-In jack on the left of the
computer, then plug the AC power cord into an outlet, and connect
the AC power cord to the AC/DC adapter and leave it there for 6
seconds or longer.
• Remove the adapter cord from the computer’s DC-In jack, and
then plug it back in again; the battery will now be unlocked.
6. Use one hand to raise the
lid/LCD to a comfortable viewing angle
(do
not exceed 180 degrees - or 130 degrees if the system is docked to
the docking station or has a 9 cell battery inserted)
;
use the other
hand (as illustrated in Figure 1) to support the base of the computer
(Note: Never lift the computer by the lid/LCD).
7. Press the power button to turn the computer “on”.
System Software
Your computer may already come with system software pre-
installed. Where this is not the case, or where you are re-con-
figuring your computer for a different system, you will find
this manual refers to Microsoft Windows 10.
Intel® Optane™ Support
You need to setup Intel® Optane™ before installing your Windows 10 operating system (see Intel® Optane™ on
page 5).
Figure 1
Opening the Lid/LCD/Computer with AC/
DC Adapter Plugged-In
Shut Down
Note that you should always
shut your computer down by
choosing the Shut down
command in Windows (see
below). This will help pre-
vent hard disk or system
problems.
1. Click the
Start
Menu
icon .
2. Click the
Power
item .
3. Choose
Shut Down from the
menu.
180 ゚
 Loading...