Disassembly
2 - 10 Removing and Installing a Processor
2.Disassembly
Removing and Installing a Processor
Processor Removal Procedure
1. Turn off the computer, turn it over, and remove the battery (page 2 - 5) and the component bay cover (page 2 - 8).
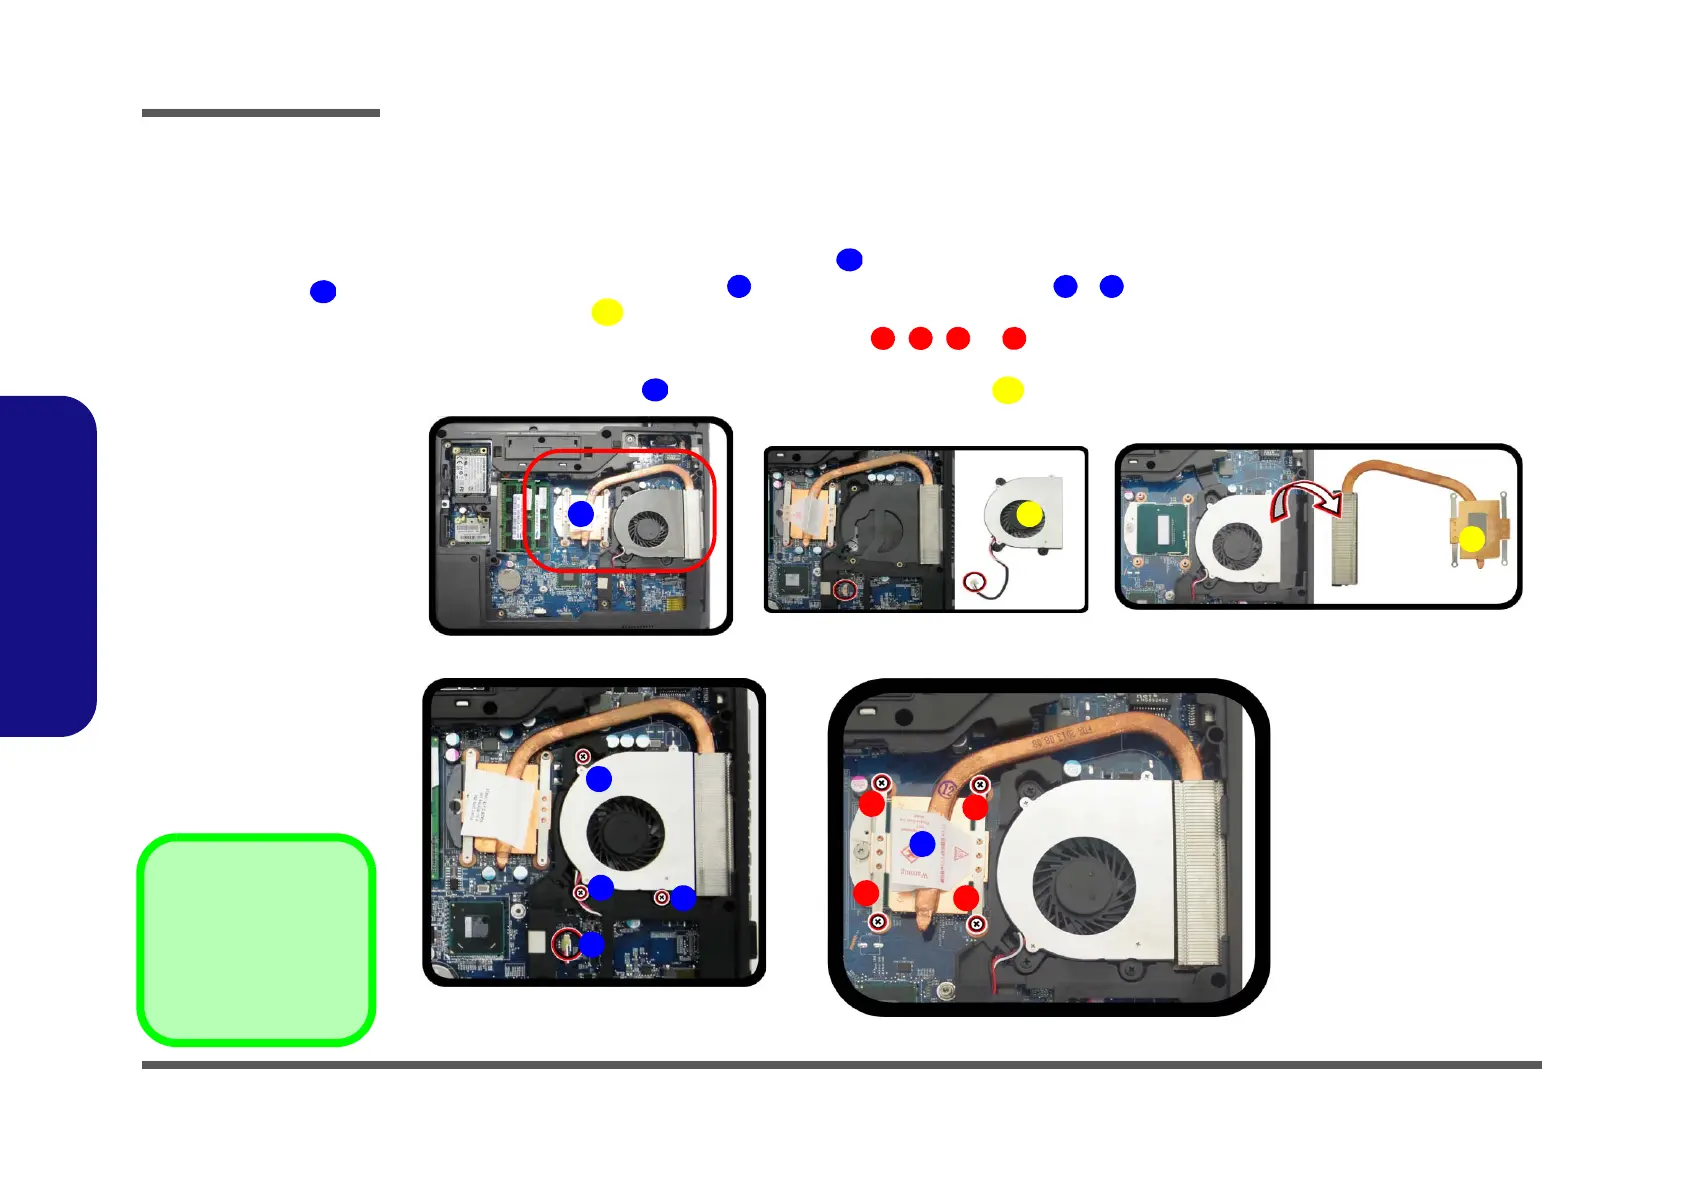
2. The CPU heat sink will be visible at point (Figure 6a).
3. Carefully disconnect the cable
, and then remove the screws - (Figure 9b).
4. Remove the fan .
5. Loosen the CPU heat sink screws in the order
, , & (the reverse order as indicated on the label Figure
6d).
6. Grip the heat sink tab and carefully raise the heat sink
up off the computer (Figure 6e).
Figure 6
Processor Removal
a. The CPU heat sink will
be visible at point .
b. Disconnect the cable
and remove the screws.
c. Remove the fan.
d. Remove the screws from
the CPU heatsink.
e. Grip the heat sink tab
and carefully lift the heat
sink up and off the com-
puter.
F. Fan
6. Heat Sink
•7 Screws
 Loading...