1. Place the radial arm in the 0 ° miter
position and lock the miter lock.
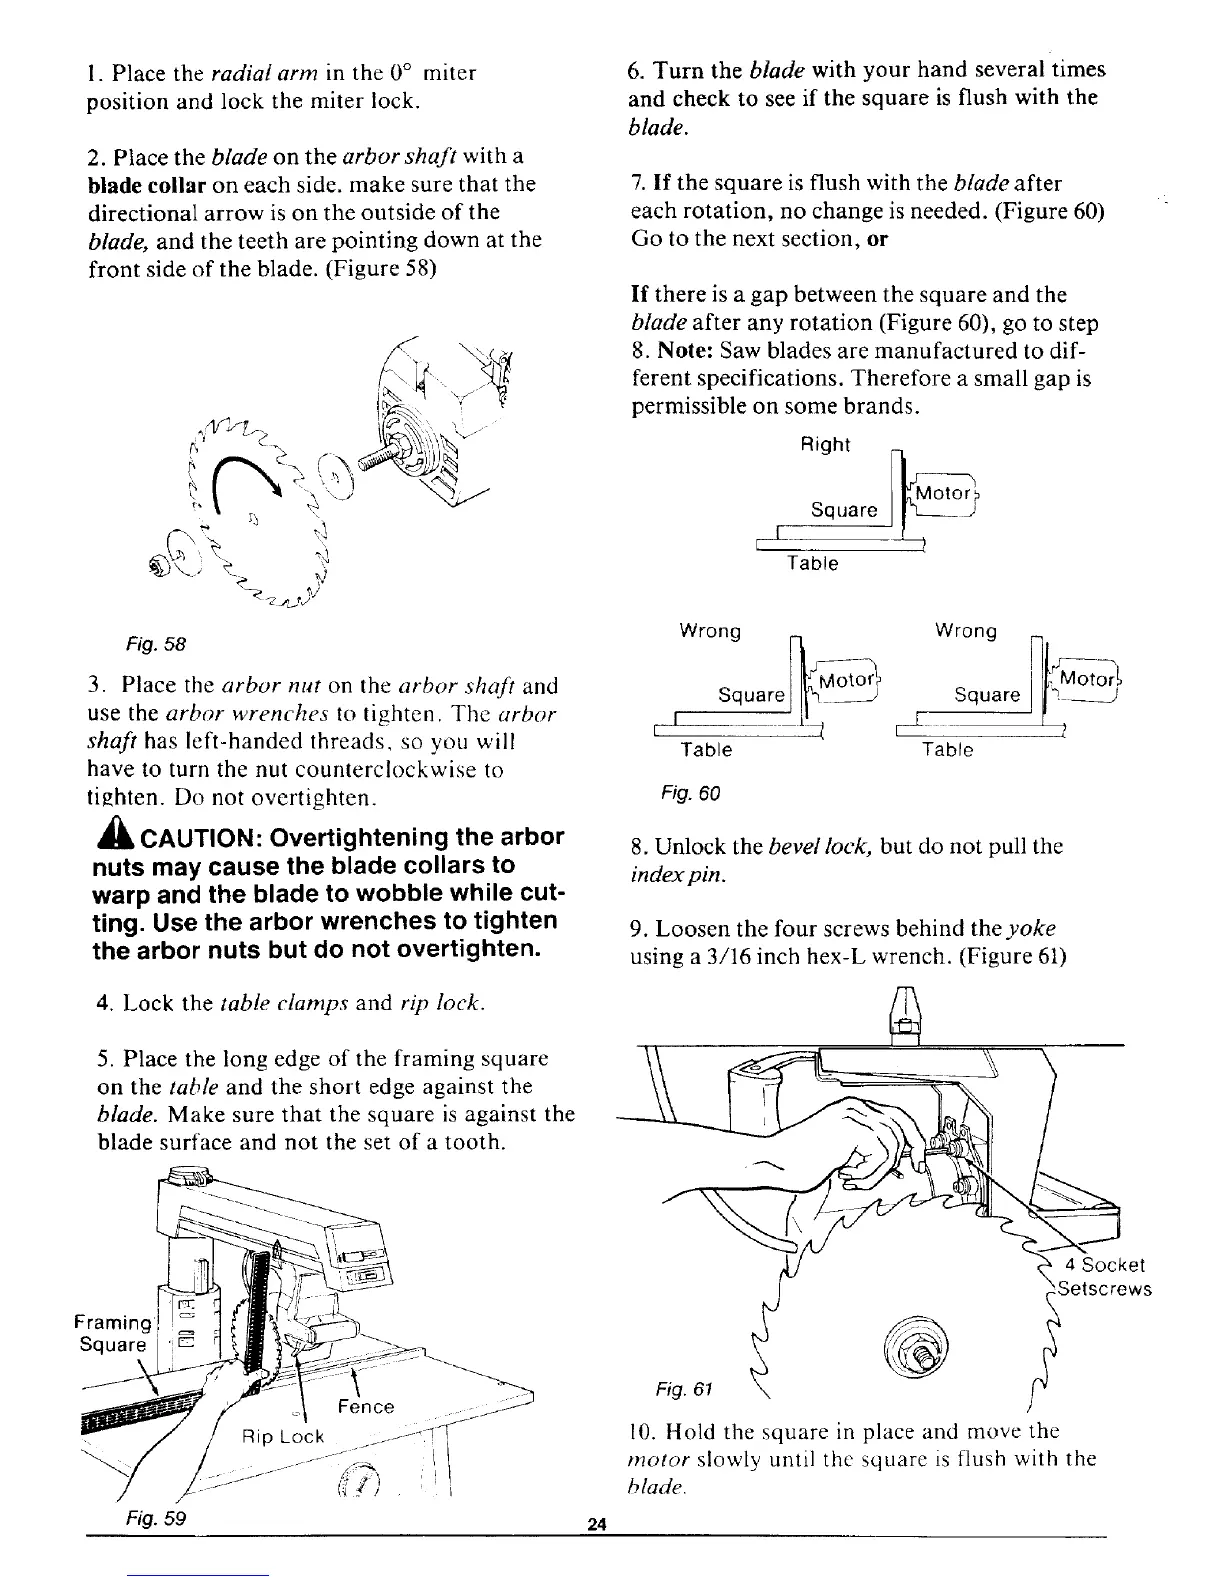
2. Place the blade on the arborshaft with a
blade collaron each side. make sure that the
directional arrow is on the outside of the
blade, and the teeth are pointing down at the
front side of the blade. (Figure 58)
¢,
Fig.58
3. Place the arbor nut on the arbor shaft and
use the arbor wrenches to tighten. The arbor
shaft has left-handed threads, so you will
have to turn the nut counterclockwise to
tighten. Do not overtighten.
'_ CAUTION: Overtightening the arbor
nuts may cause the blade collars to
warp and the blade to wobble while cut-
ting. Use the arbor wrenches to tighten
the arbor nuts but do not overtighten.
4. Lock the table clamps and rip lock.
5. Place the long edge of the framing square
on the table and the short edge against the
blade. Make sure that the square is against the
blade surface and not the set of a tooth.
6. Turn the blade with your hand several times
and check to see if the square is flush with the
blade.
7. If the square is flush with the blade after
each rotation, no change is needed. (Figure 60)
Go to the next section, or
Ifthere is a gap between the square and the
blade after any rotation (Figure 60), go to step
8. Note: Saw blades are manufactured to dif-
ferent specifications. Therefore a small gap is
permissible on some brands.
Right
I Square j_
F- 1
Table
Wrong Wrong
Square Il_tv1_: Square
FL____ _ L'I __L
Table Table
Fig. 60
8. Unlock the bevel lock, but do not pull the
index pin.
9. Loosen the four screws behind the yoke
using a 3/16 inch hex-L wrench. (Figure 61)
Framing i
Square
Fig. 59
24
4 Socket
_.J @j_Setscrews_.
Fig. 61
10. Hold the square in place and move the
motor slowly until the square is flush with the
blade.
 Loading...