ENGLISH
8
NOTE: For convenience, make a copy of this chart and post
it on or near themachine.
SPEED SELECTION CHART
CUTTING WIDTH CONTROL SETTING
FROM TO PLASTICS SOFT
WOOD
HARD
WOOD
inches mm inches mm
0 0 1–1/2 38.1 1 1 1
1–1/2 38.1 2–1/2 65.5 2 2 3
2–1/2 63.5 3–1/4 82.5 3 3 4
3–1/4 82.5 4 101.6 – 4 5
4 101.6 6 152.4 – 5 5
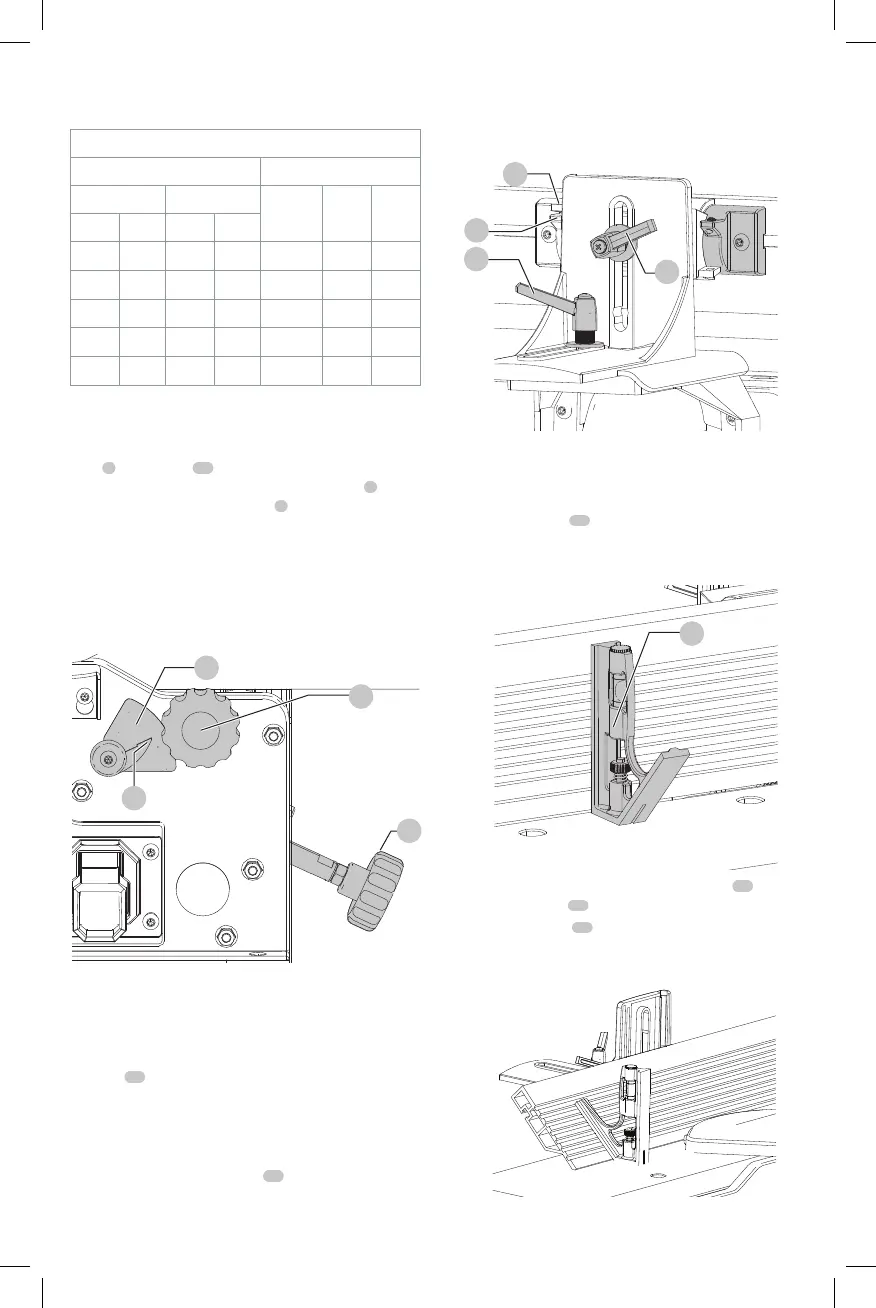
Depth of Cut Adjustment (Fig. P)
The jointer can be set to cut any depth from a very thin
shaving to 1/8" (3.2 mm) deep. A dual English/Metric
scale
9
, and pointer
20
are provided to indicate the depth
of cut. To adjust for depth of cut, loosen lock knob
8
and
turn table height adjustment knob
7
clockwise to lower
and coun ter clock wise to raise the infeed table. Raising the
infeed table decreases the depth of cut, while lowering
it will increase the depth. After the infeed table is at the
desired setting, tighten lock knob.
NOTE: For best results, final positioning of the infeed table
should always be made from the bottom to the up position.
Fig. P
8
7
20
9
Fence Adjustments (Fig. Q–T)
The fence can be moved across the table and can be tilted
up to 45°, as follows:
1. To move the fence across the table, loosen lock
lever
19
, slide the fence to the desired position on the
table and tightenlever.
NOTE: Lock lever is spring loaded and can be
repositioned by pulling up on the lever and
repositioning it on the nut located underneath thelever.
2. To tilt the fence, loosen lever
28
and tilt the fence to
the desired angle. Then tightenlever.
NOTE: Leveris spring loaded and can be repositioned
by pulling out on the lever and repositioning it on the
nut located underneath thelever.
Fig.Q
28
19
29
30
3. The fence features adjustable positive stops at the most
used fence positions of 90° and 45° to the right. To
check and adjust the positive stops, proceed as follows:
a. Place a square
31
on the table with one end of the
square against the fence as shown. Adjust the fence
until it is exactly 90° to thetable.
Fig.R
31
b. Using supplied hex wrench, turn set screw
29
until it
contacts stop
30
.
c. Using a square
31
, tilt the table to the 45° position
and make sure the fence is 45° to the table. Adjust
the fence ifnecessary.
Fig.S

 Loading...