20
SECTION III. ADJUSTMENTS
This section contains information for the various
adjustments on the tractor. Adjustment information for
the mower deck is located in Section V – Mower Deck.
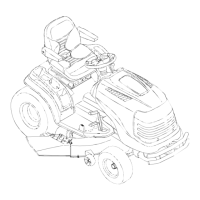
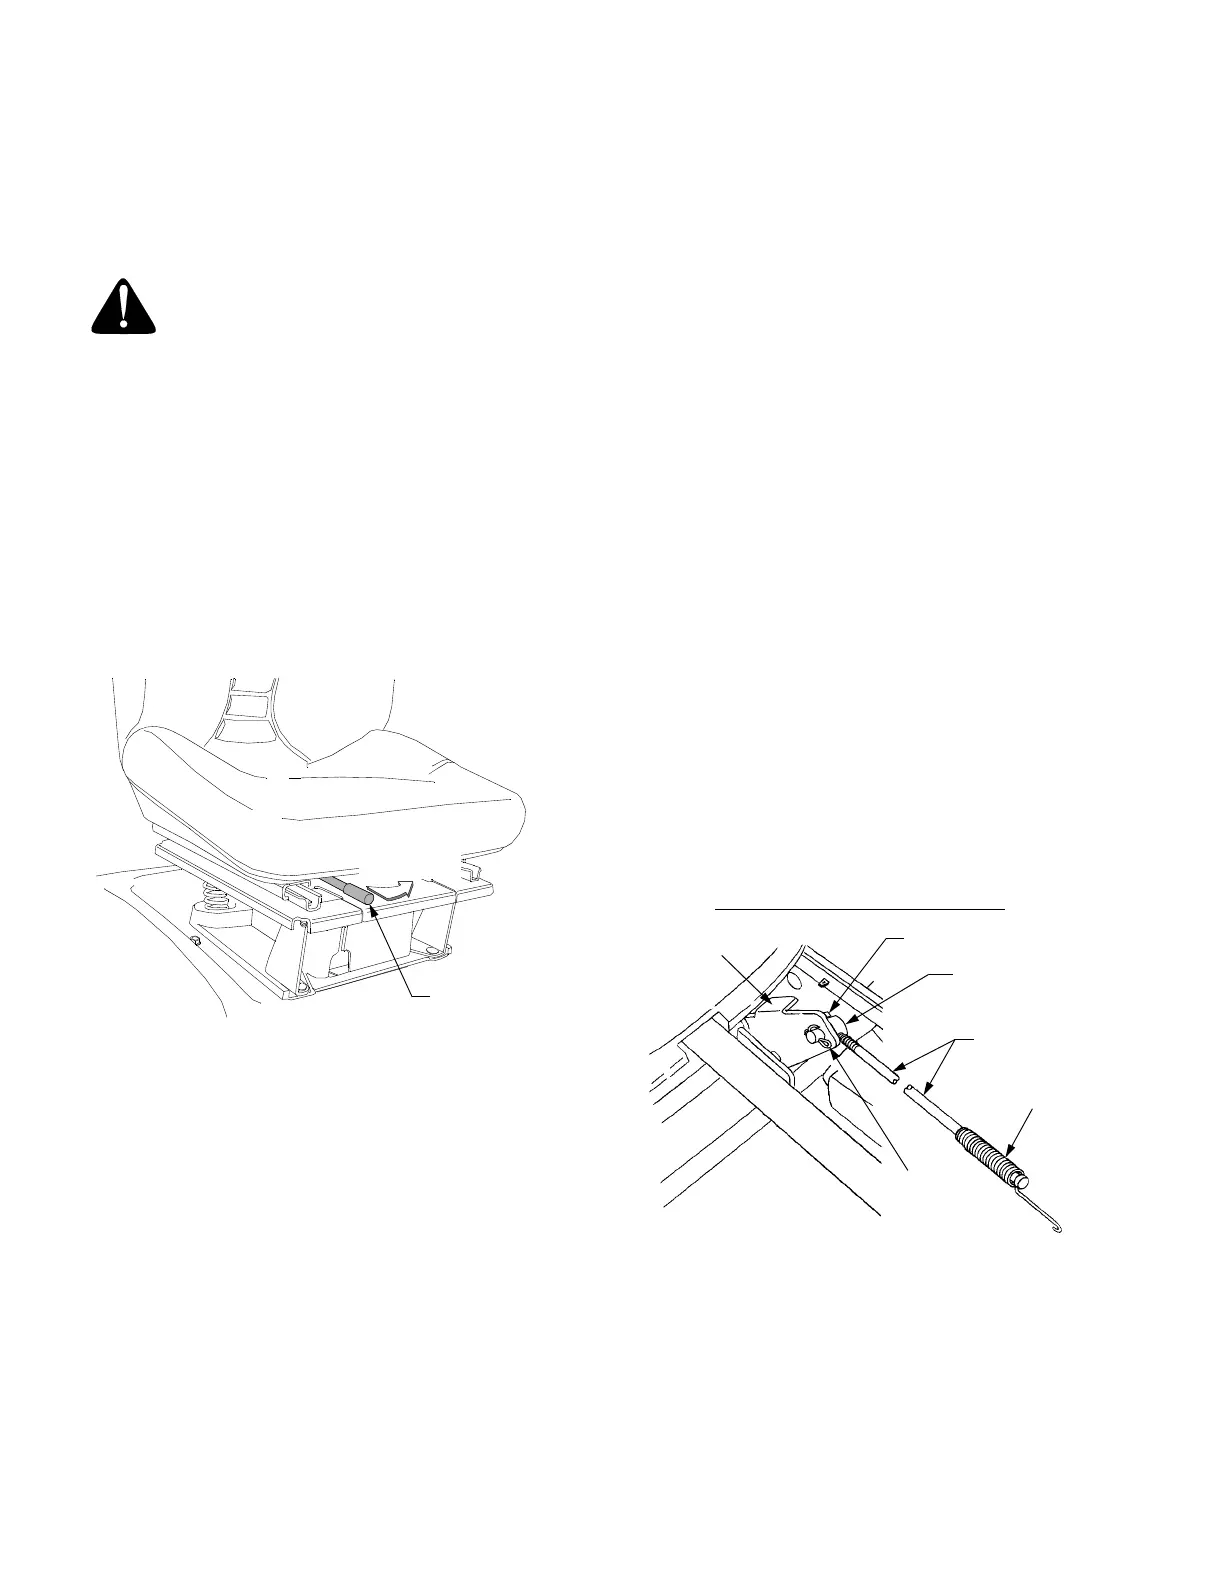
ADJUSTING THE SEAT
WARNING: Do not adjust the seat when
the tractor is moving. Adjusting the seat
while the tractor is moving could cause
the operator to lose control of the tractor.
Both seat arm rests can be rotated upward for mount-
ing and dismounting the tractor, or for the personal
comfort of the operator.
Before starting the tractor, adjust the seat forward or
rearward to the most comfortable driving position. To
reposition the seat, move the seat adjustment lever
(See Figure 12) toward the left and slide the seat
forward or rearward. Release the adjustment lever
when the seat is comfortably positioned. Gently rock
the seat forward or rearward to be sure the seat is
locked in place.
Figure 12
ADJUSTING THE BRAKES
During normal operation of this tractor, the brakes are
subject to wear and will need periodic examination and
adjustment.
To check the brake adjustment, position the tractor on
a firm and level surface. Stop the tractor engine and
remove the ignition key. Pull and lock the transmission
release lever in the “TRANSMISSION RELEASED”
position. Perform the following checks:
1. Engage the brake pedal lock. If the tractor can be
pushed forward or rearward, the braking force
must be increased.
2. Release the brake pedal lock. If the tractor cannot
be pushed forward or rearward, the braking force
must be decreased.
To adjust the braking force proceed as follows (Refer
to Figure 13):
1. Place the tractor on a level surface with the brake
pedal lock disengaged. Stop the tractor engine
and remove the ignition key.
2. While working from the underside of the tractor,
facing the threaded end of the rod:
• Remove the cotter pin from the brake rod ad-
justment ferrule and disconnect the ferrule from
the brake cam.
• Loosen the hex jam nut from against the ferrule.
To increase the braking force —
Turn the ferrule clockwise (inward) one full turn at
a time until the ferrule can be inserted into the
brake cam while applying a minimal tension on
the spring.
To decrease the braking force —
Turn the ferrule counterclockwise (outward) one
full turn at a time until the ferrule can be inserted
into the brake cam while applying a minimal
tension on the spring.
3. Turn the ferrule counterclockwise (outward) one
full turn to release the slight spring tension.
Tighten the jam nut against the ferrule, then insert
the ferrule into the brake cam and secure with the
cotter pin.
Figure 13
Recheck the brake adjustment to ensure proper brake
operation before operating the tractor. If brake rod
adjustment does not correct the problem, see your
authorized Cub Cadet dealer.
SEAT
ADJUSTMENT
LEVER
Move Lever
to Left
SPRING
BRAKE
COTTER
ADJUSTMENT
FERRULE
BRAKE
CAM
HEX JAM NUT
Viewed from top (fender off)
PIN
ROD
 Loading...