EasyManua.ls Logo

CYBEX gold CLOUD G User Manual

CYBEX gold CLOUD G
88 pages
To Next Page IconTo Next Page
To Previous Page IconTo Previous Page
Page #82 background image
82
Care and Cleaning
Seat Cover, Shoulder Pads, Infant Insert
Spot clean as needed with a clean cloth
using mild detergent and water.
Machine wash in cold water on delicate
cycle.
Air Dry. DO NOT iron.
Harness Straps
Sponge clean using warm water and mild
soap. Air dry. DO NOT iron.
Harness Buckle and Rigid LATCH
Connectors
Spot clean as needed with mild detergent
and warm water.
Allow to dry thoroughly.
Test by fastening and unfastening until
an audible CLICK is heard. If there is no
CLICK, repeat the cleaning procedure.
Plastic Parts
Wipe clean with mild detergent and warm
water.
IMPORTANT: NEVER use bleach, household cleaners, or solvents. DO NOT use
lubricants of any kind.
FOR INSTRUCTION VIDEO ON CARE AND CLEANING, SCAN THE QR CODE.
Question and Answer IconNeed help?

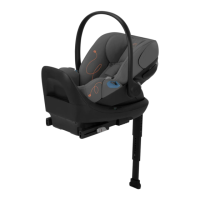
Do you have a question about the CYBEX gold CLOUD G and is the answer not in the manual?

CYBEX gold CLOUD G Specifications

General IconGeneral
BrandCYBEX gold
ModelCLOUD G
CategoryCar Seat
LanguageEnglish

Summary

Important Safety Information

Child Usage Guidelines

Rear-Facing Mode and General Requirements

Mandates rear-facing use only and outlines general child size requirements.

Specific Child Fit Requirements

Details on weight, height, and harness strap positioning for proper fit.

Premature Infant Use Guidance

Critical Safety Warnings

Airbag, Vehicle Safety, and General Precautions

Warnings about airbags, general vehicle safety, and following instructions.

Installation, Usage, and Product Integrity Warnings

Rules for installation, use, product condition, and tampering prevention.

Vehicle Placement, L.S.P., and Approved Usage

Warnings on seating positions, L.S.P. use, and approved vehicle types.

Vehicle Seat Restrictions and Harness Operation

Rules on vehicle seat types, direction, and harness operation.

Harness Security, Handle Locking, and Child Hazards

Ensuring harness security, handle locking, and avoiding suffocation/fall risks.

Fall Hazards, Stroller Compatibility, and Load Leg Safety

Warnings about fall risks, stroller use, and load leg functionality.

Load Leg, Accessory, Age Limits, and Supervision Warnings

Further warnings on load leg, accessories, age limits, and unattended children.

Seat Belt Installation Precautions

Vehicle Belt Compatibility and Restrictions

Identifying safe and unsafe vehicle belt systems for installation.

LATCH/UAS System Installation Guide

Infant Car Seat Key Features

CLOUD G LUX Base Specific Features

Installing and Removing the Infant Carrier

Installing with Base Using Rigid LATCH

Initial steps for installing the base using the Rigid LATCH system.

Completing Rigid LATCH Base Installation

Steps 5-6 for attaching connectors and adjusting the leveling foot.

Finalizing Rigid LATCH Base Installation

Steps 7-8 for securing the base against the seat and checking stability.

Rigid LATCH Base Installation: Load Leg and L.S.P.

Steps 9-11 for load leg extension, recline angle check, and L.S.P. deployment.

Installing with Base Using Lap/Shoulder Belts

Initial steps for installing the base using vehicle lap/shoulder belts.

Completing Lap/Shoulder Belt Base Installation

Steps 4-5 for opening the SafeLock tensioner and routing belts.

Finalizing Lap/Shoulder Belt Base Installation

Steps 6-7 for tightening belts with the SafeLock tensioner.

Lap/Shoulder Belt Base Installation: Load Leg and L.S.P.

Steps 8-9 for checking base stability and extending the load leg.

Lap/Shoulder Belt Base Installation: Recline and Final Checks

Steps 10-12 for recline angle check, belt locking, and L.S.P. deployment.

Installing with Base Using Lap Belt Only

Initial steps for installing the base using only vehicle lap belts.

Completing Lap Belt Only Base Installation

Steps 4-5 for opening the SafeLock tensioner and routing the lap belt.

Finalizing Lap Belt Only Base Installation

Steps 6-7 for tightening the lap belt with the SafeLock tensioner.

Lap Belt Only Base Installation: Load Leg and Checks

Steps 8-9 for checking base stability and extending the load leg.

Lap Belt Only Base Installation: Recline and L.S.P.

Steps 10-11 for recline angle check and L.S.P. deployment.

Using the Infant Carrier

Using the Infant Carrier with the Base

Securing the Child in the Carrier

Infant Carrier Use on Aircraft

Comprehensive Safety Checklist

Pre-Use Safety Verification

A checklist to ensure correct installation and usage before every trip.

Warranty Information and Registration

Related product manuals