Below is an overview for the connection of the the Indoor unit to the Outdoor unit. The pages following will give detailed
instructions for full installation. Remember to read the complete Installation section and follow all the safety instructions
fully when installing the Indoor and Outdoor units.
OVERVIEW
This appliance must be installed according to national power supply acquirement.
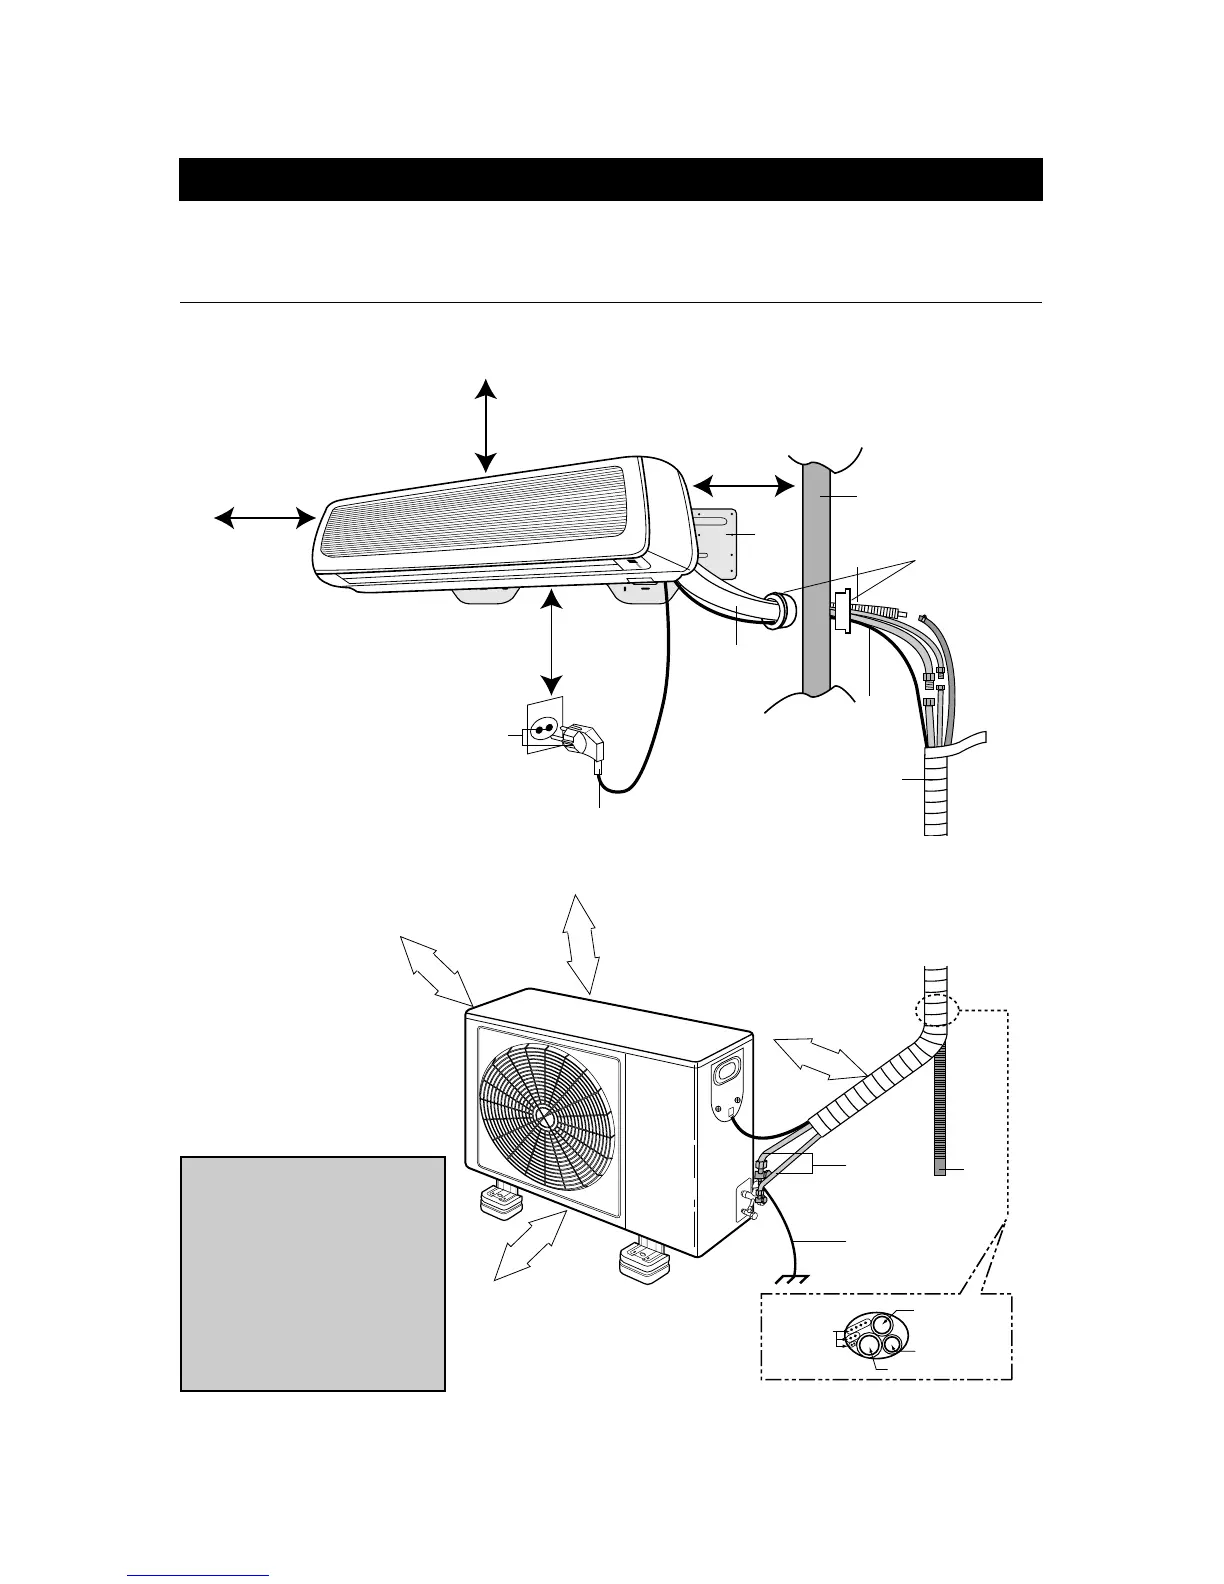
INSTALLATION DIAGRAM
5
Drain
Hose
Ground Wire
(Not Supplied)
1/2" side piping
Connecting
cable
1/4" side piping
Drain Hose
Wall
Wall Cap
Drain
Hose
Pipes
(Not Supplied)
Wall
Bracket
AC
Connection
(Not Supplied)
Wrap with
Tape
AC Outlet
and Plug
Copper
Tubing
10cm (3.95in)
from ceiling
At least 30cm
(11.8in) from unit
30cm (11.8in) from
side wall
10cm (3.95in) from
side wall
Maximum Height 7M (21Ft)
Maximum Length 15M (49Ft)
Any tube length between 7 and 15 meters must
be precharged with freon using the following calulation:
(Length – 5) x 30 grams
Adding additonal tubing will decrease efficiency
10
cm
70
cm
60
cm
3.9 inches
23.6
inches
60
cm
23.6
inches
27.6
inches
Plug into 220V~240V
AC Outlet
NOTES:
• After installation it must be pos-
sible for the user to disconnect
the power supply plug.
• If the AC outlet is a 3-pronged
type or other, have an electri-
cian install a new outlet.
• Contanct service man when
replace the power cord set.
• The specification of AC connec-
tion is 1.5mm
2
X 6P X6m.