49
7-1. WHEN INSTALLING WITH THE BASIC INSTALLATION MATERIALS
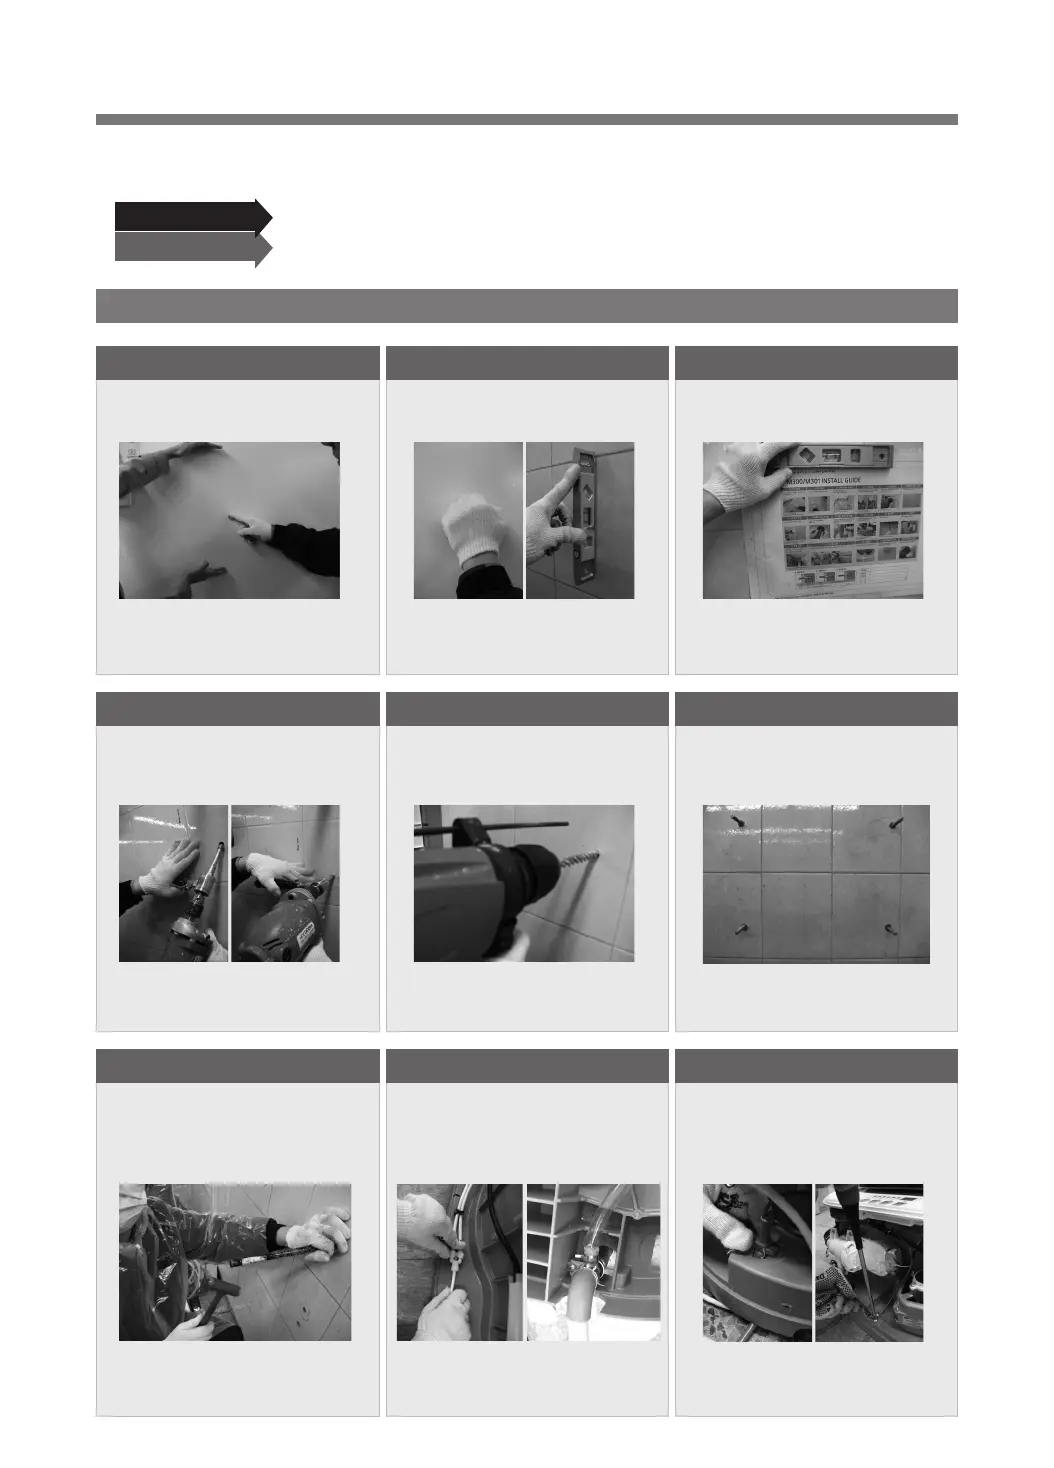
7. Installation
Follow the installation guide to install the washing machine more conveniently.
Make sure to perform a test run to check for any water leakage or abnormal noise.
After installation
Do not plug in the power cord when installing.
Before installation
- determine the installation site, considering the
structure of the area
※
It is easy to use when installed in a breast-high location
※ It is easier to use and install near the water pipe, drain
and the outlet.
1. Determine installation location
- Attach it using a level.
-
After attaching the install guide, mark the hole area.
※ Consider the actual size of the product and attach
the manual according location.
3. Attach the installation manual
- Knock on the wall to check if the wall is concrete.
※ Install the machine on the even surface of the wall.
2. Inspect the wall
- Make a notch under the marked holes beforehand.
-
Drill the holes, holding the tool perpendicular to the
wall
※ Do not drill a hole on the edge of the wall tile.
※ Do not install the machine right below a faucet.
※
Use TE 2-S Soft Hammer drill from HILTI or a Drill.
4-1 Drill a hole into the tile
-Insert set anchors into the holes
-Set anchors are included in the product
packaging
※ Insert set anchors into the end of each hole.
※ the set anchor bolt parts must be 75mm or longer
above the wall.
5. Insert set anchors (4 units)
- Set the hammer drill or a drill perpendicular to the
surface of the wall and drill a hole into the
retaining wall.
※ Follow the instructions on the diameter and depth
specifications for the holes.
※ Remove dirt from the holes after drilling.
4-2. Drill a hole into the retaining wall
- Connect the power as requested by the
customer (upward or downward)
- Connect the connector and fix the grounding
cable.
※
Fix the power cord tightly with clamp when connected upward.
※ Fix the grounding cables with flat screws.
※ Do not use multiple grounding cables in one spot.
8. Plug in the power cord
- Insert the inlet hose until the elbow makes a
snapping sound.
-
Fix the drain hose to the synchronous motor and
connect the clamp inside the synchronous motor.
※ Connect hoses properly to prevent any leakage.
※ Insert inlet and drain hoses into the back holes after
connection.
7. Connect inlet and drain hoses.
- Fix set anchors with an anchor punch
※ If the anchor cap is above the wall surface after
fixation, repeat the step.
6. Fix the set anchors
 Loading...