9–14 SEALING, CAULKING AND DEADNER
Fig. 13
6. Install the related parts.
• Install in the reverse order in which they were re-
moved.
Fig. 14
2. DEADNER
2-1. GENERAL DESCRIPTION
Deadner is properly designed and applied for reduce the
vibration and noise. Also, it plays in maintaining the struc-
tural rigidity of the panel.
2-2. REPAIR PROCEDURE
1. Remove the related parts.
• Seats, carpet.
• Trims, others.
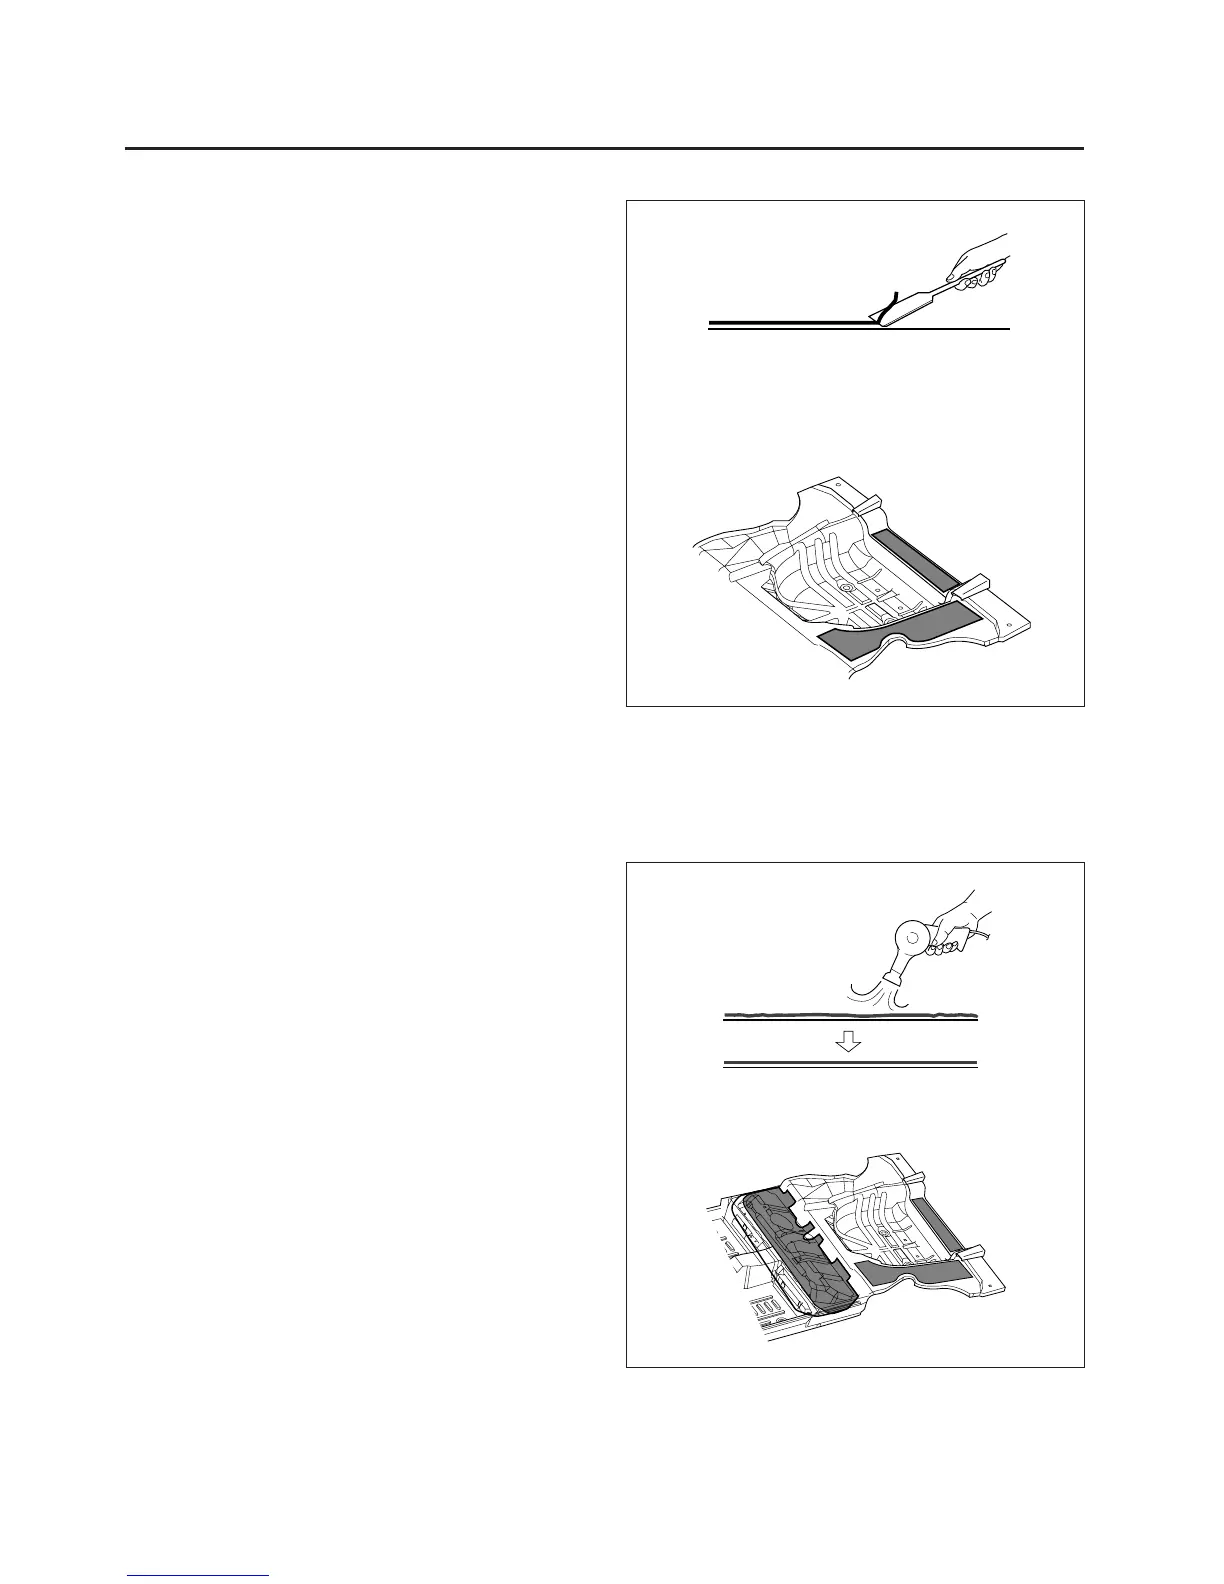
2. Removal of the damaged deadner.
• Peel off the damaged deadner with a steel spatula,
carefully.
3. Clean and dry.
• Before applying the deadner, thoroughly clean and
dry the areas to be applied.
4. Prelocation the new deadner.
• Prelocation the new deadner on the panels to be
applied.
NOTE: Avoid the parts mounting holes and service
holes.
5. Adhension of deadner.
• Heat the surface of deadner with a torch or heat-
ing gun until it adheres itself.
• Push and adhere to the panel with a rubber
spatula.
NOTE: In order to take full advantage of the deadner,
its face must adhere and contact the panels perfectly.
CAUTION: Be careful not to burn the composite parts
when beating.

 Loading...